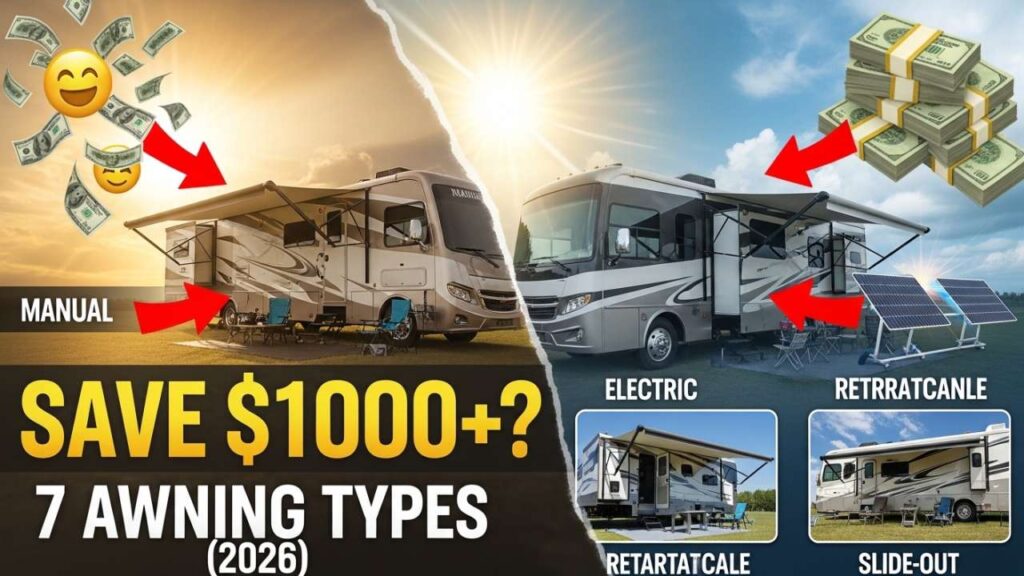
What Exactly Is an RV Awning?
Before we dive into types, let’s get the basics straight.
An RV awning is an exterior shade structure that extends from the side of your motorhome, travel trailer, or camper. Think of it as a permanent umbrella bolted to your rig. Most modern awnings roll up and tuck against your RV’s exterior wall, then deploy when you’re parked and want shade.
Awnings serve three critical functions:
- Temperature control: A quality awning blocks 85% of the sun’s heat, reducing your AC workload and fuel costs
- Living space expansion: You gain an outdoor room for relaxing, cooking, or socializing with fellow campers
- Protection: Awnings shield your RV’s windows, doors, and exterior from UV damage, fading, and water intrusion
The 7 Main Types of RV Awnings Explained
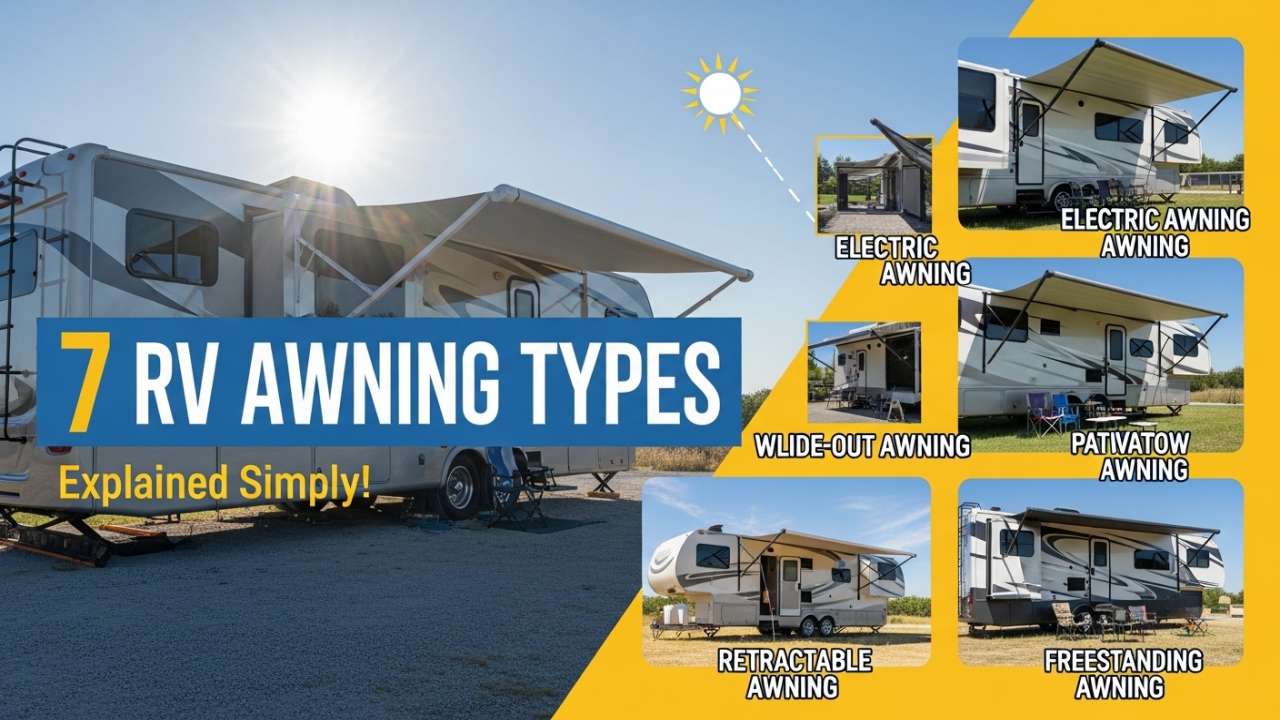
Retractable/Roller Awnings (The Most Popular Choice)
What it is: A motorized or manual awning that rolls in and out along an aluminum tube system. These are the classic awnings you see on most RVs.
How it works: Modern roller awnings deploy at the push of a button (electric) or with a crank pole (manual). The fabric winds around a roller mechanism, storing compactly when not in use.
Pros:
- Easy to deploy and retract
- Doesn’t obstruct your view when parked
- Works with most RV types and window/door configurations
- Weatherguards protect the rolled-up fabric during transit
- Wide range of fabric colors and patterns available
Cons:
- Manual versions require physical effort
- Fabric can sag if water pools on top (proper slope prevents this)
- May require professional installation
- Electric versions depend on your RV’s battery system
Best for: Weekend warriors and full-time RVers who want convenience and flexibility
Also Read:- RV Water Heater Replacement Cost 2026: The Real Budget-Buster Breakdown (With Actual Numbers)
Automatic/Smart Awnings (The Tech-Forward Option)
What it is: Electric awnings equipped with sensors and remote controls that handle deployment decisions for you.
Smart features you’ll find:
- Wind sensors: Automatically retract when winds exceed 15-20 mph, protecting your investment
- Rain sensors: Detect moisture and pull in automatically
- Sun sensors: Deploy when UV levels spike, retract at sunset
- Smartphone apps: Control your awning from anywhere on the campsite
- Weather forecasting integration: Some premium models check the forecast and adjust accordingly
Pros:
- Maximum convenience—hands literally free operation
- Excellent protection from unexpected weather
- Modern aesthetic with integrated LED lighting options
- Remote control means you can deploy from inside your RV before stepping outside
- Best protection for your investment in harsh climates
Cons:
- Highest upfront cost ($2,500-$4,000+)
- Requires reliable RV electrical system
- Sensors require occasional cleaning and maintenance
- More complex troubleshooting if something fails
- Overkill for occasional campers on a budget
Best for: Full-time RVers, boondockers in windy areas, tech-savvy travelers, and those who want maximum protection
Price range: $2,500-$4,500 (installed with smart features)
Manual Awnings (The Budget-Friendly Traditional Choice)
What it is: The old-school workhorse. No motors, no sensors—just you, a pole, and your muscles.
How deployment works: You insert a crank pole through a loop at the base of the awning, manually turn it until the mechanism locks, then secure it with support arms.
Pros:
- Most affordable option ($400-$1,500)
- Lightweight (reduces fuel consumption)
- No electrical components to fail
- Perfect for boondocking and off-grid camping
- Completely adjustable—extend as much or as little as you want
- Easier to repair with basic tools
- Greater ventilation control under the awning
Cons:
- Requires physical exertion every time you deploy or retract
- Takes 5-10 minutes to fully extend
- Less convenient for frequent on-and-off deployments
- Easy to forget retraction before driving (requires discipline)
- Prone to user error in strong winds
Best for: Budget-conscious campers, occasional users, boondockers, and those with smaller RVs
Price range: $400-$1,500 (installed)
Fixed Awnings (Permanent Coverage)
What it is: A stationary awning permanently mounted above doors or windows. It never retracts.
Installation: Permanently bolted to your RV’s exterior, typically above entry doors or large side windows.
Pros:
- Always ready—no deployment needed
- Constant protection from sun and rain
- Improves your RV’s appearance
- No moving parts means virtually no maintenance
- Great for shade over doors and windows
Cons:
- Cannot be retracted while driving (safety hazard if forgotten)
- Catches wind during transit, increasing drag and fuel consumption
- Can vibrate and rattle on the highway
- May affect RV aerodynamics
- Reduces flexibility if you later change your mind
- More difficult and costly to remove or replace
Best for: Parked RVs that don’t move frequently, or as supplementary shade over specific doors/windows
Price range: $300-$1,200 (depends on size and materials)
Also Read:- RV Refrigerator Not Cooling on Electric: The Complete Troubleshooting Guide That Actually Works
Slide-Out Awnings (The Protective Topper)
What it is: A specialized awning designed specifically to cover your RV’s slide-out rooms when extended.
Purpose: Prevents water, snow, dirt, and debris from accumulating on top of slide-out mechanisms and seams.
Pros:
- Extends the life of expensive slide-out hardware
- Eliminates need to manually clean slide-out tops
- Prevents water damage and leaks
- Small and unobtrusive
- Some deploy automatically with the slide-out itself
- Protects seams where water damage is most likely
Cons:
- Doesn’t provide personal shade or outdoor living space
- Limited to RVs with slide-outs
- Adds weight to already heavy slide-out sections
- Some require manual deployment
- Not a substitute for a main patio awning
Best for: RV owners with slide-outs who want to protect their investment and reduce maintenance
Price range: $200-$800 (installed)
Patio Awnings (The Outdoor Room Builder)
What it is: An extended awning system with additional fabric sidewalls, creating an enclosed outdoor room.
What you get: A fully weatherproof space with roof, walls, door openings, and sometimes screened windows.
Pros:
- Creates dedicated outdoor living space (think: your screened porch at home)
- Significantly increases usable living area
- Walls provide privacy and mosquito protection
- Great for entertaining or accommodating overflow guests
- Can function as a sleeping area in warm climates
- Perfect for wet-weather camping
- Some models have removable/transparent sections for customization
Cons:
- Most expensive option ($3,000-$8,000+)
- Extremely heavy (impacts fuel economy)
- Complex setup and breakdown (30+ minutes)
- Many moving parts requiring maintenance
- Poor ventilation without screened windows or vents
- Requires experienced setup to avoid water pooling
- Not practical for frequent moves
- Difficult to transport if you’re towing small trailers
Best for: Stationary RVers, full-time glampers, families with kids, anyone who plans to stay 2+ weeks per location
Price range: $3,000-$8,000+ (installed)
Hybrid/Motorized-Manual Awnings (The Compromise)
What it is: A newer category blending automation with manual override capabilities.
How it works: Mostly motorized but includes manual crank handles as backup. Some have partial automation (remote opens, you support manually).
Pros:
- Offers both convenience and redundancy
- Cheaper than full automation ($1,500-$2,500)
- Works if batteries are low or system fails
- Good middle ground between manual and automatic
- Less complex than fully smart awnings
Cons:
- Still requires manual effort to fully extend or retract
- More complex than pure manual models
- More to maintain than either pure manual or full automatic
- Not as convenient as fully automatic systems
- Still dependent on electrical systems for part of operation
Best for: Hesitant buyers wanting modern convenience with traditional backup, and those with tight budgets who don’t want basic manual
Price range: $1,200-$2,500 (installed)
Also Read:- RV Solar Panels: The Ultimate 2026 Guide to Ditching Hookups and Boondocking in Style
Awning Materials: The Foundation of Durability
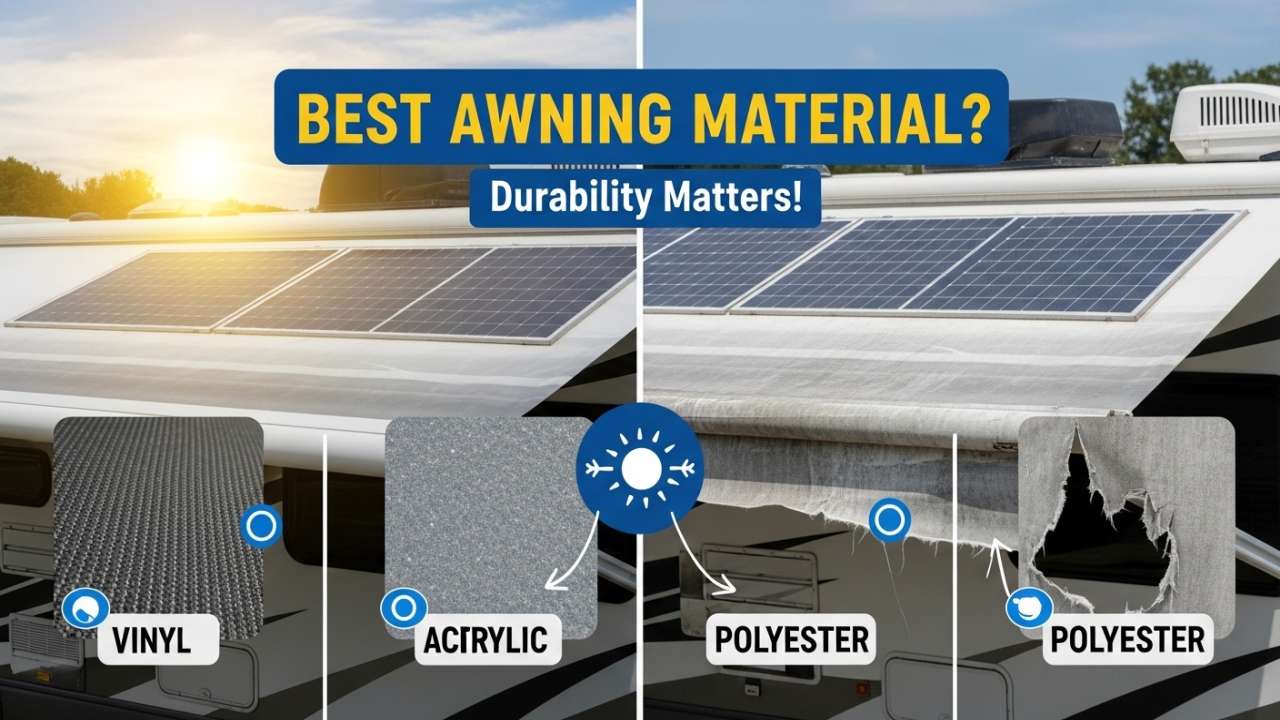
Your awning is only as good as its fabric. Here’s the breakdown:
Vinyl (The Waterproof Leader)
Composition: Heavy-duty plastic material with polyester backing
| Feature | Rating |
|---|---|
| Waterproofing | ⭐⭐⭐⭐⭐ (100% waterproof) |
| UV Resistance | ⭐⭐⭐⭐ (Excellent) |
| Breathability | ⭐⭐ (Limited) |
| Mildew Resistance | ⭐⭐⭐⭐ (Good but not proof) |
| Drying Speed | ⭐⭐⭐ (Moderate) |
| Lifespan | 5-8 years |
| Cost | Most affordable |
| Best Climate | Wet climates, frequent rain |
Why RVers choose it: Vinyl’s waterproofing is unmatched. If you camp in wet climates or leave your awning extended during rain, vinyl is your friend.
The catch: It can develop mildew in humid conditions without regular cleaning. It also doesn’t breathe, so moisture can trap underneath.
Acrylic (The Breathable Balanced Choice)
Composition: Synthetic fabric with excellent water-shedding properties
| Feature | Rating |
|---|---|
| Waterproofing | ⭐⭐⭐ (Water-resistant, not proof) |
| UV Resistance | ⭐⭐⭐⭐⭐ (Superior) |
| Breathability | ⭐⭐⭐⭐⭐ (Excellent) |
| Mildew Resistance | ⭐⭐⭐⭐⭐ (Excellent) |
| Drying Speed | ⭐⭐⭐⭐⭐ (Fast) |
| Lifespan | 7-10 years |
| Cost | Premium |
| Best Climate | Dry, sunny, humid conditions |
Why RVers love it: Acrylic’s breathability prevents mildew in humid climates. It dries quickly and resists UV fading better than vinyl. It’s the perfect choice for the Southwest or humid coastal regions.
The limitation: It’s not 100% waterproof. Water sitting on acrylic long-term will eventually seep through. Proper slope and regular drainage prevent this from being a real problem.
Choosing Your Perfect Awning: The Decision Framework
Step 1: Assess Your RV Type
- Class A/B motorhomes: Any type works; consider your power system for electric models
- Travel trailers: Manual and retractable electric most popular
- Fifth wheels: Larger surface area; patio awnings increasingly common
- Truck campers: Usually manual or small electric only (weight considerations)
- Vans/minivans: Compact retractable systems
Step 2: Consider Your Camping Style
Weekend warrior? → Manual or automatic retractable (fastest deployment)
Full-time traveler? → Automatic with smart features (convenience matters)
Boondocker who avoids hookups? → Manual or slide-out topper (no electrical dependency)
Glamper who stays 2+ weeks per spot? → Patio awning (make that outdoor space count)
Budget-conscious on a budget? → Manual retractable (proven value)
Step 3: Evaluate Your Climate
| Climate Type | Best Choice | Fabric Choice |
|---|---|---|
| Hot & dry (Arizona, Nevada) | Automatic retractable | Acrylic |
| Humid & wet (Southeast coast) | Manual/retractable with regular cleaning | Vinyl |
| Windy (mountain regions) | Automatic with wind sensors | Either, with reinforced hardware |
| Four-season camping | Patio awning with screens | Vinyl (durability) |
| Temperate (California coast) | Automatic retractable | Acrylic |
Step 4: Budget Reality Check
Be honest about your spending:
- Under $1,500: Manual retractable or basic fixed
- $1,500-$2,500: Electric retractable, hybrid models
- $2,500-$4,000: Automatic with good sensors
- $4,000+: Patio awning system or premium automatic
Remember: Installation often costs as much as the awning itself. Budget accordingly.
Installation: DIY or Professional?
When to DIY:
- Manual awnings (simplest installation)
- Basic electric awnings (if comfortable with RV wiring)
- Replacement fabric installations
- You have RV experience and proper tools
When to hire professionals:
- Complex automatic systems (warranty protection)
- Modifications to RV structure
- Electrical integration on older RVs
- First-time installation (mistakes are expensive)
Professional installation cost: $500-$2,000 depending on complexity
Maintenance: Keeping Your Awning Pristine
Monthly Maintenance:
- Visually inspect for tears or separated seams
- Check mounting hardware for corrosion
- Deploy and retract fully (keeps mechanisms clean)
- Clear any debris from roller tracks
Seasonal Maintenance:
- Deep clean with mild soap and soft brush (never pressure wash)
- Inspect weatherguards for damage
- Lubricate rollers and moving parts (use awning-safe lubricant, not WD-40)
- Check support arm fasteners
Annual Professional Check:
Consider annual inspections on electric systems to catch issues early.
Cost of negligence: Repairs and replacements run $500-$2,000. Prevention costs almost nothing.
Also Read:- Best RV Brands 2026: Class A vs B vs C Motorhomes (Complete Comparison & Buyer’s Guide)
Real RVer Scenarios: Which Awning for Whom?
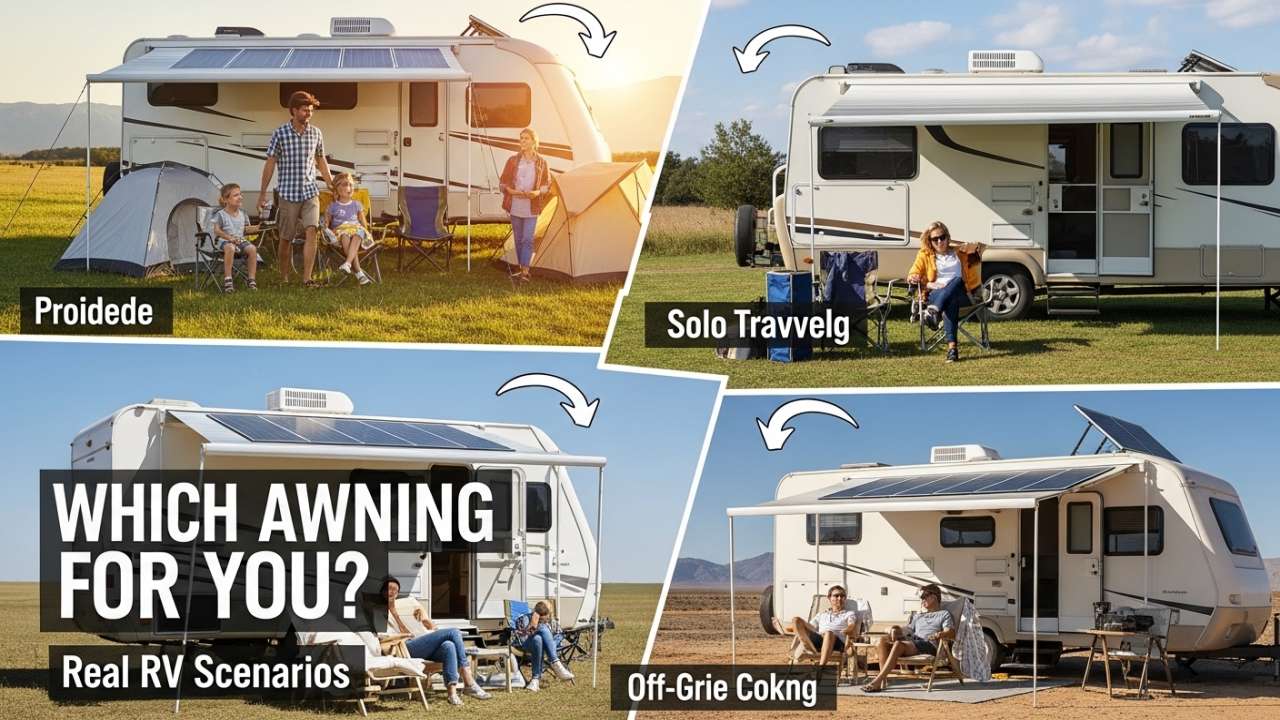
Sarah & Mark: Seasonal RVers
Profile: Retired couple, travel 6 weeks per year to warm climates, like parking for 2-3 weeks per stop
Best choice: Automatic retractable with acrylic fabric Why: They prioritize convenience and like staying put. Automatic deployment at sunrise and retraction at sunset is ideal. Acrylic handles the sunny southwest perfectly. Investment: $2,800-$3,200
The Chen Family: Full-Time RVers
Profile: Homeschooling family of 4, constant movement, mixed climates, tight budget
Best choice: Manual retractable, vinyl fabric Why: Cost savings matter. Manual deployment isn’t daily; they’re strategic about when to extend. Vinyl’s durability makes sense for constant travel and varied weather. Investment: $900-$1,200
Tom: Solo Van Lifer in the Southwest
Profile: Digital nomad, stays 2-4 weeks per location, rarely in wet weather, values independence
Best choice: Automatic retractable or hybrid with acrylic Why: Convenience is worth the extra investment. Boondocking means relying on battery power initially, but a good electrical system solves this. Acrylic suits the dry climate. Investment: $2,000-$2,800
The Johnsons: Luxury Glamping
Profile: High-end RV, stationary for winter months, entertaining frequently
Best choice: Patio awning with motorized extension Why: This is their outdoor living room. The investment creates a true lifestyle upgrade that justifies the cost. Investment: $5,000-$8,000+
F&Q
Q1: Can I install a new awning over an existing one?
Technically yes, but it’s rarely recommended. The additional weight and stress on mounting points can cause structural issues. Most professionals recommend removing the old one first. Cost difference: $200-$500 for removal, usually worth the safety investment.
Q2: How much does an RV awning extend my vehicle’s living space?
A standard 14-foot awning extends about 8-12 feet from your RV, creating a 112-168 square foot shaded area (depending on your RV’s height). Patio awnings with walls effectively add another “room” to your living space.
Q3: Will an awning affect my RV’s fuel efficiency?
Manual awnings with weatherguards add minimal wind resistance. Electric versions add slightly more due to the mounting hardware. Deployed awnings create drag, but you’re parked while using them. The impact on total trip fuel consumption is negligible (less than 2%) for most RVers.
Q4: How long do awnings typically last?
- Vinyl: 5-8 years with proper maintenance
- Acrylic: 7-10 years with proper maintenance
- Mechanical components: 10+ years if maintained
Lifespan depends heavily on climate, usage, and maintenance. Southwest RVers often see longer life. Coastal and humid climates are harder on fabric.
Q5: Can I replace just the fabric without replacing the entire awning?
Yes! Fabric replacement costs $200-$600 and extends the life of your awning significantly. This is often more economical than replacing the entire system.
Q6: What’s the typical lead time for awning orders?
Standard awnings: 2-4 weeks Custom orders: 4-8 weeks OEM installations: 6-12 weeks (factory orders)
Factor this into your planning if you need a specific setup.
Q7: Do I need special insurance coverage for my awning?
Most RV insurance covers awnings under the standard policy, but verify with your provider. High-end patio awnings ($5,000+) might warrant additional coverage. Cost is usually minimal ($50-$150/year) for the peace of mind.
The Bottom Line: Making Your Decision
Choosing an RV awning isn’t rocket science—it’s about honest self-assessment.
Ask yourself three things:
- How often do I move between locations? (Frequent movers: simpler systems; stationary campers: more elaborate options)
- What’s my realistic maintenance commitment? (Lazy about cleaning? Get vinyl. Willing to maintain? Acrylic rewards you with better performance)
- What brings me joy while camping? (Convenience? Get automatic. Outdoor entertaining? Get a patio awning. Budget relief? Get manual)
The best awning isn’t the most expensive one—it’s the one you’ll actually use and maintain. A $1,200 manual awning that gets deployed regularly beats a $4,000 automatic system gathering dust in the corner because you’re always on the move.
Your future camping self will thank you for getting this decision right.