You’re parked somewhere beautiful, but your batteries are dying faster than you’d like. Maybe you picked up a second fridge. Maybe you started working remotely from your RV. Or maybe you just realized that your 200-watt solar setup isn’t keeping up anymore.
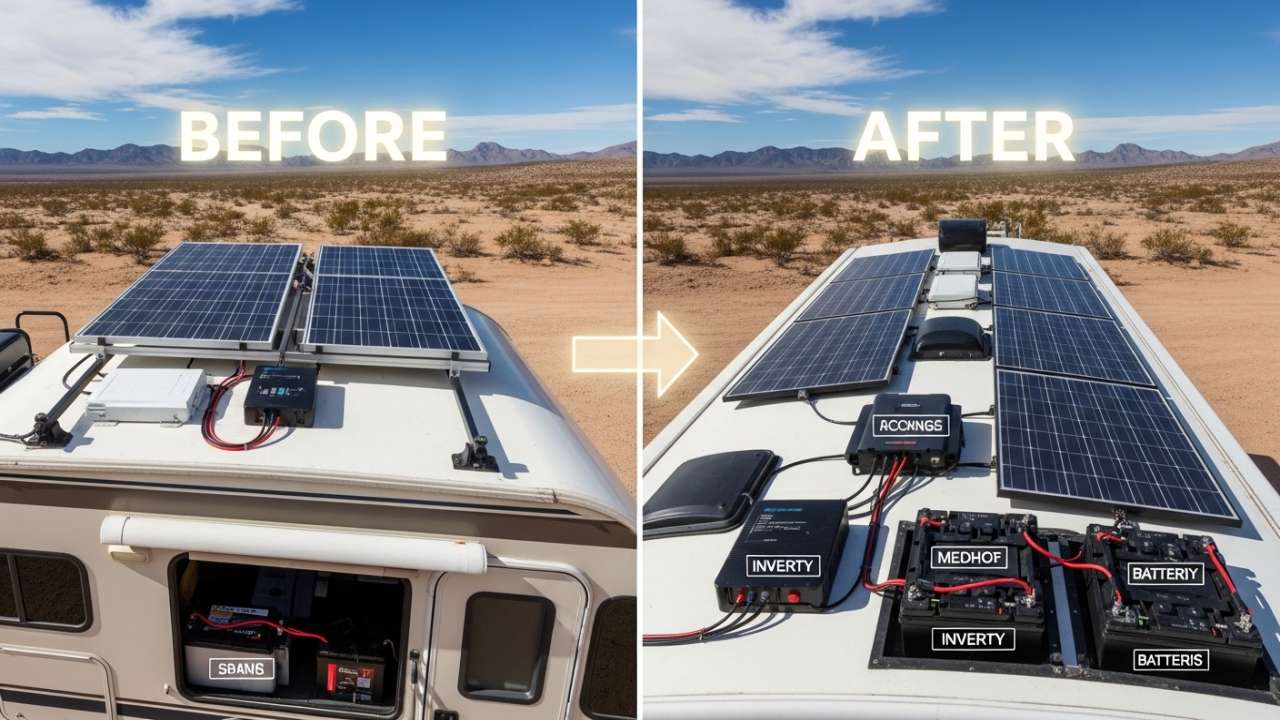
Here’s the thing: you’re not alone. Thousands of RVers hit this wall every year when they want to expand their RV solar system, and the good news is way simpler than you think. Yes, you can absolutely add more solar panels to your existing setup. The better news? You don’t always have to tear out what you already have.
This guide walks you through the real stuff: how to check if your system can handle expansion, what might need upgrading, actual costs, and step-by-step instructions to get it done safely.
Can You Actually Expand Your RV Solar System?
Let’s be straight about this. Not every RV solar system is built the same, and not all of them have room to grow. But most do, and the difference between a system that can expand and one that can’t usually comes down to four things.
Your Solar Charge Controller
This is the brain of your whole setup. It sits between your panels and your batteries, making sure everything charges properly. Every controller has limits—a maximum voltage it can handle and a maximum amp rating.
Find the label on your charge controller (usually on your roof or near your battery compartment). It’ll say something like “Victron 100/30” or “Renogy 40A MPPT.” Write down those numbers. That first number is your voltage limit, the second is your amp limit. This matters a lot because adding panels means more amps flowing through here.
If you want to dive deeper into what controller makes sense for your expansion, check out our charge controller comparison guide where we break down the different types and their capabilities.
Your Battery Bank
More panels mean faster charging, but your battery bank has to be able to handle that. If your battery isn’t ready, adding panels won’t help much. That said, adding panels doesn’t automatically mean you need a bigger battery. You just need to match the panel output to what your battery can accept without getting damaged.
Before you add panels, it’s smart to understand what you’re working with. Our complete RV battery setup guide covers everything from lithium to lead acid, and how to know if your current setup can handle more charging power.
Your Wiring and Fuses
When you add panels, you’re adding current flowing through wires. If those wires are too thin, they’ll heat up. Undersized wiring is an actual fire hazard. Most RV systems are fine, but it’s worth checking before you add anything.
Getting the wiring right is critical. We have a detailed RV solar wiring guide that walks through wire gauge requirements and proper connections.
Roof Space
This one’s simple: do you have room? If you’re already maxed out on roof space, you’ve got options (we’ll get to those), but it does limit what you can do.
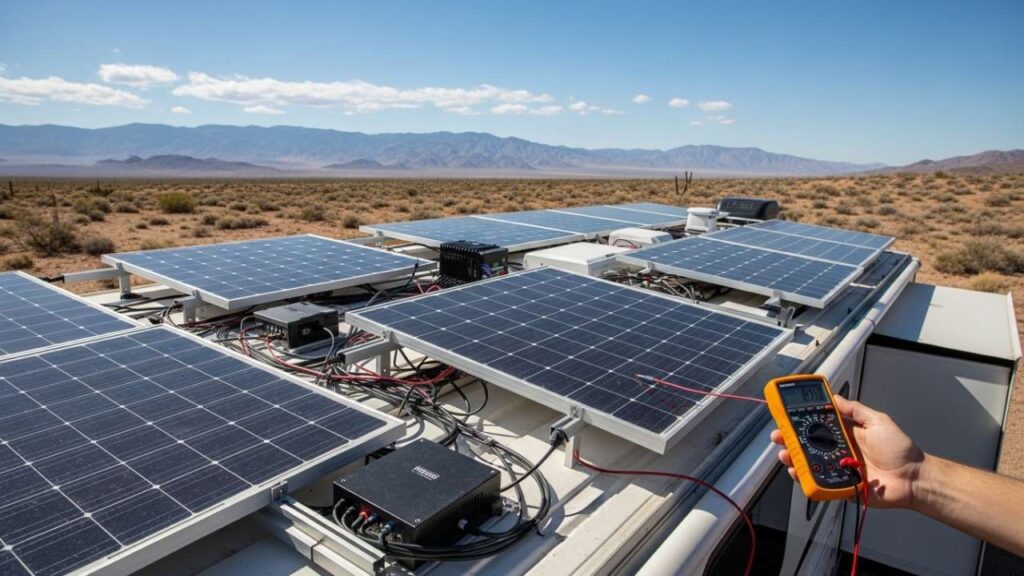
Step 1: Audit Your Current System
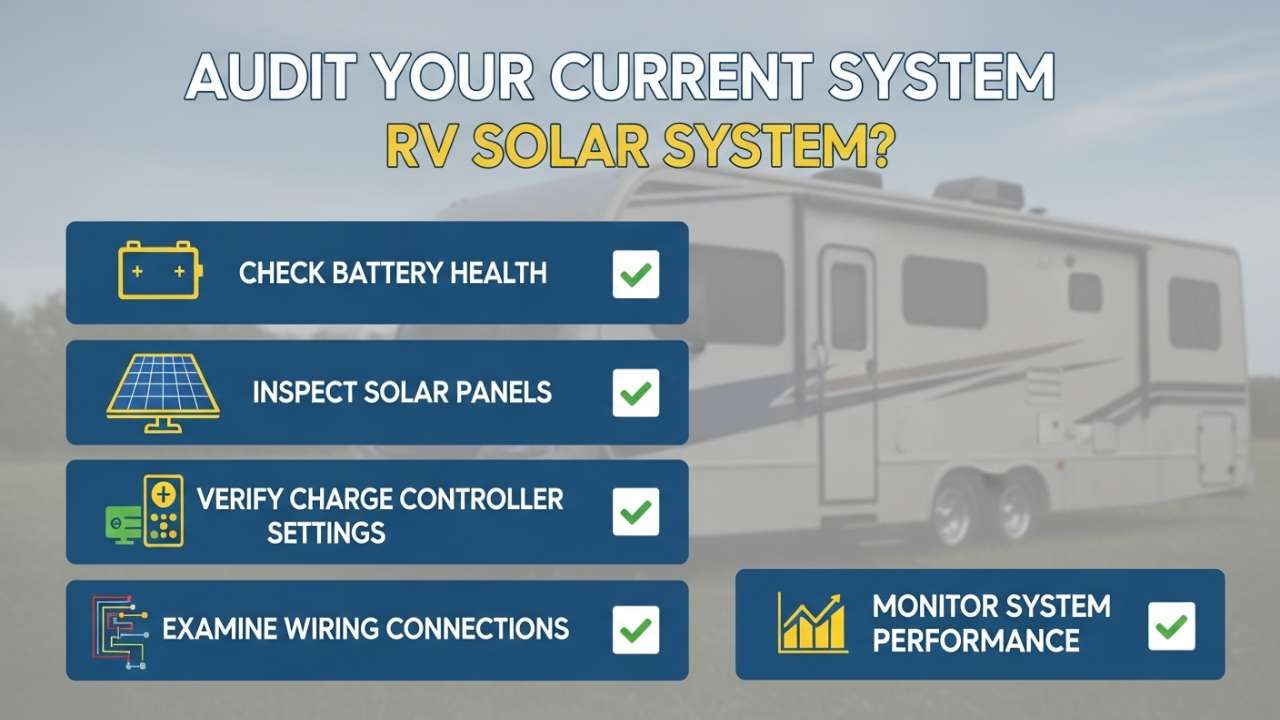
Before you spend any money, you need to know what you’ve got. Grab a pen and paper and write down these numbers. Don’t skip this part—it takes 10 minutes and saves you from making expensive mistakes.
Find Your Solar Panels
Look at the label on your existing panels. You need two things:
- Open-circuit voltage (usually labeled “Voc”)
- Rated wattage
A typical RV panel might say something like 37V and 200W. That voltage number is crucial because when you add new panels, they should match or be very close to this voltage. If you’re trying to combine 37V panels with 20V panels, your system won’t work the way you want it to.
Not sure what panels you have or whether they’re good quality? Our best solar panels for RVs guide compares the top options available today and helps you understand what specs actually matter.
Check Your Charge Controller Capacity
Look at your charge controller specs. You’re looking for the maximum voltage and maximum amperage. For example, a Victron 100/50 can handle up to 100 volts and 50 amps. That’s your ceiling.
Next, figure out what your current panels are actually generating. Take the wattage of your panels and divide by the voltage. If you’ve got 200W at 37V, that’s about 5.4 amps coming in. If you add another 200W panel, you’re looking at roughly 10-11 amps total (if they’re wired in parallel) or 74V (if they’re wired in series).
Compare that to your controller’s rating. Do you have headroom? Most people do.
Write it all down. Seriously. Your existing panel voltage, your existing panel wattage, your controller’s max voltage, and your controller’s max amps. You’re going to need this information.
Series vs. Parallel Wiring: What’s the Difference?

This is the part where a lot of people get nervous. It sounds complicated, but it’s actually pretty straightforward.
Series wiring means you’re stacking voltages. Connect the positive wire from panel one to the negative wire of panel two, and you add up the voltages. Two 37-volt panels in series gives you 74 volts. The amps stay the same. This keeps amperage low and is great for long wire runs. Downside: if one panel gets shaded, the whole system’s output drops because they’re dependent on each other.
Parallel wiring means the amps add up but the voltage stays the same. Two panels with 10 amps each, wired in parallel, give you 20 amps at the same voltage. Simpler for most RV setups, easier to deal with if one panel has an issue. Downside: your controller needs enough amperage capacity.
For adding 1-2 panels to an existing RV system, most people wire in series. It keeps the amp load manageable and works well with MPPT controllers (which are way more efficient than PWM controllers anyway).
Does Your Charge Controller Need an Upgrade?
Maybe. Here’s how to think about it.
If your charge controller is sitting at 80-90% capacity right now, an upgrade makes sense. A new 50-amp MPPT controller runs $250-400 and gives you room to grow without stressing your system.
If you’ve got headroom—say you’ve got a 30-amp controller and you’re only drawing 6-8 amps—you can probably add a panel or two without upgrading. Just do the math.
Important: MPPT controllers are always better than PWM for expansion. They’re more efficient (you get more usable power), they handle more wattage, and they cost only a bit more. If you’re upgrading your charge controller anyway, go MPPT. For a full breakdown of your options, read our charge controller comparison to see which brands and models fit your budget and expansion plans.
Wiring: Making Sure Your System Won’t Overheat
This is the safety stuff. When you add panels, you’re adding power flowing through your wiring. Undersized wire gets hot. Hot wires can start fires.
Check the gauge of your current wiring. It’s usually printed on the insulation. Common RV solar wire comes in 10AWG, 8AWG, or 6AWG.
Here’s the rule: if your amperage is going up by more than 10-15 amps, get thicker wire. Use solar-rated wire specifically—it’s got UV-resistant insulation designed to handle outdoor conditions on your RV roof.
Most RVers can add 1-2 panels without rewiring their whole system. But check it first. If you need specifics on what gauge wire to use and how to route it safely, our complete RV solar wiring guide has sizing charts and installation details.
Real Costs: What You’ll Actually Pay
Let’s talk money. Here’s what you’re looking at for adding solar capacity to an existing RV system:
One extra 200-watt panel, no controller upgrade: $250-350
This covers:
- Panel itself ($180-250)
- New mounting brackets ($30-60)
- Wire and connectors if needed ($40-80)
Two panels plus controller upgrade to 50A MPPT: $600-800
This adds:
- 50A MPPT charge controller ($250-400)
- Second panel ($180-250)
- Mounting brackets ($30-60)
- Any wire upgrades ($40-80)
Professional installation: Add $500-1,000
If you’re not comfortable on your roof or with electrical work, get a professional. It’s worth it for peace of mind and to make sure it’s done safely.
The real payback: You’re saving generator fuel, campground hookup fees, and extending your boondocking time. Most RVers recoup their investment in 2-3 years of off-grid camping.
Your Step-by-Step Guide to Adding Solar Panels

Step 1: Turn Everything Off
Seriously. Turn off your battery disconnect switch. Your system is live, and a bad connection can cause a spark. Take 30 seconds and flip that switch.
Step 2: Plan Your Layout
Get up on your roof and mark where the new panels will go. Make sure they’ll get full sun exposure—no vents or AC units blocking them. Take photos of the roof so you’ve got a clear picture of what you’re working with.
Step 3: Install the Mounting Brackets
This is where you’re drilling holes in your RV roof, so don’t rush it. Use stainless steel hardware (aluminum corrodes). Most people use Z-brackets or curved brackets designed for RVs.
The most important part: Seal everything with silicone or Butyl sealant. Water leaks from roof penetrations are a pain to deal with and can cause serious damage. One leak now saves you hundreds in repairs later.
Step 4: Mount the Panels
Get your panels up there and secure them to the brackets. Use the hardware that came with your kit. Make them tight—you don’t want them shifting around when you’re driving.
Step 5: Run the Wiring
This is where you bring the positive and negative wires from your new panels down into your RV. Most people use the fridge vent, an existing hole, or a new cable entry plate (which is cleaner and you seal it properly).
Use the right gauge wire. Pre-made MC4 connector cables make this easier if your panels have standard connectors. For detailed wiring instructions and safety practices, check our RV solar wiring guide which covers every step.
Step 6: Connect to Your Charge Controller
Follow your charge controller manual for this part. Usually, you’re connecting the positive and negative wires to the solar input terminals.
If you’re adding panels in series, you’re daisy-chaining them (positive to negative from one panel to the next). If parallel, you’re using a combiner box or branch connectors to merge them together, then running one set of wires to your controller.
Not sure which controller will work best with your new setup? Our charge controller comparison walks through voltage and amp ratings so you can match your panels to the right controller.
Step 7: Test Before Powering Up
Use a multimeter to check your voltage and polarity before you flip that battery disconnect back on. Make sure positive is positive and negative is negative. Backwards polarity will fry your controller.
Step 8: Power On Slowly
Turn the battery disconnect back on. Watch your charge controller for 30 minutes. You should see amps coming in from the panels. The voltage should be steady. If something looks weird, turn it off and check your connections.
Can You Add a Solar Suitcase Instead?
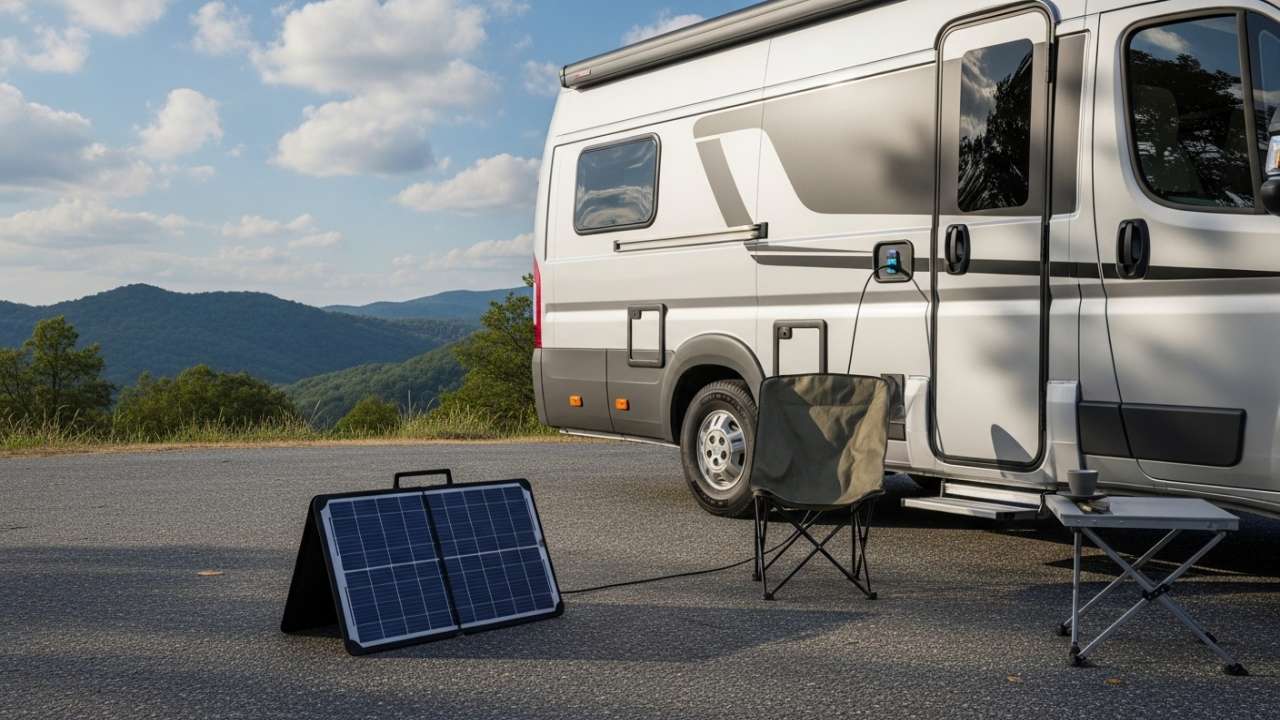
If your roof is maxed out, you’ve got another option. A portable solar panel (also called a solar suitcase) is a 100-400 watt panel system that plugs into your RV with standard connectors.
How it works:
- You deploy it when you’re parked
- It sits in full sun while your RV can be in the shade
- You store it during travel
- No roof penetrations
Downsides:
- You have to set it up and tear it down at each spot
- Weight (most weigh 50-70 pounds)
- Slightly higher cost per watt
Upsides:
- No drilling into your roof
- You can add it without upgrading your charge controller (it usually has its own)
- Flexibility for different camping scenarios
For RVers who don’t want to drill holes or who are renting their RV, this is a solid option. You can also run both a rooftop system and a portable system if you really need the power. If you’re considering portable solar, our guide to portable solar panels breaks down the best options, costs, and setup methods.
Q: Do the new panels have to match my old panels exactly?
Not exactly, but they should be close. Match the voltage—if your existing panels are 37V, get panels that are 37V or within 2-3 volts. Wattage doesn’t have to be identical, but similar is better.
Mixing panels isn’t a problem if you wire them correctly. Just be aware that a system tends to operate at the performance level of the lowest-rated panel when they’re in series. So if you wire a new 200W panel with an old 150W panel in series, you’ll get closer to 150W output on that string.
Q: What if my roof is full and I can’t fit more panels?
Go portable. A solar suitcase lets you put panels wherever the sun is, regardless of where your RV is parked. You get to pull into a shady spot to keep your RV cool while your panels sit in full sun. That’s actually smarter for a lot of boondocking scenarios.
You can also consider upgrading to one larger panel that replaces multiple smaller ones. Newer panels are more efficient, so you might get more power from one large panel than two smaller ones, with less weight and only one set of wires. Check out our best solar panels for RVs to see what’s available in the current market.
Q: Do I need to upgrade my battery bank when I add more panels?
Not necessarily. If you add panels but your battery capacity hasn’t changed, you’ll just charge faster on sunny days. You only need more battery if you’re adding panels AND running more power at night or on cloudy days, or if you’re trying to extend your off-grid time.
Think of it this way: more panels = faster charging. Bigger battery = longer runtime at night. They’re different things. If you’re thinking about battery upgrades, our RV battery setup guide covers all the chemistry types and how much capacity you actually need.
Q: Can I install this myself or do I need a pro?
DIY is totally doable if you’re comfortable on a roof and understand basic electrical wiring. The hardest part is usually the mounting and making sure your roof doesn’t leak afterward.
What you absolutely need to get right:
- Sealing any holes you drill
- Getting polarity correct (positive and negative)
- Using the right wire gauge
- Making secure connections with MC4 connectors or whatever your system uses
If any of those make you uncomfortable, hire someone. A bad electrical connection or a leak into your living space will cost you way more than professional labor. For a detailed walkthrough with specific steps, our RV solar wiring guide has everything you need to know.
Q: What’s the minimum amp rating my charge controller should have before adding panels?
Don’t use more than 70-80% of your controller’s rated capacity. So if you’ve got a 30-amp controller, aim for a system that produces no more than 24 amps.
This gives you room to grow without stressing your system. An undersized controller running at 100% capacity all the time wears out faster and can cause charging issues. Our charge controller comparison guide breaks down capacity ratings and helps you pick the right size for expansion.
The Reality of Expanding Your System
Adding 1-2 solar panels to your existing RV setup is totally possible and usually isn’t complicated. Most systems have more headroom than people realize.
Start by knowing what you’ve got: your panel specs, your controller capacity, your wiring, and your available roof space. Then decide if you’re going rooftop, portable, or a mix of both.
The payoff is real freedom. Longer boondocking trips. No generator noise at dawn. The ability to park in the shade and still charge your batteries. That’s worth the work.
Your RV solar system doesn’t have to be static. It can grow with your needs. Just do it safely, plan it out, and you’ll be generating more power without the headaches.
Want to Learn More About RV Solar?
We’ve got guides covering everything from the best solar panels for RVs to portable solar panel options, battery setups, and charge controller selection. Check out our complete RV solar wiring guide if you want the technical details on installation.
Last thought: Before you buy anything, ask yourself: “Do I actually need more solar, or do I need a better battery?” A solid battery bank that can store power is sometimes smarter than stacking more panels. Think about your actual usage patterns, where you camp, and how long you stay off-grid. That’ll tell you what you really need.