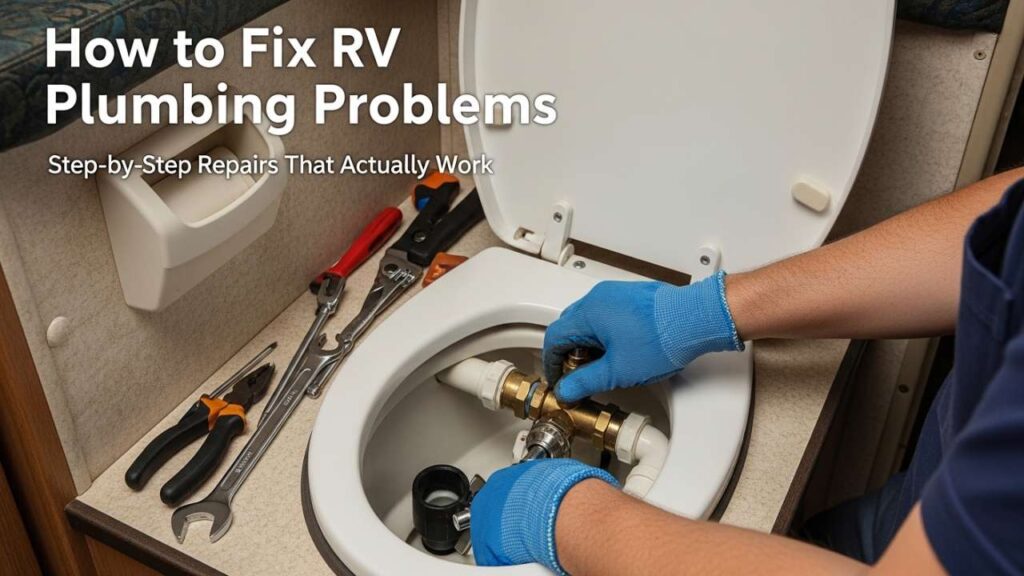
Your RV was supposed to be your ticket to freedom—hit the road, enjoy nature, and live comfortably on your own terms. Then one morning, you flip on the shower and nothing comes out. Later that day, you notice water pooling under the sink, or worse, the toilet backs up during a family gathering at your favorite campground.
Sound familiar? You are not alone. RV plumbing problems are among the most frustrating issues owners face. Unlike your home plumbing system, an RV setup is compact, tightly integrated, and exposed to constant vibrations during travel. A small leak that might take months to damage a house can wreak havoc on your rig in weeks.
Here is what most RV owners do not realize: your RV water system is actually simpler than a house system, which means you can diagnose and fix many problems yourself without calling in a professional. This guide walks you through the most common issues, how to fix RV plumbing problems, and practical solutions you can implement right now.
Let us get into it.
Understanding Your RV Plumbing System: Three Systems, One Compact Space
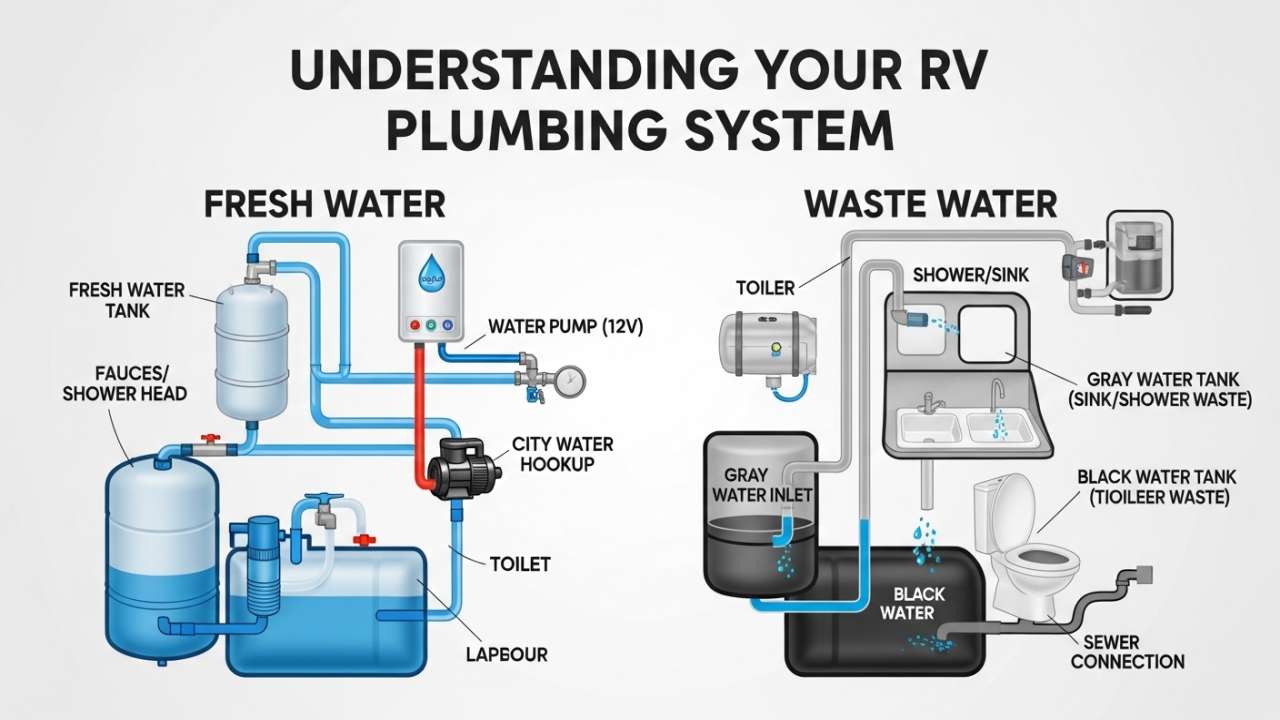
The Three Key Systems
Your RV has three separate plumbing systems working together, and each one can develop its own set of problems. Understanding where each system is and how it works is half the battle when troubleshooting issues.
Freshwater System: This is where your drinking, cooking, and cleaning water comes from. It includes your freshwater holding tank (usually 50-100 gallons), a water pump that pressurizes the lines, and PEX plastic tubing running throughout your RV to faucets, showers, and your toilet. The freshwater system is under pressure, which is both good and bad—good because water flows on demand and bad because a tiny crack in a pressurized line can dump gallons of water into your walls before you notice.
Greywater System: Everything that comes from your sink and shower drains into the greywater tank. Unlike your home, these drain lines operate by gravity, not pressure. If a greywater line clogs, water backs up quickly. Many RV owners do not realize they can recycle greywater for cleaning or flushing the toilet in remote areas, which makes understanding this system even more valuable.
Blackwater System: This is dedicated entirely to your toilet waste. It has its own holding tank (usually 20-40 gallons) and its own drain line. Because blackwater is heavier and contains solids, it clogs more easily than greywater if you are not careful about what goes down the toilet. Improper flushing habits are the #1 cause of blackwater clogs.
Quick Reference: RV Plumbing Problems at a Glance
| Problem | Most Common Cause | Severity | DIY or Pro? |
|---|---|---|---|
| Water leaks | Loose fittings, freeze damage, worn seals | High | DIY (minor), Pro (major) |
| Clogged drains | Food, grease, hair, and excessive toilet paper | Medium | DIY (usually) |
| Low water pressure | Clogged filters, sediment buildup, and air in lines | Medium | DIY |
| Frozen pipes | Winter temperatures, poor insulation, and a lack of winterization | High | Pro (damage) |
| Faucet leaks | Worn washers, damaged O-rings, mineral buildup | Low | DIY |
RV Water Leaks: Finding Them Before They Find Your Wallet
Water leaks are the silent destroyers of RVs. Unlike a house, where you might see water stains on a ceiling, RV water leak detection is crucial because leaks can hide in walls, under cabinets, and inside storage compartments for weeks before you notice wet insulation or mold. A slow drip from a pressurized line can dump 10+ gallons into your walls per day without any visible signs until catastrophic damage occurs.
How to Find Hidden Leaks
Here is a trick I have seen work consistently: turn off all faucets and appliances drawing water. Then turn on just your water pump. If the pump cycles every 20-30 seconds despite no water being used, you have a leak somewhere. Listen carefully—can you hear water moving through a specific line? Does the sound come from under the sink, behind the toilet, or near the water heater?
Steps to locate leaks:
- Check obvious areas first: under sinks, around the toilet base, and near the water pump.
- Look for water stains, dark discoloration, or soft spots in cabinets and flooring.
- Inspect all visible connections and fittings for drips or moisture.
- Use a flashlight to check tank seams, dump valves, and low-point drains for cracks.
- If you still cannot find it, isolate each fixture one at a time while watching for leaks.
Three Types of Leaks & How to Fix Each
Loose Fittings and Connections
The vibration from travel loosens connections over time. This is actually the easiest leak to fix. Use an adjustable wrench to tighten the fitting by hand—do not overtighten or you will crack plastic fittings. Sometimes just snugging up a loose connection stops a leak immediately. If tightening does not work, the fitting might need a new washer or O-ring, which costs $2-5 from any RV supply store.
Damaged Tubing (The Most Common Type)
PEX tubing (the white or red plastic tubes) can crack from freeze damage, pinching, or wear over time. If you find a crack or hole, you have two options: patch it temporarily or replace the damaged section permanently. For a quick roadside fix, wrap the damaged area tightly with self-fusing silicone tape, but plan to replace the tubing at your next stop. For a proper fix, follow the step-by-step approach below.
Step-by-step: Replacing a damaged PEX section
- Locate the damaged section and identify the nearest connection points.
- Turn off your freshwater pump and open all low-point drains to prevent water spillage.
- Use a PEX tubing cutter (not a utility knife—this makes a clean, square cut) to remove the damaged section. If the fitting itself is bad, cut it out too.
- Get a replacement PEX coupling fitting (usually SharkBite brand works great—no crimping required) from any RV or hardware store.
- Connect the fitting to both ends of the remaining tubing. SharkBite fittings work through spring clips—just push the tubing in firmly.
- Turn the pump back on and check for leaks around the new fitting.
Leaky Faucets and Fixtures
A dripping faucet wastes water and drives you crazy. Most faucet leaks come from worn washers or damaged O-rings inside the handle. If the leak comes from the base of the faucet (where it meets the sink), the seal is failing, and you will likely need to replace the entire faucet, which costs $30-80 for an RV-compatible model.
For a quick fix on an interior leak: close your freshwater valve, disassemble the faucet handle (usually just unscrewing a packing nut), and inspect the rubber parts. If they look cracked or flattened, replace them. A rubber washer kit costs under $10.
Leak Assessment: When to Panic and When to Wait
| Leak Type | Signs to Watch For | Time to Fix | Risk Level |
|---|---|---|---|
| Pressurized line crack | Water pooling, wet cabinet, musty smell | Today | Very High |
| Loose-fitting drip | Slow drip, minor moisture | This week | Low-Medium |
| Tank seam leak | Water under RV, tank level dropping | Within 2 days | High |
| Faucet leak | Dripping from the spout only | This month | Low |
Clogged Drains and Toilets: Prevention Beats Cure Every Single Time
I will be direct: most clogged drains in RVs are 100% preventable. I have seen people clog their grey tank with coffee grounds and cooking oil, then blame the RV. RV plumbing troubleshooting for clogs requires understanding both kitchen and bathroom issues separately.
RV Toilet Problems and Blackwater Clogs
Kitchen Drain Clogs
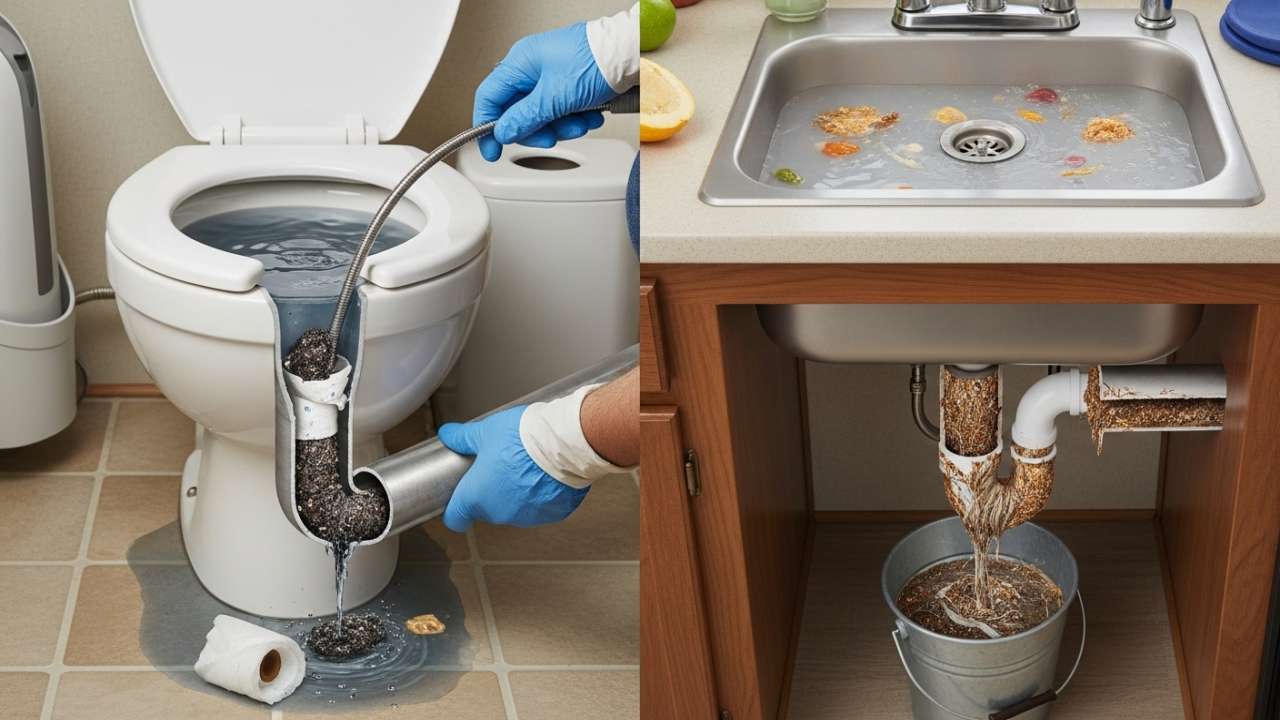
Your RV kitchen drain is way more sensitive than your home kitchen. The pipes are smaller, the angles are sharper, and there is no slope downward to help gravity do the work. Here is what clogs kitchen drains:
- Cooking grease and oil (this is the #1 killer)
- Food particles and vegetable scraps
- Soap scum and mineral deposits from hard water
- Coffee grounds (surprisingly common)
Prevention first: Never pour grease down the RV drain. Let it cool, solidify in a can, and throw it in the trash. After washing dishes, run hot water with a bit of dish soap down the drain weekly to break up buildup.
If you already have a clog: Start with the simplest methods first. Fill your sink, put a plunger over the drain, and pump vigorously for 15-20 seconds. Many minor clogs clear with this method. If that does not work, try pouring a mixture of baking soda and white vinegar down the drain (1 cup of each, wait 30 minutes, then flush with hot water.
For stubborn clogs: A hand-crank drain snake (sometimes called a plumbing auger) works better than chemicals on RV drains. Insert the snake, crank the handle to break apart the clog, and pull out the debris. These cost $15-30 and beat calling a plumber.
RV Shower Drain Issues
Hair is the main culprit here. A single shower can shed 100+ strands, and within a few weeks, that accumulates into a serious blockage. The good news: it is almost entirely preventable.
Prevention: Install a simple hair strainer or drain stopper in your shower. These cost $5-10 and catch hair before it enters the drain. Clean it after every few showers.
If clogged: Remove the drain cover if possible and manually pull out visible hair and soap scum. Then use the plunger or drain snake method. For stubborn shower clogs, the drain snake usually works better than a plunger because the angle makes plunging ineffective.
RV Sewage System Problems (The Nightmare Scenario)
This is the one that really ruins your trip. RV sewage system problems happen when people flush non-RV-friendly toilet paper or when they dump the tank while it still has standing water inside (which creates a vacuum and blockage). Here is how to prevent the nightmare:
- Use RV-specific toilet paper only. It dissolves much faster than regular paper.
- Never flush wipes, feminine products, or paper towels—period.
- Keep your black tank at least 3/4 full before dumping (water breaks up solids).
- Add enzyme-based tank treatments monthly to break down waste naturally.
If your black tank is clogged: This usually requires professional help because you cannot access the line easily. Some campgrounds have high-pressure flush systems specifically for black tanks—ask the front desk. Your next option is calling an RV repair service with a septic tank pump truck.
Low Water Pressure: Diagnosing What is Really Wrong
You turn on the shower and get a pathetic trickle instead of a nice flow. Is it your RV problem, or is the campground water source just weak? Here is how to figure it out in 60 seconds:
Grab a water pressure gauge from an RV supply store (costs $10-15). Connect it to an exterior faucet or the city water inlet. Healthy RV plumbing runs at 40-60 PSI. If you are reading below 30 PSI, something is wrong. If you are reading above 75 PSI, the issue might be too much pressure, not too little.
Three Causes of Low Pressure (And How to Fix Each)
Clogged Water Filter
Most RVs have an inline water filter that removes sediment and contaminants from the water source. Over time, this filter gets clogged. When it clogs, pressure drops. This is actually the most common cause of low-pressure problems I have seen.
Quick fix: Locate your water filter (usually under the sink or in an exterior compartment). If it has a pressure gauge on it, you will see it is below 20 PSI when clogged. Replace the filter cartridge (costs $10-20), and the pressure should return immediately.
Sediment Buildup in Water Lines
If your pressure is low everywhere in the RV, not just one fixture, sediment might be accumulating in the main freshwater line. This happens in areas with very hard water. The solution: flush your system with a sediment-removing additive available at RV stores, or run the water continuously for several minutes until it runs clear.
Water Pump Problems
Your water pump maintains pressure throughout the system. If the pump is failing, pressure will be consistently low. Check if your pump is making strange noises (grinding, squealing, or rattling). A failing pump usually needs replacement, which is a $200-400 professional job, though some experienced RVers replace them as a DIY project.
Water Pressure Diagnosis Chart
| Pressure Reading | Likely Cause | First Action |
|---|---|---|
| Below 20 PSI | Clogged filter or sediment | Replace the water filter cartridge |
| 30-40 PSI (low) | Pump failing or a weak source | Check pump operation and listen for noise |
| 75+ PSI (high) | Excessive source pressure | Install the pressure regulator immediately |
Frozen Pipes: Winter Survival Guide for RV Plumbing
Winter camping is amazing until your pipes freeze solid and burst. Frozen pipe damage can cost thousands to repair because water expands as it freezes, cracking both plastic and metal lines. The worst part? Most freeze damage is completely preventable.
Prevention: Your Best Investment
If you regularly winter in temperatures below 32°F, invest in pipe insulation before the cold sets in. The options:
- Foam pipe sleeves (snap-on cylinders that wrap around pipes) cost $1-3 per foot and take 30 minutes to install.
- Fiberglass insulation wrap works for irregular pipe runs and costs $2-4 per foot.
- Heat tape (electric cable that wraps around pipes) works actively—when you plug it in, it generates heat to prevent freezing. Cost: $20-40 per kit.
- RV skirting (creating a fully enclosed bottom) keeps warm air around all pipes and costs $300-800, but is the most comprehensive solution.
Winterization: The Seasonal Shutdown
If you are not using your RV during winter, you must winterize the plumbing. Winterization means flushing all water out and replacing it with RV antifreeze (which does not freeze) to protect pipes, tanks, and fixtures. Here is the basic process:
- Drain all freshwater, grey, and black tanks completely using low-point drains.
- Add RV antifreeze to each tank and run it through all faucets, the shower, and the toilet until lines are full of antifreeze.
- Bypass the water heater (this saves on antifreeze and prevents damage) using the bypass valve.
- Keep your RV parked in a sheltered location away from wind and direct exposure.
Cost for winterization supplies: $15-25. Cost if you do not winterize and pipes burst: $ 1,000 – $3,000. Do the math.
If Pipes Already Froze
The damage is done, but you can minimize further problems. The water inside the pipes will thaw—the question is whether the pipes survived. Using a hair dryer or space heater, gently warm the frozen section from the outside. Never use a blowtorch or you risk melting plastic pipes.
Once thawed, check immediately for cracks or breaks. Listen for water dripping inside the walls or under the RV. If you hear dripping, you have a leak and need a professional assessment. If no dripping is heard, monitor for the next week before continuing your trip.
RV Plumbing Essential Tools: What to Keep in Your Rig
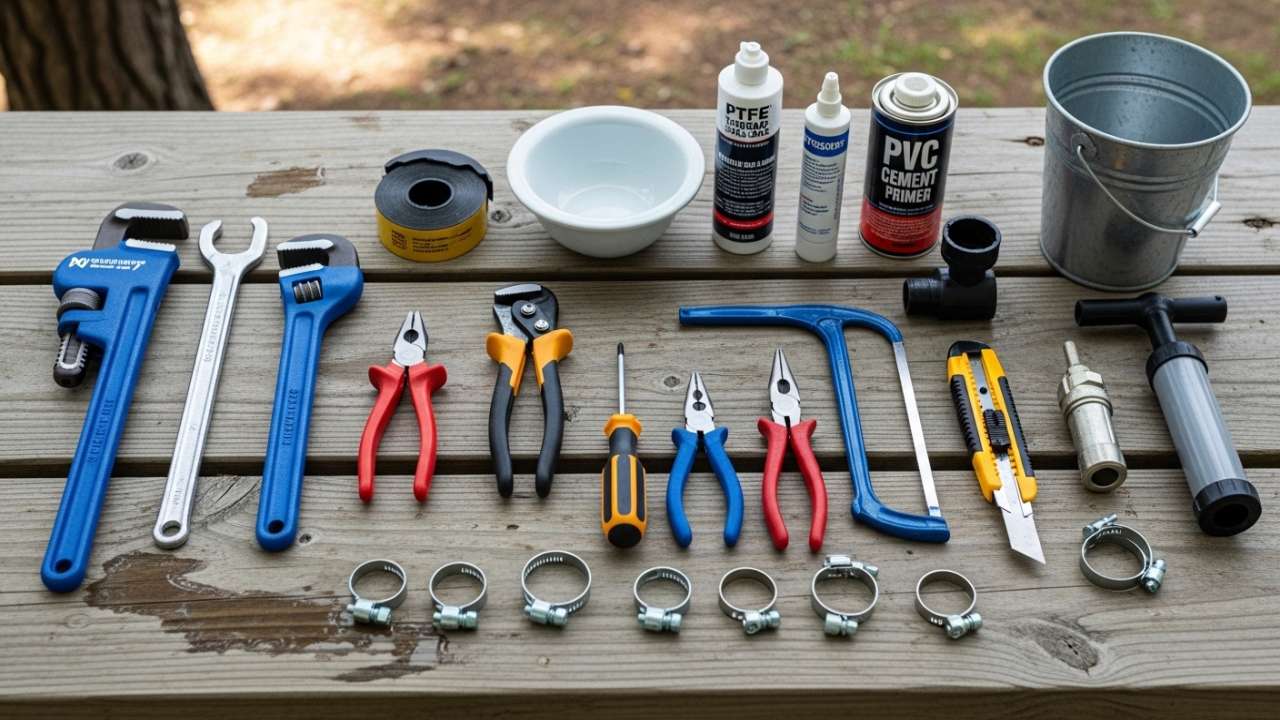
Do not wait until something breaks to wish you had the right tools. Keep these items in your RV:
| Tool/Supply | Purpose | Estimated Cost |
|---|---|---|
| Adjustable wrench (2-3 sizes) | Tighten/loosen fittings | $10-15 |
| PEX tubing cutter | Cut water lines cleanly without damage | $8-12 |
| SharkBite fittings assortment | Connect tubing without crimping | $20-30 |
| Plunger + drain snake combo | Clear clogs in any drain | $15-25 |
| Water pressure gauge | Diagnose pressure problems quickly | $10-15 |
Optional but worth having: RV-safe drain cleaner, hair strainers (2-3), replacement washers and O-rings assortment, Teflon tape, and enzyme tank treatment for your RV gray water tank maintenance. Total investment: under $100. This kit will save you hundreds in repair bills.
Questions RV Owners Ask About Plumbing Problems
Q1: What is the most common RV water system repair issue I will actually face?
Water leaks in pressurized lines. The vibration from travel loosens fittings, and small cracks develop in plastic tubing. Clogs come in second. Regular inspections catch both before they become disasters.
Q2: Can I use regular toilet paper in my RV toilet?
Technically, yes, but do not. Regular toilet paper dissolves slowly and clogs RV systems easily. RV-specific paper breaks down in 30 seconds versus several minutes for regular paper. The $5-10 cost difference per roll is worth the peace of mind.
Q3: How often should I dump my RV toilet problems-related holding tanks?
Dump blackwater when it is 3/4 full. Dump greywater when it is 3/4 full. Dumping when full removes all liquid and sediment together, which prevents clogs. Never dump a half-full blackwater tank because the waste will not flow properly into the dump station.
Q4: Is a water pressure regulator really necessary at every campground?
Yes. Campground water pressure varies wildly—some have 30 PSI (too low), others have 100+ PSI (too high). High pressure stresses your RV lines and fittings. A regulator costs $15-25 and prevents future leaks and damage. Use one every single time.
Q5: What is the difference between RV antifreeze and regular antifreeze?
Regular automotive antifreeze is toxic and can poison you if it contaminates your drinking water. RV antifreeze is non-toxic (propylene glycol-based) and safe for plumbing systems. Never use automotive antifreeze in your RV.
Q6: Can I fix a cracked freshwater tank myself?
Temporary patches work for tiny cracks, but tanks usually need professional repair or replacement. A cracked tank can contaminate your water and cause rapid water loss. If you suspect a tank is cracked, have it inspected by an RV technician.
Q7: Why does my RV smell like sewage even after dumping the black tank?
Odors come from bacteria in the blackwater tank. Fix it by: (1) adding enzyme-based tank treatment monthly, (2) ensuring vent pipes on your roof are not clogged, (3) keeping the tank at least 3/4 full so water covers waste, and (4) running plenty of water through the system. If odor persists, have a pro inspect the system for cracks.
Your Preventive Maintenance Checklist: Stay Ahead of Problems
Do these things before every trip and monthly while traveling:
- Inspect all visible pipes and fittings for cracks, discoloration, or moisture.
- Check under sinks and behind the toilet for any signs of dripping or water damage.
- Listen to your water pump for unusual noises.
- Test the water pressure at an exterior faucet with a pressure gauge.
- Look at your water filter—if it is visibly discolored or clogged, replace it.
- Dump holding tanks before they get completely full.
- Run the enzyme treatment through your black tank.
- Use a hair strainer in your shower drain.
When to Stop DIY and Call an RV Plumber
Some problems are beyond the DIY scope. Call a professional RV technician if:
- You have a major leak that you cannot locate or repair.
- The blackwater tank is completely clogged.
- Your water pump is not running or is making strange grinding noises.
- You suspect freeze damage to pipes or tanks.
- Water is pooling under your RV with no visible source.
- A faucet or fixture leaks from the base (seal failure).
- Your water heater is not producing hot water.
Finding an RV-specific technician matters. Regular plumbers often do not understand RV systems and can give you bad advice. Look for certified RV repair shops in your area—many travel along seasonal routes and you can call ahead to book service.
The Bottom Line: Your RV Plumbing Works Until It Does Not
RV plumbing is simpler than house plumbing, which means you have a real opportunity to prevent most problems from happening in the first place. A $25 investment in a pressure regulator prevents thousands in RV water leak detection issues and water damage. A $10 hair strainer stops 95% of RV shower drain clogs. An hour spent winterizing your system before winter saves you from disaster.
The problems outlined in this guide are not inevitable. They happen to people who ignore small warning signs and skip maintenance. You now know what to look for, how to diagnose issues, and exactly how to fix the most common problems yourself.
Your next step is simple: grab that flashlight, crawl under your RV right now, and look for any signs of moisture or damage. If you find something, you have caught it early, before it becomes expensive. If you do not find anything, you can hit the road with confidence knowing you are prepared.
About the Author
Saket Kumar Singh is an RV maintenance specialist and digital content creator based in India, writing for RV owners across the USA. With years of experience troubleshooting real-world RV problems, Saket focuses on practical, actionable solutions that prevent costly repairs and keep RVs road-ready. His approach combines industry knowledge with straightforward explanations that do not require a plumbing degree to understand.
Also Read:-
- How Much Power Does Your RV Use Daily? Easy Solar Sizing Calculation Guide
- Best RV Solar Panels for New Mexico Extreme Heat (2026 Desert Solar Guide)
- Albuquerque RV Solar Installation (2026): Top Shops, Cost Breakdown & DIY Setup Guide
- How Much Does It Cost to Convert an RV to Solar? The Real 2026 Pricing