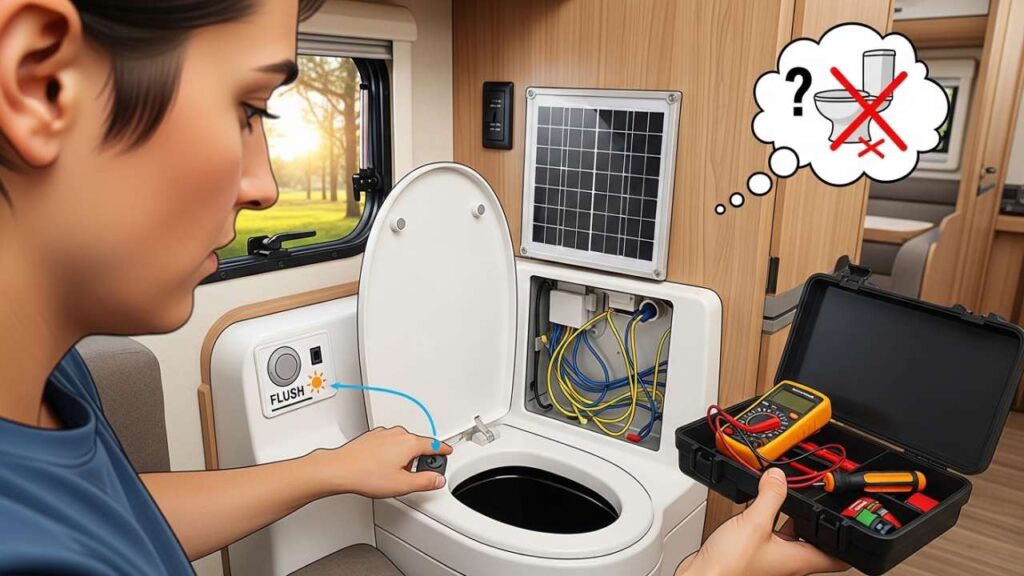
That Sinking Feeling When Your Solar RV Toilet Won’t Flush
Picture this: you’re parked at a gorgeous campsite in the Smoky Mountains, the morning coffee is brewing, and you head to the bathroom — only to find your Solar RV toilet staring back at you like a broken promise.
You press the pedal. Nothing. Or maybe water trickles in but refuses to drain. Your heart sinks faster than you’d like anything else to in that bowl.
Here’s the good news: in 90% of cases, a Solar RV toilet that won’t flush is something you can absolutely fix yourself — no plumber, no panic, no ruined camping trip.
Let’s walk through exactly what’s going wrong and how to fix it, step by step.
How a Solar RV Toilet Actually Works (A 60-Second Primer)
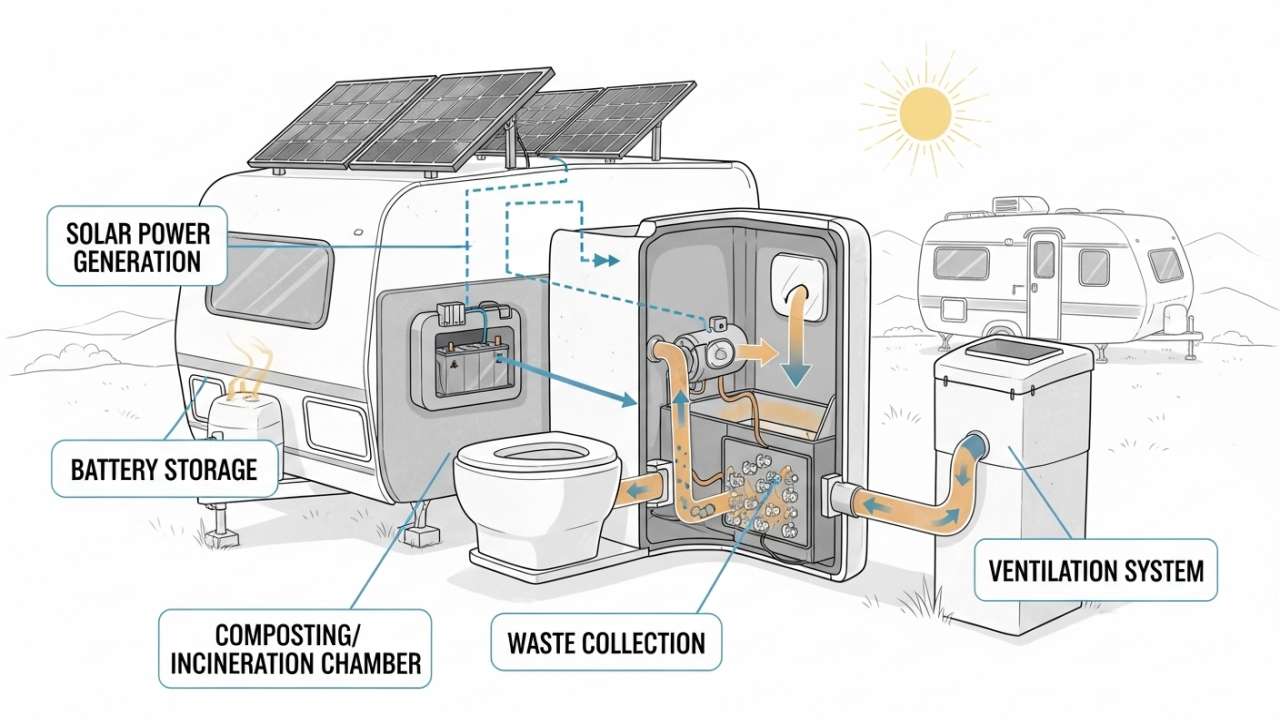
Unlike your home toilet, an RV toilet doesn’t use a gravity-fed tank of water sitting up top. Instead, it pulls from your fresh water supply — either through a city water hookup or your onboard 12V pump — and uses a foot pedal (or button) to control two functions:
- Partial press: adds water to the bowl
- Full press: opens the ball valve (also called the flush valve or slide valve) and sends everything into the black water holding tank
When something goes wrong with that system — the water supply, the valve, or the tank itself — your toilet stops flushing. Simple as that. And once you know which part failed, the fix is usually straightforward.
Also Read:- Best RV Solar Panels for New Mexico: Desert Climate Guide 2026
Quick Diagnosis: What’s Actually Wrong With Your RV Toilet?
Before you dive into any fix, you need to figure out which problem you’re actually dealing with. There are really only two scenarios:
- No water enters the bowl when you press the pedal → water supply or valve issue
- Water enters but won’t drain down → clog or mechanical failure
Ask yourself these three questions to narrow it down fast:
- Is your water pump on and your freshwater tank filled (or are you on city hookup)?
- Is your black tank full or almost full?
- Can you see the bottom of the bowl opening at all, or is it blocked?
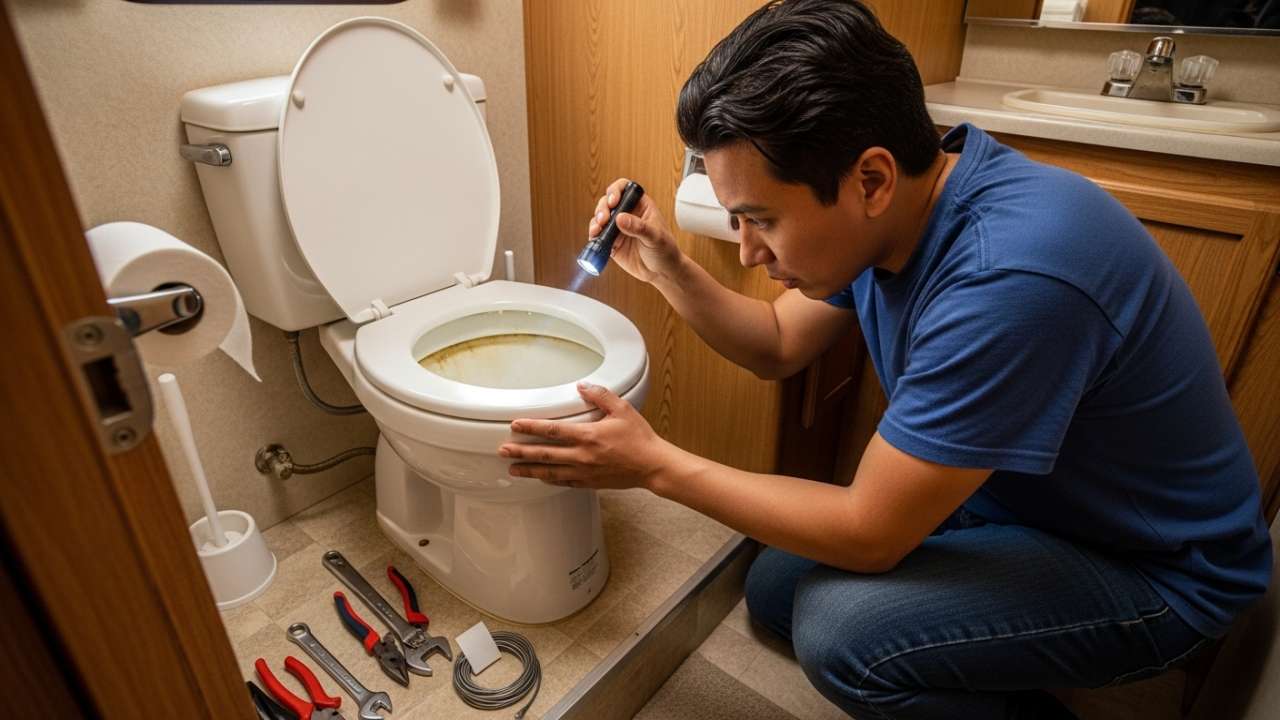
The 5 Most Common Causes — And How to Fix Each One
Fix #1: Check Your Water Supply First (The Easiest Win)
This sounds too simple, but you’d be surprised how often it’s the culprit. If no water is entering the bowl at all, your RV toilet literally cannot flush.
- Is your water pump switched on? Find the pump switch on your control panel — it’s often labeled — and flip it on. Listen for the pump to cycle and pressurize.
- Is your freshwater tank empty or nearly empty? Check your tank monitor panel. Even a low tank can drop water pressure enough to prevent flushing.
- Are you on city water hookup? Make sure the city water inlet is properly connected and the hose has no kinks.
- Is the water shut-off valve near the toilet open? Some RVs have a small shutoff right at the toilet’s supply line. Make sure it’s fully open.
If water suddenly starts entering the bowl after checking these — congratulations, you just fixed it. If not, move on.
Also Read:- What Is a Solar Charge Controller and Why Does Your RV Need One?
Fix #2: Unclog a Blocked Toilet Pipe (The Pyramid Plug Problem)
This is the most common and most dreaded cause of a non-flushing RV toilet: a blockage in the pipe leading to the black tank.
The number-one culprit? What RVers call a “poop pyramid.” It happens when RVers leave their black tank valve open while connected to full hookups. The liquids drain away, but the solids pile up — literally — into a cone-shaped obstruction directly under the toilet opening.
Other causes include using regular household toilet paper (which doesn’t break down fast enough), flushing wipes (never, ever do this), or simply not using enough water when flushing.
How to Break Up an RV Toilet Clog
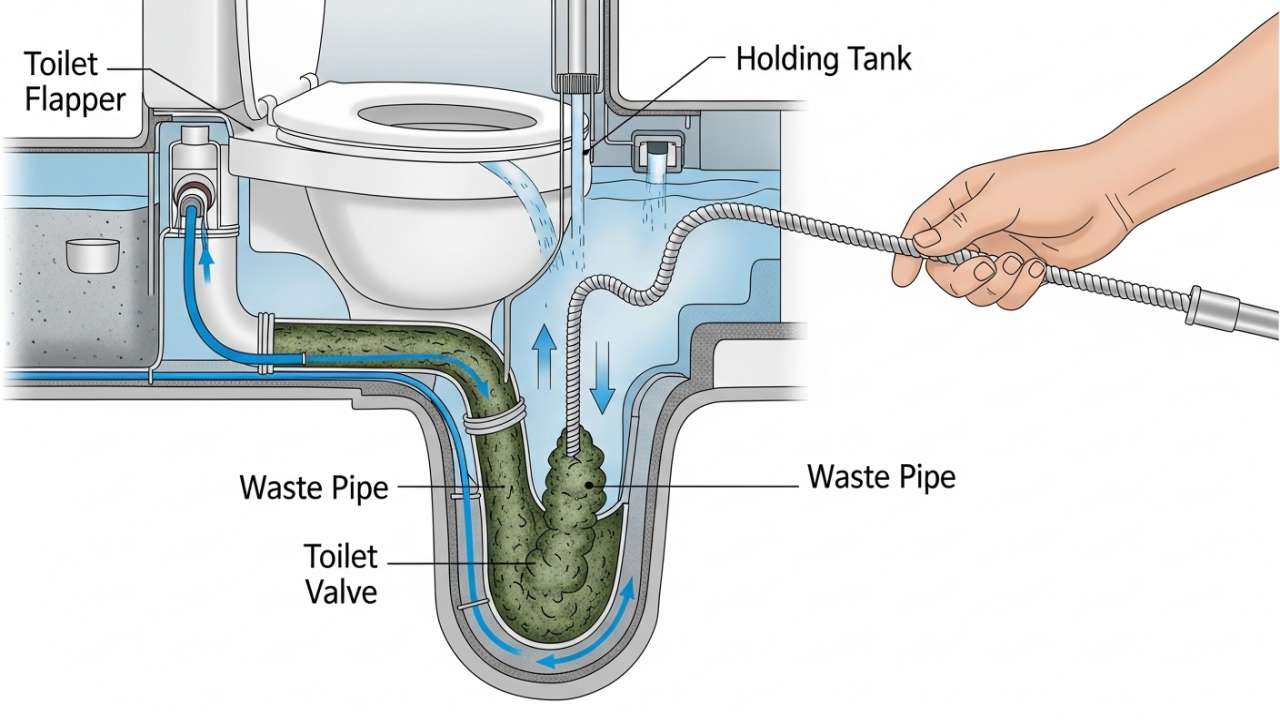
- Turn off your freshwater supply to avoid spilling.
- Close your black tank valve on the outside of the RV.
- Pour one full bottle of RV black tank clearing fluid (like Unique Clear-It or Aqua-Kem) directly into the toilet bowl.
- Hold the flush pedal down completely so the fluid goes through.
- If the clog is near the toilet, use a 3–5 foot section of 1/2″ PEX pipe (flexible, won’t damage your toilet) to gently poke holes through the blockage.
- Let the fluid sit for 24–48 hours for stubborn clogs.
- Try flushing again — if slow but moving, flush 3–6 more times.
- When it clears, flush thoroughly and then rinse your tank with a tank wand or built-in flush system.
- Pro tip from real RVers: After clearing, always add at least 5 gallons of water back to the empty black tank before your next use. A dry tank is how you get another pyramid fast.
Fix #3: Free Up a Stuck or Seized Flush Valve
Sometimes the problem isn’t a clog at all — it’s the ball valve (the flap that opens the toilet to the black tank) that’s stuck closed or broken.
Here’s how to tell: press the foot pedal all the way down. Does it feel stiff, like pressing against a wall? Or does it move freely but the valve doesn’t open? Both indicate a valve problem.
If the valve feels seized:
- The most common fix is adding holding tank cleaner (Aqua-Kem works well here) directly to the bowl and letting it sit. The enzymes can dissolve mineral buildup that’s locked the valve shut.
- You can also try manually working the pedal slowly, back and forth, to loosen a sticky valve — carefully, and with gloves on.
If the pedal moves freely but nothing opens:
- The actuating mechanism — the physical connection between the pedal and the valve — may be broken.
- This is a mechanical fix that usually means replacing the toilet’s valve assembly. Dometic and Thetford both sell replacement kits that screw in without removing the entire toilet.
Also Read:- Sioux Falls RV Solar Panels 2026 – How to Install, Maintain & Save Money
Fix #4: Your Black Tank Is Full (Check Before You Flush)
A completely full black tank physically cannot accept more waste — and your toilet will act like it’s clogged because, in a way, it is.
Your tank monitor panel should tell you the fill level, but take those readings with a grain of salt. Sensors are notoriously inaccurate when waste coats the sensor probes.
What to do:
- Head to a dump station and empty your black tank completely.
- After dumping, use your tank rinse system (or a flush wand through the toilet) to spray clean water inside and get an accurate read.
- Don’t rely on your monitor panel alone — if you’ve been camping for more than a few days without dumping, assume it’s getting full.
According to the RV Industry Association, improper tank maintenance is one of the leading causes of preventable RV plumbing repairs in the U.S. Keeping up with regular dumps — at least every 3–4 days during active use — saves a lot of grief. (Source: rvia.org)
Fix #5: Inspect and Replace the Toilet Seal (The Overlooked Fix)
The rubber seal inside your RV toilet (also called the blade seal or toilet bowl seal) does double duty: it keeps water in the bowl between flushes AND creates a watertight closure to the black tank. When it dries out, cracks, or hardens, the toilet can behave erratically — draining too slowly, not sealing, or letting odors through.
This is especially common in RVs that have sat unused for months, or in dry climates where seals tend to dry out faster.
How to diagnose it:
- After flushing, does your bowl slowly drain on its own? That’s a failing seal.
- Can you smell sewer gas even with the toilet closed? Failing seal.
- Is the rubber visibly cracked, stiff, or flattened? Definitely replace it.
The fix:
- Apply RV toilet seal lubricant (Dometic 310 Toilet Seal Lubricant is a popular choice) to a soft cloth and coat the seal. This alone can restore a dried-out seal to working condition.
- If it’s cracked or damaged, replacement seals are available for most Dometic and Thetford models for around $10–$25 at Camping World, Amazon, or your local RV dealer. Most snap in without tools.
RV Toilet Problem Diagnosis
| Symptom | Most Likely Cause | DIY Fix | Difficulty |
|---|---|---|---|
| No water enters the bowl | Water pump off / no water pressure | Check pump + water supply | Easy |
| Water enters, won’t drain | Clog/pyramid plug | Tank clearing fluid + PEX pipe method | Medium |
| Pedal feels rock-solid | Seized flush valve | Tank cleaner soak + valve lubricant | Medium |
| Pedal moves freely, nothing opens | Broken actuating mechanism | Replace the valve assembly | Medium |
| Tank full indicator (or suspected) | Full black tank | Dump at the station, then rinse the tank | Easy |
| The toilet drains slowly between uses | Worn or dry rubber seal | Seal lubricant or seal replacement | Easy |
| Sewer smell even when closed | Cracked or failing seal | Replace toilet seal | Easy |
Not All Toilet Paper Is RV-Safe: What You Need to Know
One of the most preventable causes of RV toilet clogs is regular household toilet paper. It’s thicker, takes longer to break down, and can cause exactly the kind of pyramid plug described above.
| Toilet Paper Type | Breakdown Speed | RV Safe? | Best For |
|---|---|---|---|
| RV-specific TP (Camco, Thetford) | Very fast (1–2 min) | Yes | Worry-free RVing |
| Scott 1000 / Septic-safe single-ply | Fast (2–5 min) | Yes (tested) | Budget-conscious RVers |
| Standard 2-ply household TP | Slow (20+ min) | No | Home use only |
| “Flushable” wipes | Very slow / never | NEVER | Trash can only |
| Bamboo TP (most brands) | Moderate (5–10 min) | Check label | Eco-conscious RVers |
Quick test: Drop a few sheets in a cup of water and give it a gentle stir. RV-safe paper should dissolve in under 5 minutes.
How to Prevent a Clogged RV Toilet — For Good
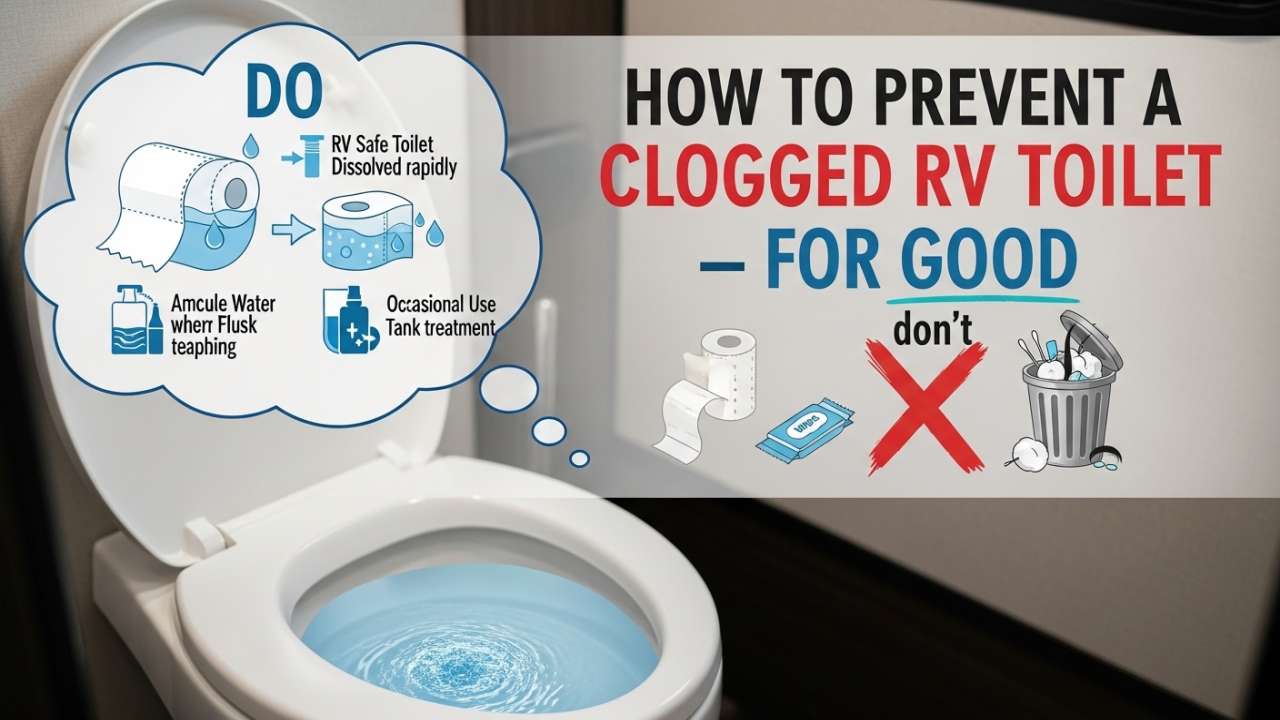
The best RV toilet fix is the one you never have to do. Here’s what full-time RVers swear by to keep their systems running clean:
- Always pre-fill the bowl with at least 1/4 of water before solid waste. It helps paper break down before you flush.
- Use plenty of water when flushing — really hold that pedal down for a full 3–5 seconds.
- Never leave your black tank valve open at full hookup sites. Always close it and dump when the tank is 2/3 full.
- Add 5 gallons of water and a black tank treatment enzyme after every dump. Keeping the tank moist prevents buildup.
- Use only RV-safe toilet paper — or test yours first.
- Never flush wipes, feminine products, paper towels, or anything that isn’t TP.
- Lubricate your toilet seal every 3–6 months to extend its life.
Also Read:- How to Clean Solar RV Black Tank: Step-by-Step Guide & Pro Tips
People Also Ask: Common RV Toilet Questions Answered
How do I flush an RV toilet with no foot pedal?
Some older or budget RV toilets have a hand lever instead of a foot pedal — the mechanism is the same. If the lever is missing or broken, you can manually pour water into the bowl using a bucket, then manually open the flush valve with a long rod or the replacement lever. Replacement levers are available for most brands for under $30.
Can I use boiling water to unclog an RV toilet?
Yes — carefully. Pouring hot (not boiling) water directly into the toilet bowl can help soften and break up a fresh clog or pyramid plug. Let it sit for 10–15 minutes before flushing. Boiling water can theoretically damage certain plastic components in older RV toilets, so aim for very hot tap water rather than a rolling boil.
What is RV toilet seal lubricant and do I really need it?
Yes, you really do. RV toilet seal lubricant is a water-based, petroleum-free conditioner (like Dometic 310 Lube) that keeps the rubber blade seal soft and pliable. Without it, the seal dries and cracks — causing slow draining, odor leaks, and eventually full seal failure. A $5 bottle applied every 3 months is far cheaper than a $25+ seal replacement.
How do I know if I need a Dometic RV toilet seal replacement?
Watch for these signs: the bowl drains slowly on its own between uses, you can smell sewer gas when the toilet is closed, or you can visibly see the rubber seal is cracked, stiff, or torn. Dometic seals (and those for Thetford models) are model-specific, so check your toilet’s model number before ordering.
What are the most common RV toilet problems overall?
Beyond not flushing, the most common RV toilet problems American RVers deal with include: persistent sewer odors (usually a seal issue), inaccurate tank sensors (caused by waste buildup on sensor probes), phantom draining (bad seal), water constantly running into the bowl (faulty water valve), and cracked toilet bases (from overtightening during installation or road stress).
FAQ: RV Toilet Not Flushing
Q: My RV toilet makes no sound at all when I press the pedal. What’s wrong?
A: Complete silence usually means there’s no water pressure reaching the toilet. Check that your water pump is on, your freshwater tank isn’t empty, and the supply line valve near the toilet is open. If you’re on city water, check the hose connection.
Q: The pedal goes down but nothing flushes — water enters but won’t drain.
A: This is almost certainly a clog between the toilet and the black tank, or a completely full black tank. Start with the tank — dump it first. If it’s not full, pour RV tank clearing fluid through the toilet and let it sit overnight before trying again.
Q: How long should I let tank clearing fluid sit on a stubborn clog?
A: For a serious pyramid plug or compacted clog, give it 24–48 hours. The enzymes need time to break down solid waste. Adding hot water first helps the process along.
Q: Is it safe to use a regular plunger on an RV toilet?
A: A soft-cup plunger can be used carefully, but avoid a flange plunger or aggressive plunging that could damage the ball valve seal. For most RV clogs, tank clearing fluid and a section of PEX pipe are safer and more effective.
Q: Can a clogged RV toilet damage my black tank permanently?
A: A clog itself won’t damage the tank, but leaving waste sitting for extended periods can corrode seals, damage tank sensors, and cause persistent odor problems. Address clogs as soon as you notice them.
Q: When should I call a professional RV tech?
A: If you’ve tried all five fixes and the toilet still won’t flush, or if you suspect the ball valve actuating mechanism is physically broken inside the toilet body, it may be time for a professional. Many mobile RV technicians can handle toilet valve replacements on-site at your campground.
Q: How much does it cost to fix an RV toilet that won’t flush?
A: DIY costs range from $0 (if it’s just your water pump being off) to $25–$50 for seal replacement or tank clearing fluid. A professional valve repair typically runs $75–$200 in labor. Full toilet replacement can be $300–$700+ depending on the model.
The Bottom Line
An RV toilet that won’t flush is almost never a catastrophe — it just feels like one at 7 a.m. in the middle of nowhere.
Nine times out of ten, the fix comes down to one of five things: water pressure, a clog, a stuck valve, a full tank, or a worn seal. Work through these in order, give each fix the time it needs, and you’ll almost certainly solve the problem without spending a dime on a service call.
And once you’re back in business? Stick to the prevention habits — plenty of water, the right toilet paper, regular tank maintenance — and you’ll likely never deal with this particular camping nightmare again.