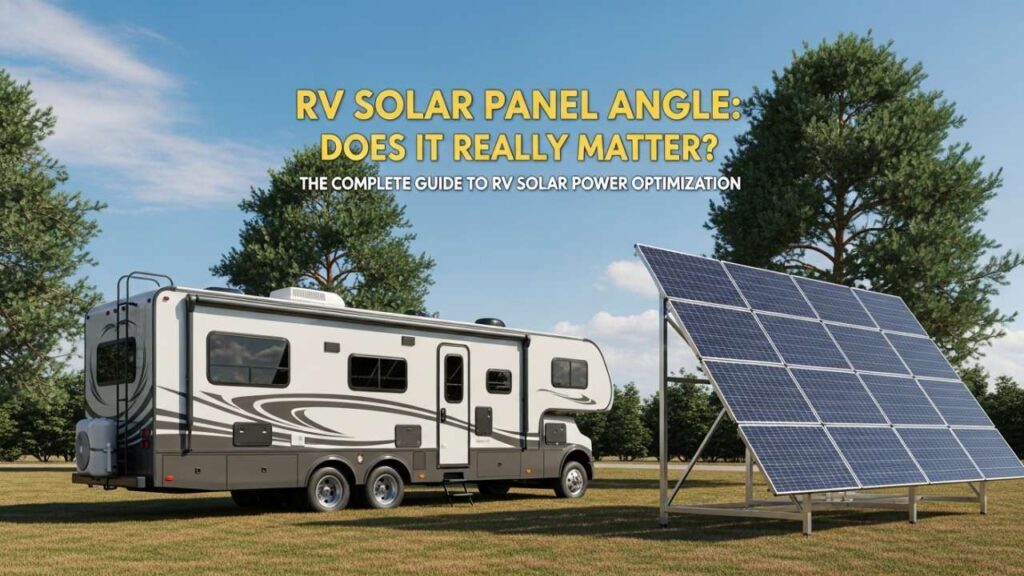
The Question Every RV Owner Asks About Solar Panel Angles
You’re standing at your favorite boondocking spot in Arizona. The desert sun is beating down on your RV roof. Your solar panels are lying flat. Your battery bank is at 65%. And you’re wondering: Should I climb up there and adjust the RV solar panel angle?
This isn’t just about mechanics. It’s about deciding whether the effort—climbing on your roof, adjusting equipment in the wind, remembering to lower everything before driving—is actually worth the power gain you’ll get.
Here’s the uncomfortable truth: Most articles about RV solar panel angles don’t answer this question honestly.
They tell you HOW to adjust your solar panel angle. They show you the formulas for optimal RV solar panel angle by season. They explain the science of solar panel angle and efficiency.
But they don’t tell you whether YOU should actually do it based on your specific RV lifestyle.
Let’s change that.
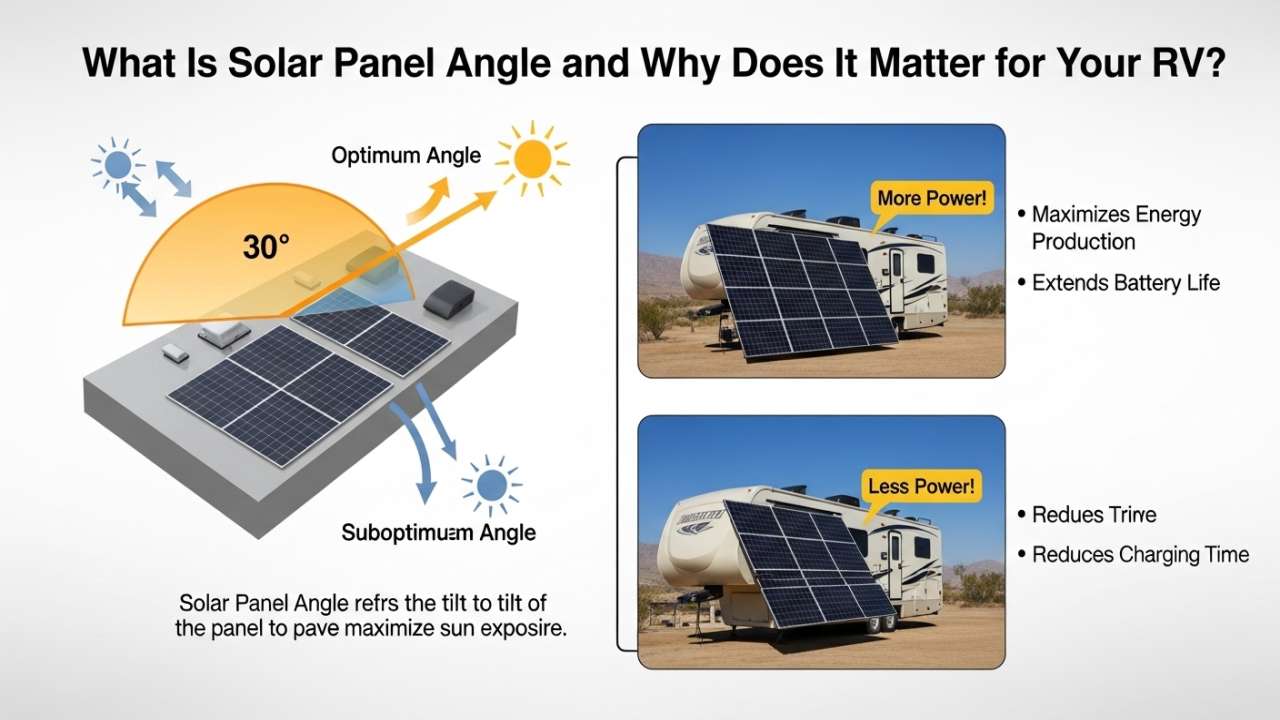
What Is Solar Panel Angle and Why Does It Matter for Your RV?
Before we dive into whether adjusting your RV solar panel angle is worth it, let’s get clear on what we’re actually talking about.
Solar panel angle (also called tilt angle or inclination angle) is the measurement—in degrees—between your solar panel surface and a completely flat, horizontal position.
When your solar panels are lying completely flat on your RV roof, the angle is 0 degrees.
When you tilt them up toward the south (assuming you’re in the Northern Hemisphere), you’re increasing the angle—maybe to 20 degrees, 30 degrees, or even 45 degrees depending on the season and location.
Why Solar Panel Angle Affects RV Solar Power Output
Here’s the physics, explained without making your eyes glaze over:
Imagine you’re trying to catch water from a fire hose. If you stand directly in front of the hose and hold a bucket perpendicular to the spray, you catch maximum water. If you turn sideways, the same amount of water is hitting your bucket, but at an angle—so less actually goes into the bucket.
Solar panels work the exact same way.
When sunlight hits your RV solar panels at a perpendicular angle (90 degrees), the panels convert the maximum amount of that sunlight into electricity. When the sun is shining at an angle relative to your panels, they’re less efficient.
The sun’s position in the sky changes constantly:
- Throughout the day – The sun moves from east to west
- Throughout the year – The sun is lower in the sky in winter, higher in summer
- Based on latitude – If you’re camping far north, the sun never gets very high; far south, it gets higher
So the question becomes: Does adjusting your RV solar panel angle throughout the year give you enough extra power to justify the effort?
That’s what we’re going to answer, based on real data from full-time RVers.
Real-World RV Solar Panel Angle Testing: The Numbers That Matter
Let me share the most important field test for understanding whether RV solar panel angle adjustment is worth it.
A full-time RV couple (Gone With The Wynns) installed a tilting system on their RV solar panels and tested the results in Joshua Tree, California during January. They carefully measured the power output with their solar panels lying flat versus tilted.
Here’s what they found:
The Test Results
Location: Joshua Tree BLM South, California (Latitude: 33.67°N) Date: January 11-24, 2016 Panel Direction: Facing true south Conditions: Clear desert weather, optimal sun conditions
Flat RV Solar Panels (No Tilt)
- Maximum power reading: 37 amps
- Average per panel: 6.17 amps
- Daily energy production: Consistent baseline
Tilted RV Solar Panels (Optimized Angle)
- Maximum power reading: 57 amps
- Average per panel: 9.5 amps
- Daily energy production: Significantly higher
The Real Impact of Solar Panel Angle Adjustment
The difference: 20 additional amps at peak production
Let that sink in. By simply adjusting the RV solar panel angle to match the sun’s position in January, they gained 20 amps of continuous power output.
To achieve that same 20-amp increase WITHOUT tilting, they would need to install 3 additional solar panels on their RV roof.
That’s a dramatic difference. But—and this is important—this test was done in ideal conditions: clear skies, stationary position for 2 weeks, and specific attention to optimizing the angle.
Your real-world results might be different depending on:
- How long you stay in one location
- What season you camp during
- Your RV’s latitude location
- How well you optimize your solar panel angle
- Weather conditions at your RV campsite
- Your RV’s specific solar panel setup
How Solar Panel Angle Changes Throughout the Year
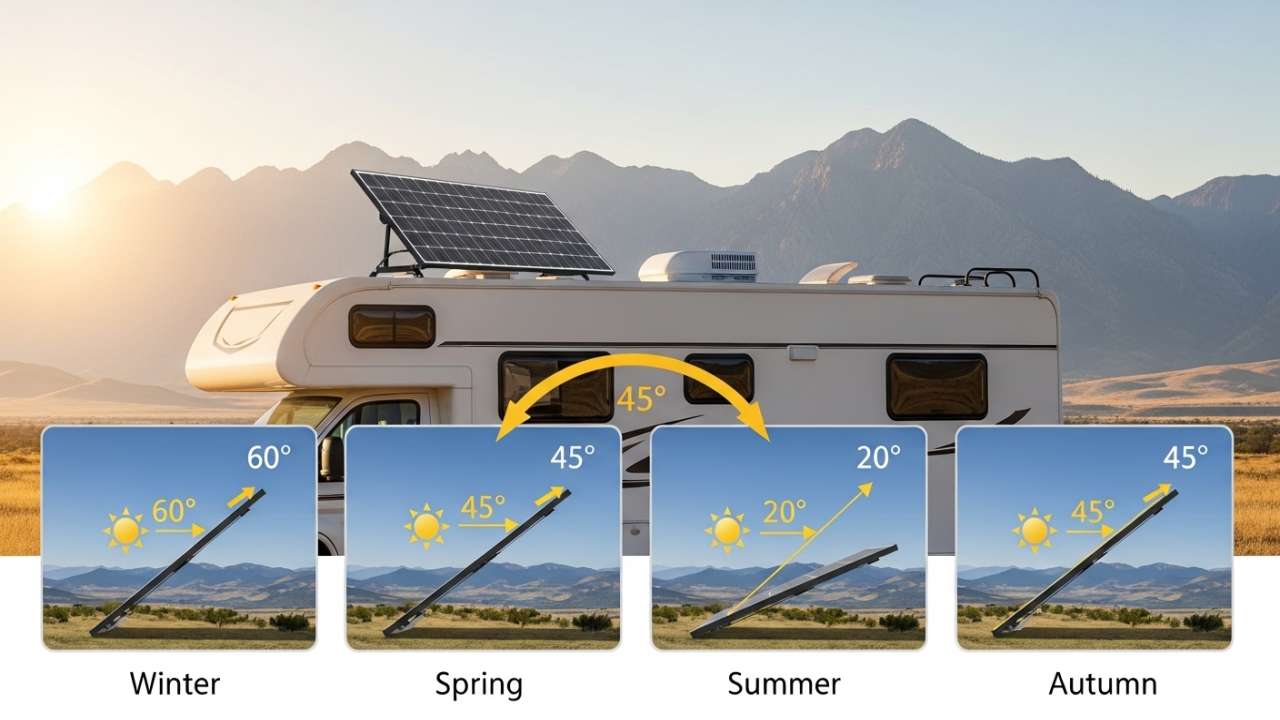
Winter: The Sweet Spot for Solar Panel Angle Adjustment
In winter months (December, January, February), the sun hangs low in the southern sky—especially if your RV is in the northern latitudes.
This is when adjusting your RV solar panel angle makes the biggest difference.
With the sun at a low angle, flat-mounted panels (0 degrees) are pointing too far away from the sun. By tilting your panels upward toward the south by 25-35 degrees, you aim them more directly at the sun’s path.
The result: 35-50% more power output compared to flat panels in winter. This is the number that gets people excited about solar panel angle adjustment.
Summer: Why You Should Leave Your Panels Flat
Come summer (June, July, August), the sun climbs high into the sky—especially in the southern United States where many RVers camp.
Now the situation reverses. Flat panels are actually pretty close to optimal. If you keep your winter tilt angle (say, 30 degrees) into summer, your panels are now tilting AWAY from the sun.
The result: Tilted panels perform only 5-10% better than flat panels in summer. And when the sun beats down at high angles, the flat position is often actually better because:
- Panels run cooler (better efficiency)
- Less wind resistance
- Easier to access
- You don’t have to remember to lower them before driving
Spring and Fall: The Transition Zones
In spring and fall, the sun is at medium angles—not as low as winter, not as high as summer. Tilting your RV solar panel angle in these seasons gets you a modest 15-20% improvement, but many RVers skip spring/fall adjustments and just use winter and summer positions.
Also Read:- Best RV Water Heater for the Money in 2026: Tested Models, Real Talk & the One That Actually Wins
The Complete Solar Panel Angle Table by Season and Location
Here’s how solar panel angle requirements change based on when and where your RV is parked:
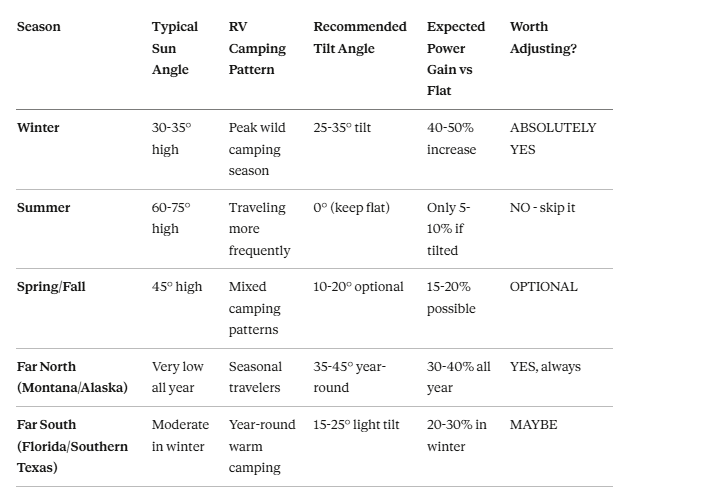
Key Insight About RV Solar Panel Angle
The further south you camp in winter, the less dramatic the angle effect becomes (because the sun is already fairly high).
The further north you camp, the more dramatic the angle effect (because the sun is very low).
This is why an RVer in Quartzsite, Arizona will see a 35-40% gain from adjusting their solar panel angle, while an RVer in San Diego, California might only see a 15-20% gain with the same adjustment.
Calculate Your Optimal RV Solar Panel Angle in 60 Seconds
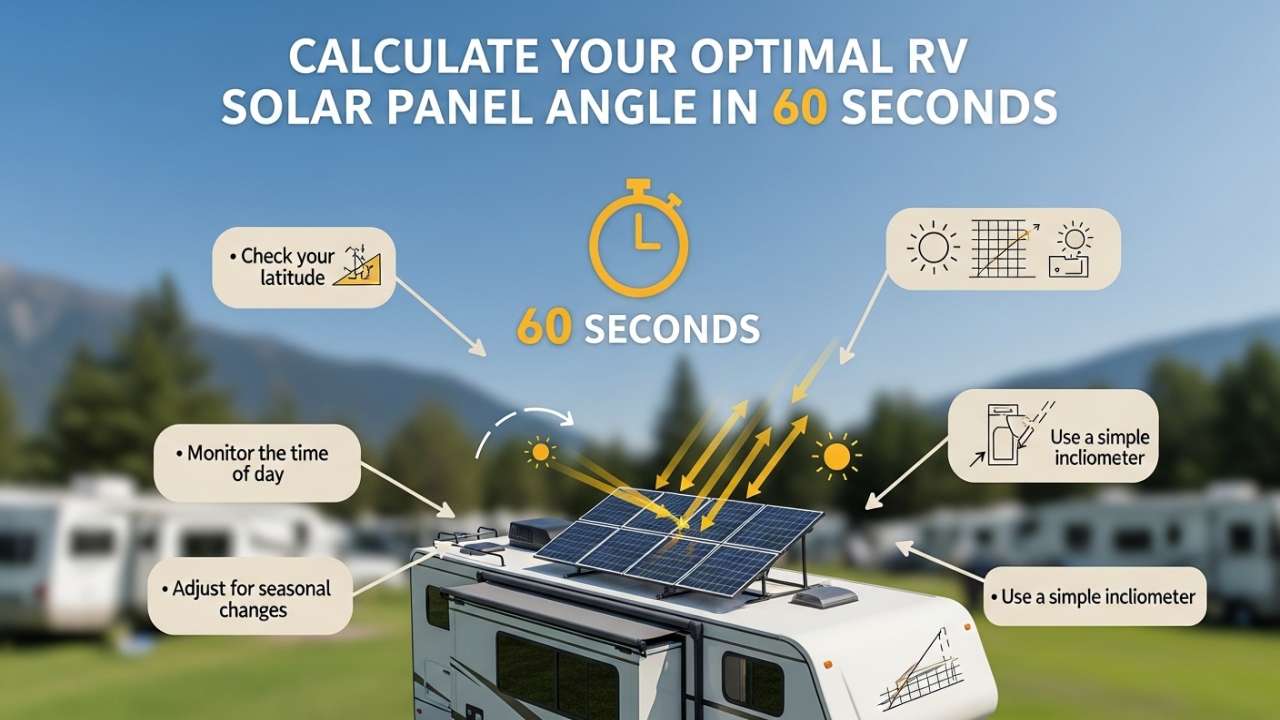
You don’t need to be a solar engineer. Here’s the simple formula used by actual solar installers:
Step 1: Find Your RV’s Latitude
Google your current camping location and note the latitude degree. Not sure? Here are common RV spots:
- Quartzsite, Arizona: 34°N
- Yuma, Arizona: 32°N
- Las Vegas, Nevada: 36°N
- Phoenix, Arizona: 33°N
- Blythe, California: 34°N
- Indio, California: 34°N
- San Diego, California: 33°N
Step 2: Apply This Simple Winter Formula
Optimal RV Solar Panel Angle for Winter = Your Latitude × 0.89
Example for Quartzsite, Arizona (34°N latitude):
- 34 × 0.89 = 30.26 degrees
- Round to 30 degrees
- Tilt your panels 30 degrees from horizontal in winter
Example for Las Vegas, Nevada (36°N latitude):
- 36 × 0.89 = 32.04 degrees
- Round to 32 degrees
- Tilt your panels 32 degrees from horizontal in winter
Example for Yuma, Arizona (32°N latitude):
- 32 × 0.89 = 28.48 degrees
- Round to 28 degrees
- Tilt your panels 28 degrees from horizontal in winter
Step 3: Summer Is Easy—Keep Panels Flat (0 degrees)
In summer, don’t tilt. Leave your solar panel angle at 0 degrees (completely horizontal). The high sun angle makes this optimal for most RV locations.
Advanced Formula (Optional)
If you want to get fancy with seasonal adjustments:
For Winter RV Solar Panel Angle:
(Your Latitude × 0.875) + 19.2 = Winter Tilt Angle
For Summer RV Solar Panel Angle:
(Your Latitude × 0.93) - 21 = Summer Tilt Angle
But honestly? The simple formula works for 95% of RVers and gives you 95% of the benefit. The advanced formula adds complexity without much real-world advantage.
Pro Tip: Account for Your Roof’s Existing Pitch
Some RVs have pitched roofs (sloped). If your roof already has a 15-degree slope, and your optimal winter solar panel angle is 30 degrees, you only need to add an additional 15 degrees of tilt using your tilting system.
Always check your RV’s roof angle before calculating your solar panel angle adjustment.
Real Solar Panel Angle Testing Across Different RV Locations
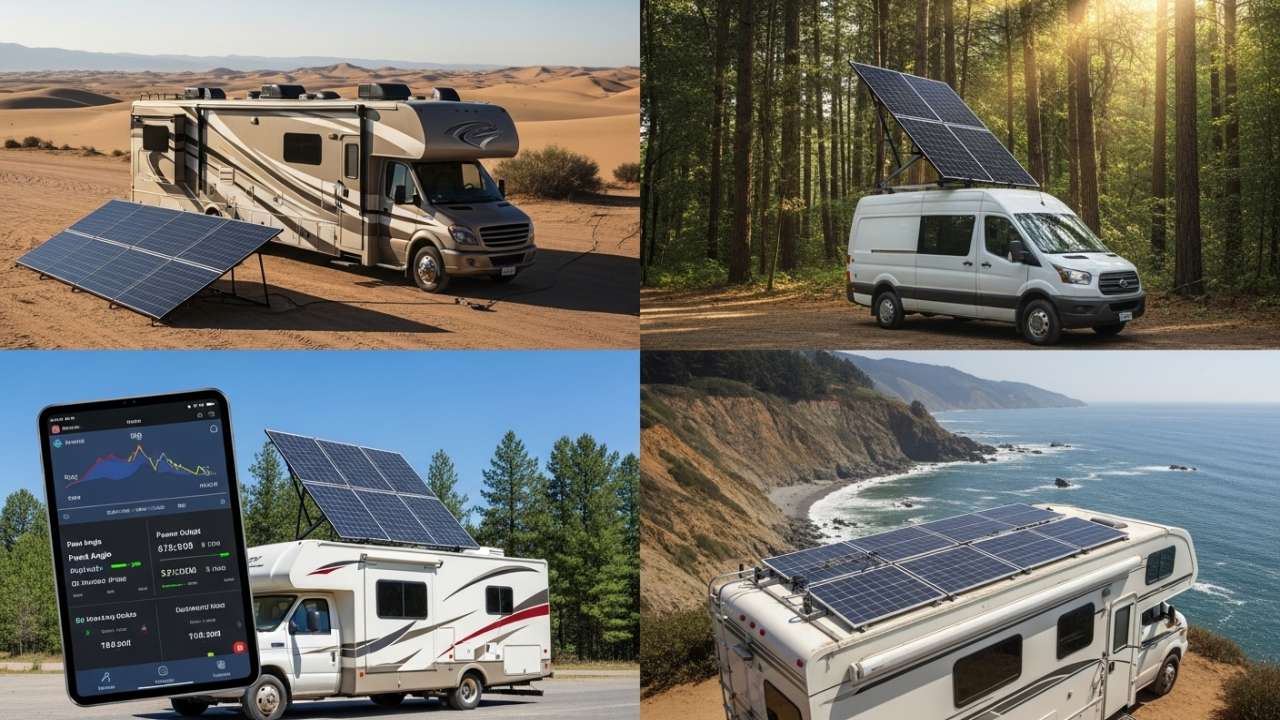
Here’s what actually happens when RVers adjust their solar panel angle in different parts of the country:
Quartzsite, Arizona (34°N) – Most Popular RV Boondocking Spot
Winter Solar Panel Angle: 30° Winter Power Gain: 35-40% more power vs. flat Summer Solar Panel Angle: 0° (keep flat) Summer Power Gain: 5-10% if you keep winter angle RVer Report: “Game changer for winter camping. Massive power increase. Worth the effort.”
Yuma, Arizona (32°N) – Southernmost Popular RV Location
Winter Solar Panel Angle: 28° Winter Power Gain: 38-45% more power vs. flat (highest in popular RV areas) Summer Solar Panel Angle: 0° (keep flat) Summer Power Gain: Less than 5% if you keep winter angle RVer Report: “Best winter boondocking improvement I’ve made. Battery charges much faster.”
Las Vegas, Nevada (36°N) – Good Middle-Ground Location
Winter Solar Panel Angle: 32° Winter Power Gain: 32-38% more power vs. flat Summer Solar Panel Angle: 0° (keep flat) Summer Power Gain: Negligible if you keep winter angle RVer Report: “Noticeable difference in winter. Makes winter boondocking viable for us.”
Phoenix, Arizona (33°N) – Urban RV Parking
Winter Solar Panel Angle: 29° Winter Power Gain: 37-42% more power vs. flat Summer Solar Panel Angle: 0° (keep flat) Summer Power Gain: 5-8% if you keep winter angle RVer Report: “Helps us boondock longer without generator. Worth the 10 minutes to adjust.”
San Diego, California (33°N) – Mild Winter Location
Winter Solar Panel Angle: 29° Winter Power Gain: 20-25% more power vs. flat (lower than Arizona because sun is higher) Summer Solar Panel Angle: 0° (keep flat) Summer Power Gain: 5% if you keep winter angle RVer Report: “Helps in winter, but not dramatic. Less dramatic than Arizona.”
Bisbee, Arizona (32°N) – High Altitude Boondocking
Winter Solar Panel Angle: 28° Winter Power Gain: 40-45% more power vs. flat (highest due to high altitude and clear skies) Summer Solar Panel Angle: 0° (keep flat) Summer Power Gain: Minimal if you keep winter angle RVer Report: “Altitude plus angle = incredible winter power. Best spot in Arizona for solar.”
The Real Trade-Offs: Why Solar Panel Angle Adjustment Isn’t Automatic
Okay, so adjusting your RV solar panel angle can give you 30-45% more winter power. That sounds amazing, right?
Here’s what nobody tells you upfront: the costs and risks of adjusting your solar panel angle.
The Safety Risk of Roof Climbing
You’re climbing a ladder in the morning. Your RV is parked on uneven BLM land. The roof is slippery from dew. You’re holding metal arms and trying not to drop bolts.
One slip means a fall. In a remote location 100+ miles from medical care, even a minor ankle fracture becomes a major emergency.
This is the real risk people don’t discuss. Solar panel angle adjustment requires you to be on your roof. And roofs are dangerous, especially on unfamiliar terrain.
Wind and Weather Complications
You set up at a beautiful boondocking spot. The weather forecast looked clear. You adjust your solar panel angle to optimize for winter. Three days later, a wind event rolls in.
Now you’ve got 25-30 mph gusts hitting your tilted panels. The wind resistance is much higher on tilted panels versus flat panels. You’re watching your panels flex with each gust. You’re worried they’ll rip off your roof.
You have to get up there and lower them during windy conditions—an additional safety risk.
One full-time RVer group watched helplessly as wind ripped their tilted panels completely off their RV roof. Insurance claim, emergency repairs, and weeks without full solar power.
The Memory Game Before Driving
You’ve been parked for 10 days, adjusting your solar panel angle daily, optimizing everything.
You’re packed up. Your RV is hitched. You’re ready to drive to the next location.
Have you lowered the panels?
The adrenaline of packing up, the rushing to meet friends at the next location, the stress of towing—you could easily forget.
One RVer drove down the highway for 30 minutes before realizing their tilted panels were still up. Wind was catching them like a sail. The mounting system was failing. They watched in the mirror as their panels ripped partially off their roof.
That’s a several-thousand-dollar mistake that happens because you forgot one step in the rush of traveling.
Physical Effort and Ongoing Maintenance
Each time you adjust your RV solar panel angle, you’re:
- Climbing a ladder (possibly twice—once to tilt, once to lower)
- Wrestling with bolts and wing nuts
- Exposing new bolt connections to weather and potential corrosion
- Creating wear on mounting brackets
- Adding stress to your roof sealant
Over 5 years of seasonal adjustments, this adds up. You might eventually face roof leaks from repeated penetrations or bracket failures from metal fatigue.
The Roof Space and Mounting Limitations
Some RVs don’t have room for tilting systems. Some have curved roofs that make tilting nearly impossible. Some have roof-mounted AC units or vents that interfere with tilting.
Before getting excited about solar panel angle optimization, you need to verify your specific RV’s limitations.
Theft Risk (Real, But Rare)
If you extend your RV boondocking to remote locations where you leave your RV unattended for days, tilted solar panels are more visible and more accessible to potential thieves than flat-mounted panels.
It’s rare, but it happens. One RVer returned from hiking to find their tilted panels had been stolen from their parked RV.
Flat panels, mounted flush to the roof, are harder to access and less appealing to thieves.
Also Read:- How to Charge RV Battery with Solar: Best Solar Chargers, Panels & RV Solar Power Systems
Who Should ACTUALLY Adjust Their RV Solar Panel Angle (Be Honest)
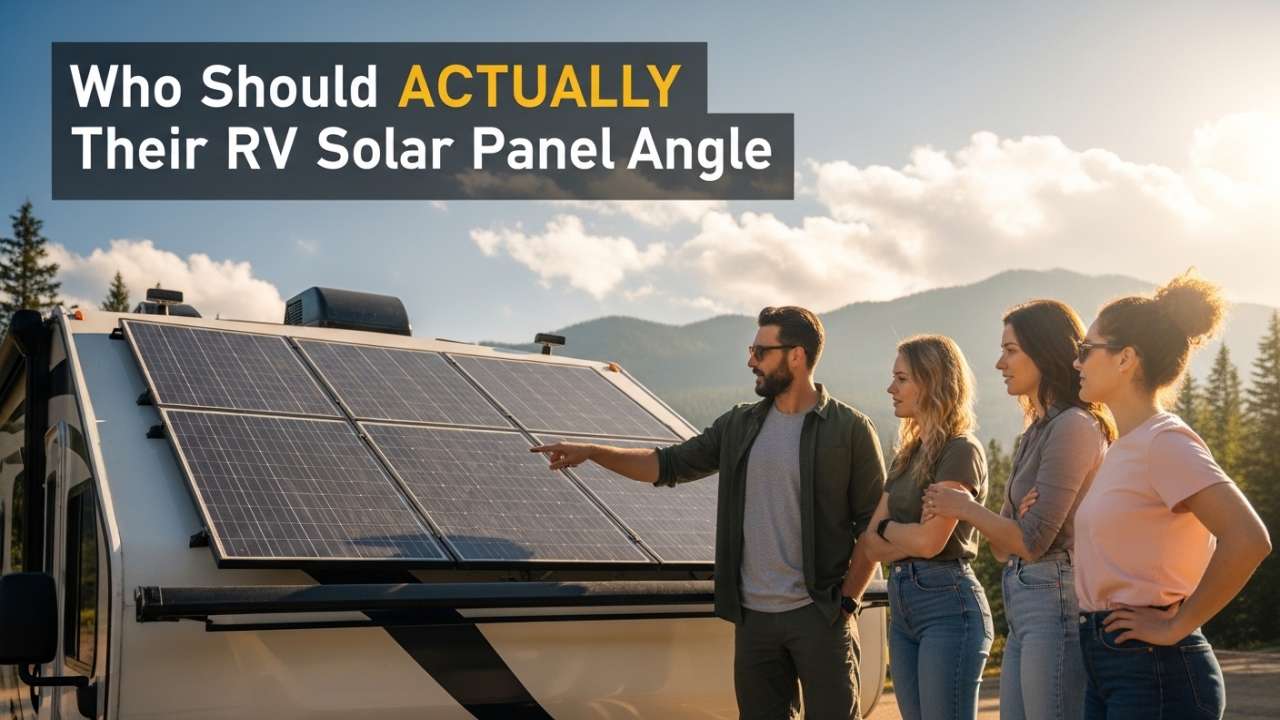
After understanding the real costs and benefits, here’s who should actually take on solar panel angle adjustment:
Adjust Your RV Solar Panel Angle If:
✓ You wild camp in one location for 7+ days at a time – Short stays don’t give you time to benefit from angle optimization
✓ You winter camp in the Southwest (Arizona, Southern California, Southern Nevada, Utah) – These regions have the highest angle benefits because the sun is lowest in winter
✓ You run heavy power draws – Air conditioning, water heaters, cooking, and entertainment systems that require lots of electricity
✓ Your battery bank is undersized for your power needs – The extra 30-40% power gain from angle adjustment makes the difference between running your systems and running your generator
✓ You’re comfortable climbing on your RV roof – Either physically comfortable or willing to accept the risk
✓ You have a professionally installed tilting system – Not a makeshift setup, but equipment designed for your specific panel model
✓ You’re willing to do 2-4 annual adjustments – Winter positioning, summer lowering, possibly spring and fall transitions
✓ You boondock through winter – If you park in hookup-equipped campgrounds during winter, you don’t need solar optimization
✓ You’re staying through January-February – The worst power months when angle adjustment matters most
Do NOT Bother With Solar Panel Angle Adjustment If:
✗ You move your RV every 3-5 days – No time to benefit from angle optimization
✗ You primarily travel during summer months – Summer solar panel angle adjustment provides minimal benefit
✗ You have adequate battery capacity for your power usage – You get enough power from flat panels for your actual needs
✗ You’re uncomfortable with roof work – Or unwilling to accept the physical risks
✗ You don’t have a proper tilting system designed for your panels – Improvised systems are risky
✗ You boondock in windy areas regularly – High wind spots make tilted panels problematic
✗ You have a curved or complex roof – Tilting becomes exponentially harder and requires custom solutions
✗ You’re concerned about roof penetrations and sealing – Repeated adjustments create repeated sealant failures
✗ You prefer simple, maintenance-free setups – Flat-mounted, permanently installed panels require zero annual maintenance
Also Read:- RV Solar Installation in Albuquerque: Your Complete Guide to Top Shops + DIY Setup
The Alternative: Adding More Solar Panels vs. Adjusting Solar Panel Angle
Here’s the real question you need to ask yourself:
Should I adjust my solar panel angle, or should I just add another solar panel?
Let’s compare the two strategies for a typical RVer who needs more winter power:
Option A: Adjust Your RV Solar Panel Angle (Seasonal Tilting)
Equipment Cost:
- Tilting kit: $300-600 per panel
- Potential reinforcement hardware: $100-200
Total One-Time Cost: $400-800
Pros:
- No additional roof space needed
- One-time installation
- 30-45% power gain in winter months
- Relatively low cost
Cons:
- Requires 2-4 annual roof visits
- Manual adjustment effort
- Safety risks from climbing
- Potential for wind damage
- Easy to forget before driving
- Roof sealant stress over time
- 0% benefit in summer (panels must be lowered)
Real-World Effort:
- 10 minutes per adjustment
- 2-4 times per year
- Over 5 years = 2-4 hours of roof work
Option B: Add Solar Panel (Permanent Installation)
Equipment Cost:
- 400W solar panel: $2,000-4,000 installed
- Mounting hardware: $200-400
- Electrical connections: $300-500
Total One-Time Cost: $2,500-4,900
Pros:
- 20-30% power gain year-round (winter and summer)
- Zero annual maintenance
- Zero safety risks
- Zero winter adjustment hassle
- Improves power in all seasons
- Permanent, set-and-forget solution
Cons:
- Significant upfront cost ($3,000-5,000)
- Requires available roof space
- Adds weight to RV (45+ lbs)
- May affect RV’s center of gravity
- Professional installation typically required
- Roof penetrations required
- Weight affects fuel economy slightly
Real-World Effort:
- Zero annual maintenance
- Zero hours of ongoing work
- One-time professional installation
Which Should You Choose?
Choose Solar Panel Angle Adjustment (Tilting) if:
- Budget is tight
- You wild camp exclusively in winter
- You’re willing to do seasonal maintenance
- You don’t want to lose roof space
- You’re comfortable with physical effort
Choose Adding More Panels if:
- You want long-term simplicity
- You camp in mixed seasons
- You want year-round power improvement
- You’re willing to invest more upfront
- You want zero annual maintenance
The Math: Adding one panel costs 5-6x more initially but saves you 2-4 hours of annual roof work and eliminates all the risks and hassles of seasonal adjustment. If you value your time and safety, the extra panel often makes more sense.
Real-World Failures: What Goes Wrong With Solar Panel Angle Adjustment
These aren’t theoretical problems. These are real situations full-time RVers have experienced:
Failure #1: Wind-Damaged Tilted Panels
What Happened: An RVer in Arizona adjusted their solar panel angle to 30 degrees for winter. Three days later, a dust storm brought 40+ mph winds. The tilted panels caught the wind like sails. The bolts fatigued. One panel ripped partially off the roof, hanging at an awkward angle.
The Cost: $2,000 emergency roof repairs, two weeks without full solar power, temporary generator running (expensive fuel), stress and lost boondocking time.
The Lesson: High wind locations make tilted panels risky. Always check wind forecasts and have a plan to lower panels quickly if storms approach.
Failure #2: Driving with Panels Still Tilted
What Happened: An RV couple adjusted their solar panel angle for winter camping. After a 10-day stay, they packed up in a hurry (late to meet friends). They did their final walk-around and got in the driver’s seat. Thirty miles down the highway, they realized—through the rear-view mirror—that their panels were still tilted up.
The Result: The wind resistance on the tilted panels was extreme. The mounting system, designed for stationary use, wasn’t built for highway wind speeds. One panel started to rip at the bolts. They emergency-stopped, called a mobile RV technician, and had $1,500 in repairs.
The Lesson: Create a pre-drive checklist. Make it impossible to forget. One RVer couple now takes a photo of their lowered panels before starting the engine.
Failure #3: Roof Leak from Repeated Penetrations
What Happened: An RVer adjusted their solar panel angle 4 times per year for 4 years. Each adjustment required loosening bolts that penetrated the roof. Each time, they re-sealed with silicone. After 4 years (16 bolt-loosening cycles), the sealant started failing. Water infiltrated around one bolt. Roof damage underneath progressed invisibly for months before visible interior water damage appeared.
The Cost: $3,000-5,000 in interior water damage repairs, potential mold issues, structural damage investigation.
The Lesson: Repeated roof penetrations create long-term sealing problems. Budget for professional re-sealing every 2-3 years if you’re doing seasonal adjustments.
Failure #4: Solar Panel Angle Formula Miscalculation
What Happened: An RVer tried to calculate their optimal solar panel angle using a formula they found online. They misunderstood the formula, thought it meant 45 degrees instead of 30 degrees. They over-tilted their panels dramatically. The over-tilt created excessive wind resistance and improper angle relative to the winter sun.
The Result: Instead of 40% power gain, they got 10% power gain. The panels were actually tilted away from the optimal sun angle. They realized the mistake after wasting two weeks of camping.
The Lesson: Use the simple formula provided (Latitude × 0.89). When in doubt, under-tilt rather than over-tilt. Slightly less-than-optimal angle is better than over-tilting.
Failure #5: Tilting System Incompatible With Panel Type
What Happened: An RVer bought a generic tilting kit online without checking compatibility. They installed it on their specific panel model. The mounting bracket alignment was slightly off. Over a season of adjustments, the bracket stress points micro-fractured. One bracket failed completely while panels were tilted.
The Result: Panels partially collapsed. Emergency repairs needed. The tilting system was incompatible with that panel model.
The Lesson: Verify tilting system compatibility BEFORE purchasing. Most panel manufacturers recommend specific tilting systems. Using a generic system is risky.
Also Read:- Santa Fe RV Solar High Desert Performance & Maintenance Guide
How to Monitor Your Solar Panel Angle Effectiveness
If you adjust your solar panel angle, you should verify that your adjustments are actually helping. Here’s how:
Method 1: Digital Monitoring (Most Accurate)
Most modern RV solar charge controllers (MPPT or PWM) have Bluetooth connectivity. Download the manufacturer’s app:
- Victron Energy: VictronConnect app
- Epever/EPsolar: Epever app
- Renogy: Renogy+ app
- Rich Solar: Rich Solar app
These apps show real-time:
- Current amperage from panels
- Daily energy production (watt-hours)
- Efficiency percentage
- Temperature readings
How to Use This Data:
- Record your flat-panel max amperage on a clear day at solar noon
- Adjust to your calculated optimal angle
- Record max amperage on the next clear day at solar noon
- Compare the two numbers
If your flat panels hit 30 amps at solar noon, and your tilted panels hit 45 amps the next day at solar noon (similar conditions), you’ve got a 50% power gain. That’s excellent.
Method 2: Manual Testing
If you don’t have app-based monitoring:
- On a clear day, note your maximum amperage reading when panels are flat (typically check around 11 AM – 1 PM)
- Wait a few days for similar weather conditions
- Adjust your panels to your calculated optimal angle
- Record your maximum amperage on the next clear day at the same time
Compare the numbers. The percentage increase is your actual solar panel angle benefit for that location and season.
Method 3: Simple Visual Check
You can’t measure precisely, but you can observe:
- At solar noon (check online for exact time at your location), face south
- Look at where the sun is coming from
- Check if your solar panels are facing that direction
If the sun is directly ahead and your panels are facing that direction—optimal angle. If the sun is higher and your panels are still tilted upward—not optimal. If the sun is low and your panels are flat—definitely not optimal.
Visual checks aren’t precise, but they give you a sense of whether you’re in the right ballpark.
Common Solar Panel Angle Mistakes
Mistake #1: Using a Magnetic Compass Instead of True South
Your phone’s compass shows magnetic south, not true south. These are different (magnetic declination).
The Problem: You face magnetic south with your RV, thinking you’re facing true south. Your solar panel angle is mathematically correct, but it’s pointing 10-15 degrees away from the actual optimal direction. You lose 3-5% efficiency.
The Solution: Use the NOAA Magnetic Declination Calculator (www.ngdc.noaa.gov/geomag-web) to find true south for your location. Or use an app like “Sun Surveyor” that shows exact solar position.
Mistake #2: Setting Optimal Summer Angle
The formula (Latitude × 0.89) is specifically for winter. If you apply it in summer, your panels will be tilted AWAY from the high summer sun.
The Problem: You use your winter angle year-round. Summer power production drops because you’re over-tilted.
The Solution: Lower panels to completely flat (0 degrees) in summer. This is non-negotiable. The high summer sun requires flat positioning.
Mistake #3: Ignoring Your Roof’s Existing Pitch
Some RVs have roofs pitched at 15-20 degrees. Your tilting system adds to that existing pitch.
The Problem: You calculate 30-degree optimal angle and set your tilting system to 30 degrees. But your roof already has 15 degrees of pitch, so your panels are now at 45 degrees. Way too much tilt.
The Solution: Measure or research your RV’s roof pitch. Subtract it from your calculated optimal angle. If your roof is 15 degrees and optimal angle is 30 degrees, set your tilting system to only 15 degrees.
Mistake #4: Over-Tilting for Extra Power
“If 30 degrees is optimal, what if I do 40 degrees? Won’t I get more power?”
No. The formula exists for a reason. Over-tilting moves panels away from the actual sun position.
The Problem: You over-tilt (40 degrees when 30 is optimal). Your power gain is less than it should be. You’ve also increased wind resistance and difficulty of adjustment for worse results.
The Solution: Trust the formula. Slightly under-tilting is better than over-tilting. The sweet spot is the sweet spot.
Mistake #5: Tilting Only One Panel in a Series String
You have multiple panels wired in series. You decide to tilt just one to test.
The Problem: When panels in a series string are at different angles, they produce different voltages. This creates inefficiencies throughout the string. You might actually lose power overall.
The Solution: All panels must be tilted together to the same angle. It’s all-or-nothing with solar panel angle adjustment.
Also Read:- RV Solar in Santa Fe: Get Free Power From the Desert Sun
FAQ
These are the exact questions full-time RVers ask about solar panel angle optimization:Q: If I adjust my solar panel angle in winter, do I have to lower them completely flat in summer?
A: Yes. The summer sun is too high. If you keep your winter tilt angle (30 degrees) into summer, your panels are pointing too far away from the sun. You’ll actually get LESS power than if they were flat. Summer requires 0 degrees (completely horizontal).
Q: Will adjusting my solar panel angle void my warranty?
A: Probably not, if you use proper mounting hardware designed for your specific panels. Most manufacturers don’t care HOW you mount panels—they care that you don’t damage them. Check your warranty, but warranty loss is rare when using proper tilting systems.
However, if your tilting causes panel damage (cracked glass, moisture intrusion), that damage wouldn’t be covered. Only adjust with proper equipment.
Q: Can I adjust my solar panel angle just once a year instead of seasonally?
A: You’ll miss out on optimization. The winter angle doesn’t work in summer. But if you’re only wild camping in winter, you only need one adjustment (winter angle). If you camp year-round, two adjustments (winter and summer) capture 90% of possible gains.
Some RVers do four adjustments (winter, spring, fall, summer) but most find two is sufficient and less hassle.
Q: My RV has a curved roof. Can I still tilt my solar panels?
A: Tilting on a curved roof is extremely difficult. Custom brackets would be required. Standard tilting systems assume a flat roof.
For curved roofs, your two options are:
- Add more panels instead of tilting
- Find a tilting system custom-built for curved roofs (expensive)
Most curved-roof RV owners choose option 1: just add another panel instead.
Q: What if I’m parked east-west instead of north-south? Can I still benefit from tilting?
A: If your RV’s long axis runs east-west, one side of your roof faces north, one faces south. Tilting only helps if you consistently park with the same direction facing south.
If you rotate your RV’s direction frequently, tilting doesn’t help. The panels need to consistently face south to benefit.
Solution: Either always park the same way (limiting your flexibility) or add panels instead of tilting.
Q: Do I need to adjust my solar panel angle every month, or just winter and summer?
A: Most RVers get 90%+ benefit from two adjustments:
- Winter (December-February): Optimal angle (e.g., 30 degrees)
- Summer (June-August): Flat (0 degrees)
Some do four adjustments (adding spring and fall), but the additional benefit is small and requires more effort. Two is the sweet spot for most RVers.
Q: What about spring and fall? Are those times when I should adjust my solar panel angle?
A: Spring and fall are transition months. The sun is at medium angles—not as low as winter, not as high as summer.
You can:
- Just use winter angle in spring, then switch to flat in summer (simplest)
- Use winter angle in spring, then intermediate angle (15 degrees) in fall
- Do four seasonal adjustments (winter 30°, spring 20°, fall 15°, summer 0°)
Option 1 (two adjustments) is what most RVers do. Options 2 and 3 give maybe 5-10% additional benefit for extra effort. Diminishing returns.
Q: How does cloud cover affect solar panel angle optimization?
A: Significantly. On cloudy days, sunlight comes from many angles (diffuse light). Your solar panel angle matters less because light isn’t directional.
On partially cloudy days with occasional sun breaks, tilting helps you maximize output during those sun breaks.
On completely overcast days, tilting provides almost no benefit. The cloud cover scattered light across all angles equally.
The Practical Impact: If you’re in a location with frequent cloud cover, solar panel angle optimization provides less benefit. Locations with consistent sunshine (Arizona, Southern Nevada) show dramatic tilting benefits.
Q: At what temperature does tilting become less necessary?
A: Never. Even in hot climates, winter sun stays low. The only place tilting becomes optional is far south (southern Florida) where winter sun angle is still 45+ degrees (not that low).
Far north (Alaska, Montana), tilting is always necessary because the sun never gets high.
For 95% of RVers camping across North America, seasonal tilting is beneficial in winter.
Q: What if I forget to lower my solar panel angle before driving?
A: This is a real problem. You could:
- Suffer panel damage from wind resistance (most common)
- Have panels rip off completely (rare but happens)
- Damage mounting system (common)
- Face $1,000-5,000 in repairs
This is why many RVers eventually add panels instead of tilting. The risk and hassle of remembering to lower panels before driving is not worth the benefit.
Solution: Create a pre-drive checklist. Take a photo of lowered panels. Have a reminder on your dashboard. Make it impossible to forget.
Q: How much does a solar panel tilting system cost?
A:
- Budget tilting kits: $200-300 per panel
- Quality tilting systems: $400-600 per panel
- Installation: $100-300 if DIY, $500-1,000 if professional
Total: $300-700 per panel for complete system installed.
Compared to adding a panel ($2,500-5,000 installed), tilting is much cheaper upfront. But it requires ongoing maintenance and annual adjustment effort.
Q: Can I return to flat panels after tilting for a season?
A: Yes. Tilting systems are reversible. You can tilt in winter, lower to flat in summer, and repeat yearly with no permanent changes.
If you decide tilting isn’t worth it after one season, you’ve lost the cost of the tilting kit ($300-600), but your RV is back to normal operation.
Q: Does solar panel angle affect the lifespan of my panels?
A: Proper tilting (with professional equipment) does not shorten panel lifespan.
However, repeated seasonal adjustment does cause wear on mounting brackets and bolts, creates sealant stress, and increases oxidation on exposed bolt connections.
Over 10+ years, you might need to replace brackets or re-seal penetrations. But the panels themselves last the full 25+ year warranty.
Installation Guide: If You Decide to Adjust Your RV Solar Panel Angle
If you’ve decided that solar panel angle adjustment is right for your RV, here’s what you need to know about installation:
The Hardware You’ll Need
For Each Solar Panel:
- Tilting L-brackets – Mount to the short sides of your panel (45-90 degree tilt range)
- Tilt arms – Metal rods with multiple holes for positional adjustment
- Bolts and hardware – Grade 8 or higher bolts (don’t use cheap hardware)
- Lock washers – Prevent bolts from loosening over time
- Wing nuts – For easy seasonal adjustment
- Rubber grommets – Protect panel frame from bolt stress
Step-by-Step Installation Process
Step 1: Verify Compatibility Before buying anything, confirm that your tilting system is designed for your specific solar panel model and mounting situation.
Step 2: Mount L-Brackets
- Mount brackets to the short sides of your panels
- Mount them on the side that will tilt upward toward the sun
- Use proper torque specs for bolts (check manufacturer specs)
- Ensure brackets are level and symmetrical
Step 3: Position Tilt Arms
- Install tilt arms between L-brackets at your calculated optimal angle
- Use multiple holes on the arms to create 2-4 position options (winter, summer, etc.)
- Ensure arms can’t accidentally slip to different positions while tilted
Step 4: Secure Everything
- Use appropriate-size bolts and grade 8 or higher hardware
- Install lock washers under bolt heads and nuts
- Tighten to proper torque (don’t over-tighten and crack bracket)
- Use thread-locking compound on bolts that see vibration
Step 5: Seal All Penetrations
- Apply marine-grade silicone around every bolt penetration
- Use a caulking gun for even application
- Let cure fully before first tilt adjustment
- Plan to re-seal every 2-3 years
Step 6: Test Adjustment
- Adjust to winter angle
- Check that everything is stable
- Adjust back to flat
- Verify bolts don’t loosen during adjustment
- Check for any roof leaks in next rain
Common Installation Mistakes to Avoid
Mistake: Using cheap bolts or generic hardware Why it matters: Cheap bolts corrode in outdoor environments. Corroded bolts seize and can’t be loosened for seasonal adjustment. Solution: Always use stainless steel or grade 8 bolts.
Mistake: Over-tilting or under-securing bolts Why it matters: Bolts back out over time when panels are in constant use. Loose bolts lead to panel movement. Solution: Use lock washers and thread-locking compound. Check tightness monthly.
Mistake: Not sealing roof penetrations immediately Why it matters: Water intrusion starts immediately. It’s hidden until major damage occurs. Solution: Seal before panels are even tilted. Plan to re-seal every 2-3 years.
Mistake: Installing on an already-weak roof Why it matters: RV roofs age and deteriorate. Adding tilting weight to a weak roof can accelerate failure. Solution: Have roof inspected before installation. Repair any existing issues first.