Your RV solar system is the heart of your mobile power independence. But like any complex system, it requires regular attention to keep performing at its peak. The good news? Most maintenance tasks take just 15-20 minutes per month and can prevent expensive repairs down the road. This guide walks you through exactly what to check monthly and how to prepare your system for seasonal challenges.
Why RV Solar Maintenance Matters
Before diving into the checklist, understand what you’re protecting. Your solar system has four main components that work together: solar panels (capturing energy), charge controller (regulating power), batteries (storing energy), and wiring connections (delivering power). Each component can degrade without attention. Neglecting maintenance doesn’t just lower production—it can reduce system output by 10-30% and shorten your battery lifespan by years. Regular checks catch small problems before they become expensive failures.
Also Read:- RV Solar in Santa Fe: Get Free Power From the Desert Sun
Monthly RV Solar Maintenance Checklist
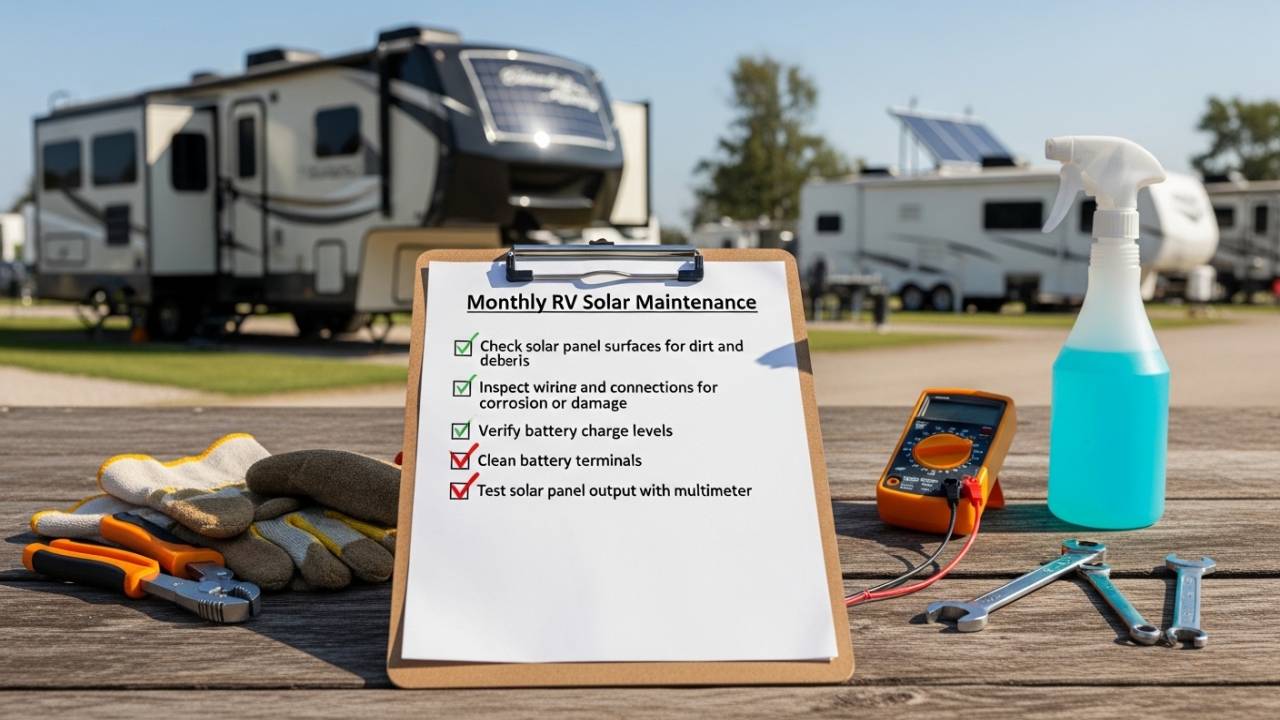
Perform these checks every month when your RV is in use. Most tasks require just a visual inspection—no special tools needed.
☑️ Solar Panels (Monthly)
What to Check:
- Visual Inspection – Walk around your RV and inspect all visible panels. Look for physical damage like cracks, broken corners, or delamination (white haze between layers).
- Debris Removal – Check for leaves, dirt, bird droppings, pollen, or dust accumulation. Even light dust reduces output by 3-5%.
- Shading Issues – Note any new shading from trees, other vehicles, or structures. Shading even a small portion of one panel can reduce your entire system’s output.
- Mount Hardware – Visually check that panels haven’t shifted. Look for any loose bolts or movement when you gently push a panel (when system is off).
- Panel Cleaning – If you see significant dirt buildup, clean with soft cloth and cool water. Use a soft sponge for stubborn residue. Avoid pressure washers (they damage seals).
Frequency: Visual inspection monthly; cleaning as needed (especially during dry seasons)
Tool Needed: None (soft cloth optional)
Time Required: 10-15 minutes
☑️ Battery System (Monthly)
What to Check:
- Battery Voltage – Use a multimeter or your monitoring app. Check that voltage is within normal range for your battery type:
- 12V lead-acid: 12.5-13.5V (resting)
- 12V lithium (LiFePO₄): 13.0-13.5V (resting)
- 24V systems: Double these readings
- Physical Condition – Look for swelling, leaks, corrosion, or discoloration on battery case.
- Battery Temperature – Feel the battery case (don’t touch terminals). It should be warm but not hot. Excessive heat indicates problems.
- Charge Levels – Monitor your system’s display or app daily. Ideally, keep depth of discharge (DOD) below 50% for lead-acid, below 80% for lithium.
- Capacity Testing – Monthly, note your amp-hour consumption. Compare to previous months for trends indicating battery degradation.
Frequency: Voltage check monthly; visual inspection monthly; capacity trend tracking monthly
Tools Needed: Multimeter (or rely on monitoring system)
Time Required: 5-10 minutes
Pro Tip: If you have lead-acid batteries (not sealed), check water levels monthly and top off with distilled water if needed.
Also Read:- RV Solar Panel Angle: Does It Really Matter? The Complete Guide to RV Solar Power Optimization
☑️ Electrical Connections (Monthly)
What to Check:
- Terminal Corrosion – Battery positive and negative terminals should be shiny. White/blue/green powder means corrosion. Clean with a dry cloth or corrosion cleaner if present.
- Terminal Tightness – Gently attempt to wiggle battery terminal posts. They should not move. Use a wrench to tighten if loose.
- Wire Condition – Trace major wires from battery to controller and panels. Look for:
- Exposed copper (damaged insulation)
- Pinched or crushed sections
- Melted plastic
- Corrosion on connectors
- Disconnect Switch – Verify your disconnect switch (if installed) moves smoothly. Test that it actually stops power flow.
- Fuse/Breaker Condition – Check that fuses aren’t discolored and breakers are in ON position.
- Frequency: Monthly
- Tools Needed: Wrench, possibly corrosion cleaner
- Time Required: 10-15 minutes
- Safety Note: Turn off your system before checking tight terminals.
☑️ Charge Controller (Monthly)
What to Check:
- Display Status – Your charge controller (MPPT or PWM) should show normal operation. Look for:
- Steady charging during sunlight
- Appropriate voltage for your battery type
- No error codes or warning lights
- Physical Condition – Check that the controller isn’t hot to touch (slight warmth is normal). Look for no visible damage, water damage, or corrosion.
- Ventilation – Ensure the controller’s cooling vents aren’t blocked by dust or debris. Gently blow out vents if dusty.
- Connection Tightness – If accessible, ensure all wire terminals are tight (use a small wrench if needed).
- Monitoring System – Check your monitoring app (if you have one) for:
- Normal charging current during daylight
- Expected voltage levels
- Any performance anomalies
- Historical trends (production declining over months)
- Frequency: Monthly visual check; daily app monitoring
- Tools Needed: None (possibly small wrench)
- Time Required: 5-10 minutes
Also Read:- How to Monitor Your RV Solar System Output: Complete Guide to RV Solar Monitoring
Seasonal RV Solar Maintenance Guide: Keep Your Solar System Running All Year
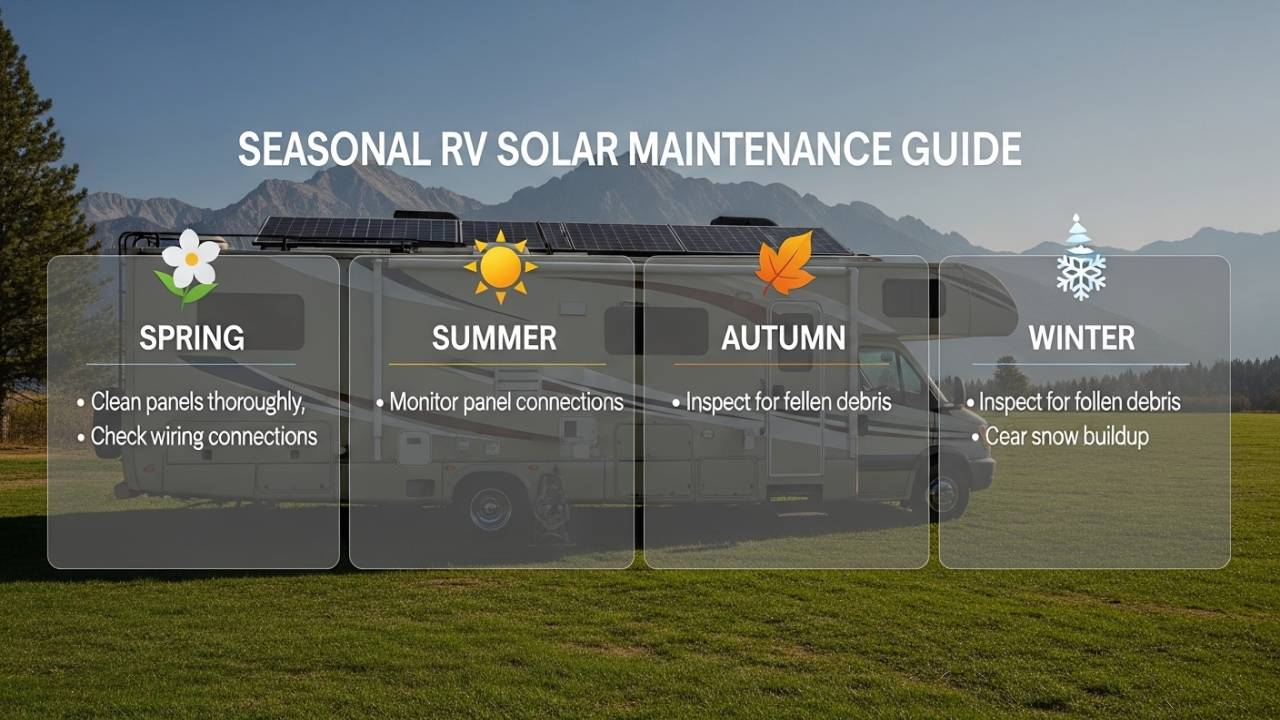
Beyond monthly checks, your system needs seasonal preparation for extreme conditions.
Spring Maintenance (Before Summer Season)
Preparation Tasks:
- Deep Clean Solar Panels – Before intense summer sun hits, give panels a thorough cleaning. Remove pollen, tree droppings, and winter debris. Clean panels can produce 15-20% more energy than dusty ones.
- Battery Capacity Test – Perform a full discharge/charge cycle (if using lithium with BMS). This recalibrates your monitoring system and reveals capacity loss.
- Inspect All Seals – Summer sun and UV damage accelerate seal degradation. Check caulking around panel mounts. If cracked, recaulk with marine-grade sealant to prevent water intrusion.
- Check Wire Insulation – UV damage happens year-round. Inspect exposed wires for cracking or brittleness. Replace any obviously damaged sections.
- Upgrade Monitoring – Check for firmware updates to your monitor or app. Manufacturers release improvements and bug fixes regularly.
- Verify Ventilation – Ensure controller and battery vents are completely clear. Heat is your battery’s enemy in summer.
Summer Maintenance (Heat Management)
During Hot Months:
- Monitor Temperature – Check battery temperature weekly during heat waves. If exceeding 140°F (60°C), ensure proper ventilation or add cooling measures.
- Increase Cleaning Frequency – Dust accumulates faster in summer. Clean panels every 2-4 weeks in dusty regions.
- Track Performance Decline – Temperature causes efficiency loss. Your system may produce 10% less energy per degree above 77°F. This is normal but worth tracking.
- Water System Checks – High heat causes water line swelling. Check fresh water lines for bulging or damage monthly.
- Shade Management – Summer sun angles may create new shading issues. Monitor for tree branch growth or new structures casting shade on panels.
Also Read:- Santa Fe RV Solar High Desert Performance & Maintenance Guide
Fall Maintenance (Pre-Winter Prep)
Preparation Tasks:
- Comprehensive Inspection – Perform a detailed inspection of all system components:
- Panel physical condition and cleanliness
- All wiring for damage
- Battery for swelling or leaks
- Connections for corrosion
- Controller for proper operation
- Battery Conditioning – Run a full charge cycle before winter. If using lithium, update battery firmware (if available).
- Clean Everything – Remove leaves, dirt, and debris from panels, vents, and connections. Clear gutters near panels to prevent water pooling.
- Check Sealants – Fall inspections often reveal cracks from summer heat. Recaulk any damaged seals before winter rain.
- Document Baseline – Record your system’s current voltage, amperage, and temperature. Use this as a baseline for winter performance comparison.
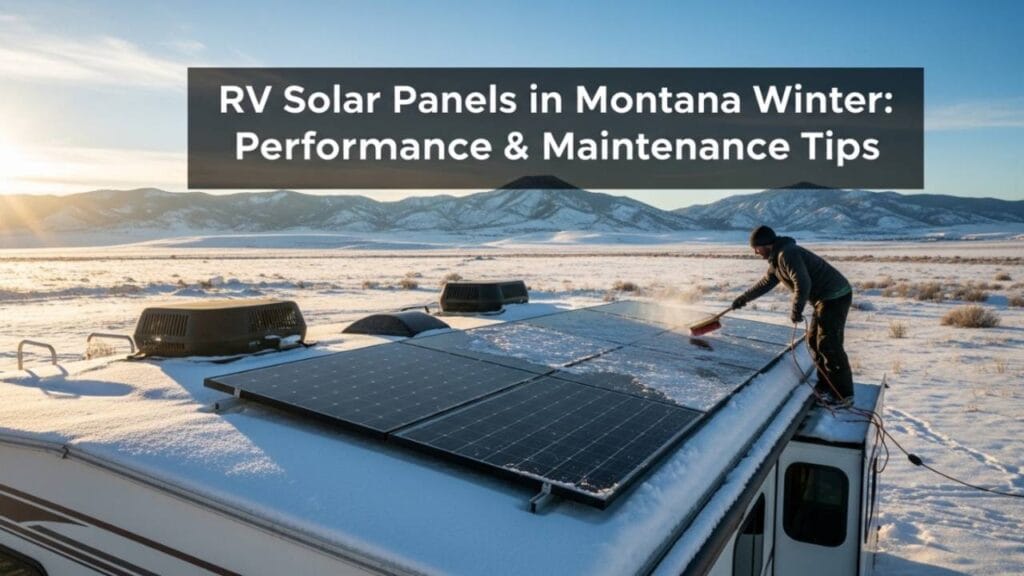
Winter Storage and Maintenance
If Storing Your RV in Winter:
Lead-Acid or AGM Batteries:
- Leave in RV; maintain solar panels free of snow
- Monitor charge monthly (even when parked)
- Consider a battery tender/maintainer if not plugged to shore power
Lithium Batteries (Non-Heated):
- If temperatures drop below 32°F continuously: fully charge, disconnect, and store indoors
- Cold lithium cannot accept charge and can suffer permanent damage
- Store in temperature-controlled location (60-80°F ideal)
Heated Lithium Systems:
- Can stay in RV as long as system has power for heating circuits
- Verify heater is functioning (usually activates below 40°F)
- Monitor battery voltage monthly
General Winter Checks:
- Remove snow from panels every 3-5 days (use soft brush, never scrape)
- Inspect for ice damming (water freezing at panel edges)
- Ensure all vents remain unobstructed by snow/ice
- Monthly voltage check (even when parked)
Also Read:- RV Solar Installation in Albuquerque: Your Complete Guide to Top Shops + DIY Setup
10 Common RV Solar Problems and How to Fix Them Fast
| Problem | Likely Cause | Quick Fix | When to Call Pro |
|---|---|---|---|
| Low charging amps | Dirt/debris on panels | Clean panels with a soft cloth and water | If cleaning doesn’t restore power |
| No charging despite sunny day | Disconnect switch OFF | Check and flip the switch to ON | If the switch won’t engage |
| High battery temp (hot to touch) | Excessive charging current | Check charge controller settings; ensure proper ventilation | If temp exceeds 140°F after ventilation improvement |
| Battery voltage dropping fast | Battery nearing end-of-life OR phantom loads | Check for parasitic drains (fridge, fans, inverters); run capacity test | If capacity test shows <80% of rated capacity |
| Corrosion on battery terminals | Moisture and acid fumes | Clean with dry cloth; apply corrosion inhibitor spray | If corrosion returns quickly (indicates leak) |
| Controller showing error codes | Loose connection OR overvoltage | Check all wire connections; verify battery voltage range | If error persists after checking connections |
| Monitoring app shows no data | WiFi/Bluetooth disconnect | Check connection settings; move closer to router; restart app | If app still can’t connect after restart |
| Panel output uneven between panels | Partial shading or one panel damaged | Check for shadows; inspect shaded panel for cracks | If panel is visibly cracked or delaminated |
| Breaker/fuse keeps tripping | Short circuit in system | DO NOT ignore—turn off immediately | Immediately—do not restore power without professional help |
| Visible water in battery case | Seal damage (lead-acid) | Stop using; order replacement battery | Immediately—water in cells indicates imminent failure |
FAQ: 5 Common RV Solar Maintenance Questions
Q1: How often should I clean my RV solar panels?
A: Monthly visual inspection is ideal. Actual cleaning frequency depends on your environment. In dusty regions (Arizona, California), clean monthly during dry seasons. In humid regions with regular rain, rain naturally cleans panels—check quarterly. Light dust reduces output only 3-5%, so cleaning is more important if you see visible debris (bird droppings, tree pollen, dust buildup). The key: don’t let dirt accumulate visibly.
Q2: Can I use a pressure washer to clean solar panels?
A: Never use a pressure washer on solar panels. High pressure damages the protective coatings, cracks the glass, and forces water into seals causing leaks. Use only soft cloth or soft-bristled brush with cool water. For stubborn residue, mild dish soap is acceptable, but rinse thoroughly. Always use cool water—hot water can crack tempered glass on cool days. When in doubt, stick with plain water and a soft cloth.
Q3: What’s the ideal battery state of charge to store my RV?
A: For winter storage, fully charge your battery before parking. This maximizes the time it can hold charge without maintenance. If your RV is stored indoors without power, a fully charged battery lasts 2-3 months before needing recharge. Check voltage monthly even while parked. For lithium batteries specifically, store at 50-80% state of charge (not fully charged) in temperature-controlled environments for absolute longest lifespan.
Q4: How do I know if my solar system is performing poorly?
A: Track your production over time. Create a simple log: date, weather (sunny/cloudy), charging current (amps), and time of day. After 3-4 months, you’ll see patterns. If sunny-day production drops 20% below your baseline, investigate: clean panels, check for new shade, inspect wiring, verify battery isn’t full (limiting charge). Use your monitoring app’s historical data—most show monthly trends you can compare year-over-year.
Q5: Can I do RV solar maintenance myself or do I need a professional?
A: Most monthly maintenance (cleaning, visual inspection, connection checking) you can absolutely do yourself. You don’t need special skills—just basic observation. However, call a professional if you encounter: corrosion that returns quickly after cleaning, breaker/fuse repeatedly tripping, obvious water damage in battery case, visible wire damage requiring replacement, or charge controller showing persistent error codes. Electrical work beyond visual inspection is best left to licensed technicians for safety.
Creating Your Monthly Maintenance Log
Monthly Log Template:
| Month | Panel Condition | Battery Voltage | Charging Amps | Temperature | Notes | Cleaning Done? |
|---|---|---|---|---|---|---|
| January | Clean | 13.2V | 25A | 65°F | Snow on roof | Yes |
| February | Dusty | 13.1V | 22A | 68°F | Decreased output | Yes |
Tracking patterns helps you catch problems early. A 3-amp drop in charging current between months often indicates panel dirt or battery aging. Temperature rise over months suggests cooling issues.
Final Maintenance Reminders
- Disconnect Before Servicing – Turn off your system before checking terminal tightness or doing any electrical work
- Safety First – Never work on connections in rain or wet conditions
- Document Everything – Keep receipts for battery replacement, cleaning products, and repairs for warranty purposes
- Watch the Warnings – Don’t ignore error codes, unusual temperatures, or declining performance
- Plan Ahead – Seasonal maintenance takes 1-2 hours; monthly checks take 15-20 minutes. Schedule these during routine RV care
Your solar system is designed to work reliably with minimal maintenance. These monthly and seasonal checks ensure it stays that way, keeping you powered up wherever your adventures lead.
Keep your RV solar system running strong. Small maintenance investments prevent big problems.