Your RV solar system just powered you through three perfect days of dry camping. Everything’s humming—panels gleaming in the morning sun, batteries holding a solid charge, inverter running whisper-quiet—then day four hits. Panels are producing half as much as they did yesterday. Battery voltage dips faster than usual. You realize you haven’t cleaned anything since you left. Welcome to the reality of RV power system maintenance: skip it for a few weeks, and your off-grid setup becomes a liability instead of a lifeline. This guide walks you through every maintenance task your RV solar panels, batteries, charge controllers, and inverters need—by season, by priority, and with exact timelines so you never end up stranded wondering why your system died.
Why RV Solar Maintenance Matters (And What Happens When You Skip It)
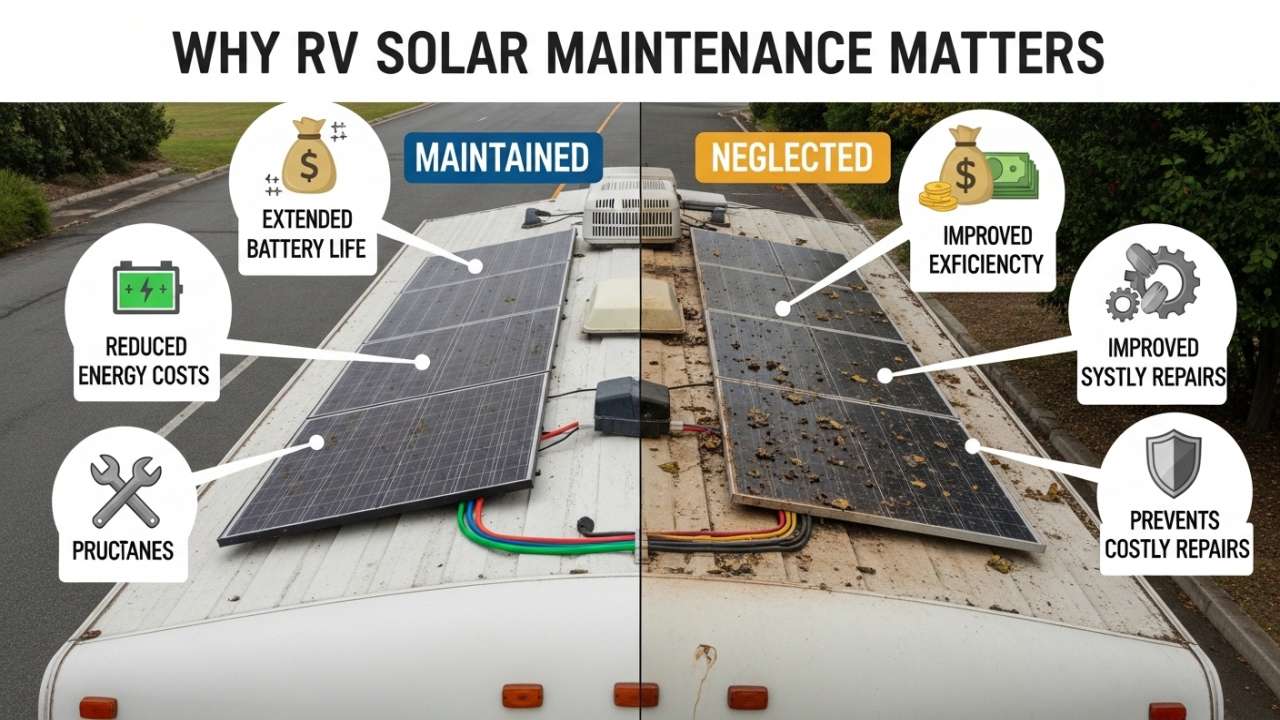
Most RV solar system owners learn about maintenance the hard way: sitting in a campground with dead batteries, dusty panels producing almost nothing, and no AC power to run the coffee maker. Here’s what actually happens when maintenance lapses:
Month 1–2 (neglect begins):
- Dust and pollen coat panels → 10–15% efficiency loss
- Battery terminals start corroding → charging slows, voltage drops
- Inverter fan clogs → runs hotter, throttles performance
- Wiring connections loosen from vibration → intermittent power loss
Month 3+ (system decline):
- Panel output drops 25–40% → can’t charge batteries on cloudy days
- Battery sulfation accelerates (lead-acid) → permanent capacity loss
- Corroded terminals risk electrical fire → safety hazard
- Inverter overheats → automatic shutdown, no AC power when you need it
- Complete system failure → $8,000–$15,000 replacement cost
The fix? A simple maintenance routine—30 minutes per week—prevents 99% of these issues. This guide gives you that routine, month by month.
Also Read:- RV Camping White Sands Solar: Your Complete Guide to Desert Camping & Off-Grid Power
Understanding Your RV Solar Power System Components
Before you maintain something, you need to understand what you’re maintaining. An RV solar power system has five critical components, each with different maintenance needs.
1. Solar Panels: The Energy Source
What they do: Convert sunlight into DC electricity.
Why maintenance matters: Dust, pollen, bird droppings, tree sap, and salt spray reduce output by 15–30% if left uncleaned. Panel glass degrades over time if exposed to extreme UV without protection.
Lifespan: 25–30 years (if maintained); 10–15 years (if neglected).
2. Charge Controller (MPPT or PWM): The Regulator
What it does: Optimizes voltage from panels to charge batteries efficiently.
Why maintenance matters: Controllers generate heat and can overheat if vents clog. Loose wiring creates resistance and fire risk. Temperature sensors must work accurately or charging suffers.
Lifespan: 10–15 years (if kept cool and dry); 5–7 years (if overheated or moisture-damaged).
3. Battery Bank: The Storage
What it does: Stores energy from panels for night use and cloudy days.
Why maintenance matters: Batteries are the most expensive part of your RV solar setup. Proper maintenance extends lifespan by 50–100%. Neglect cuts it in half.
Lifespan: Lead-acid: 3–5 years (maintained), 1–2 years (neglected). Lithium: 8–10 years (maintained), 3–5 years (neglected).
4. Inverter: The Converter
What it does: Converts DC power (from battery) to AC power (for RV appliances).
Why maintenance matters: Inverters run hot and draw air constantly. Clogged vents cause overheating, which triggers automatic shutdown or permanent damage.
Lifespan: 7–10 years (if cooled and maintained); 3–5 years (if overheated or moisture-damaged).
5. Wiring and Connections: The Circulatory System
What it does: Carries power between all components.
Why maintenance matters: Loose connections create resistance, heat, and fire risk. Corrosion increases resistance exponentially. Damaged insulation is a shock hazard.
Lifespan: 10–20 years (if sealed and protected); 2–5 years (if exposed to weather, salt, or heat).
Monthly RV Solar Maintenance Checklist (30 Minutes)
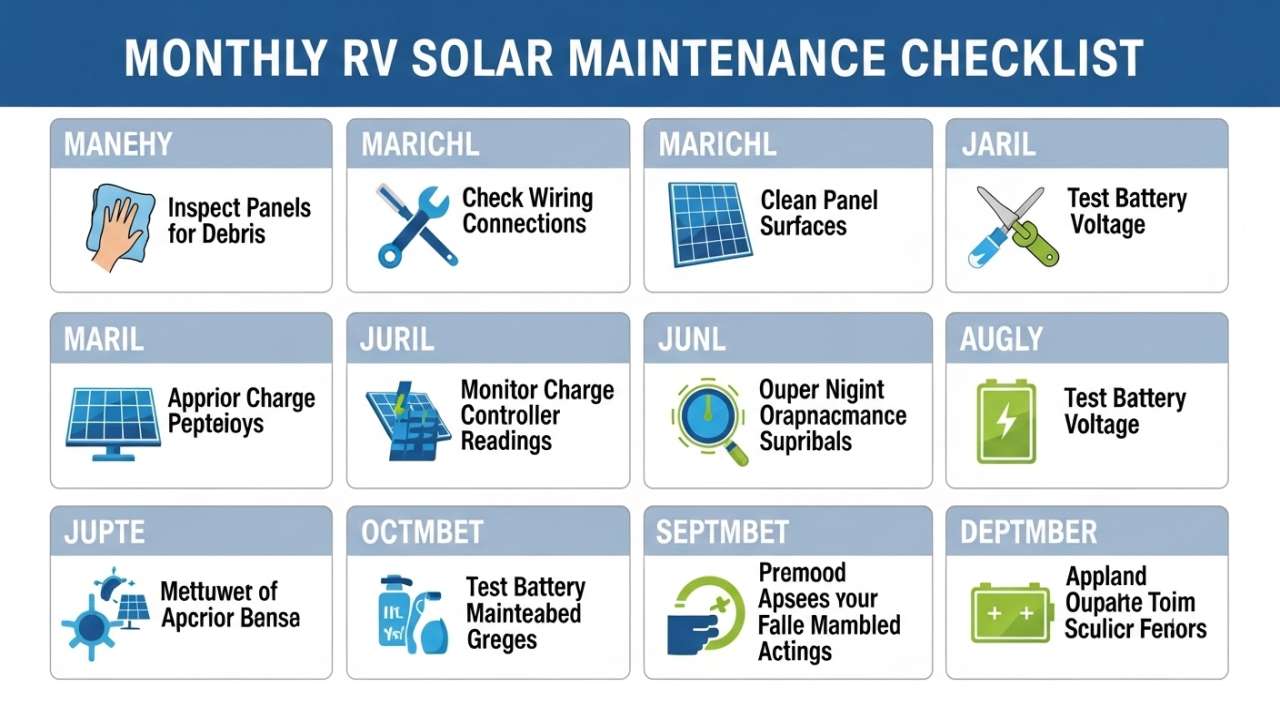
Do this every month, whether you’re camping or parked at home. It takes 30 minutes and prevents 80% of problems.
Also Read:- How to Charge RV Battery with Solar: Complete Guide + Calculator
Week 1: Visual Inspection
Time: 10 minutes
Panels:
- Walk around your RV and look for obvious damage—cracks, loose mounting bolts, bird droppings, tree sap, or dust buildup
- Check mounting hardware (bolts, clamps, brackets) for corrosion or looseness—gently tug on each corner
- Look for water pooling under panels (indicates seal failure)
Wiring:
- Visually inspect all exposed DC wiring from panels to charge controller
- Look for cracked insulation, loose connectors, or green corrosion (copper oxidation) on terminals
- Check that all connections are tight (don’t pull hard, but ensure no wiggle room)
Charge Controller & Inverter:
- Ensure vents are clear of dust, cobwebs, or debris
- Check for any unusual sounds (buzzing, clicking, humming)
- Verify LED indicator lights match normal operating mode (varies by brand)
Battery Bank:
- Check battery terminals for corrosion (white, blue, or green crusty buildup)
- Verify all bolts are tight (use a small wrench; hand-tight is not enough)
- Ensure no cables are pinched, cut, or exposed
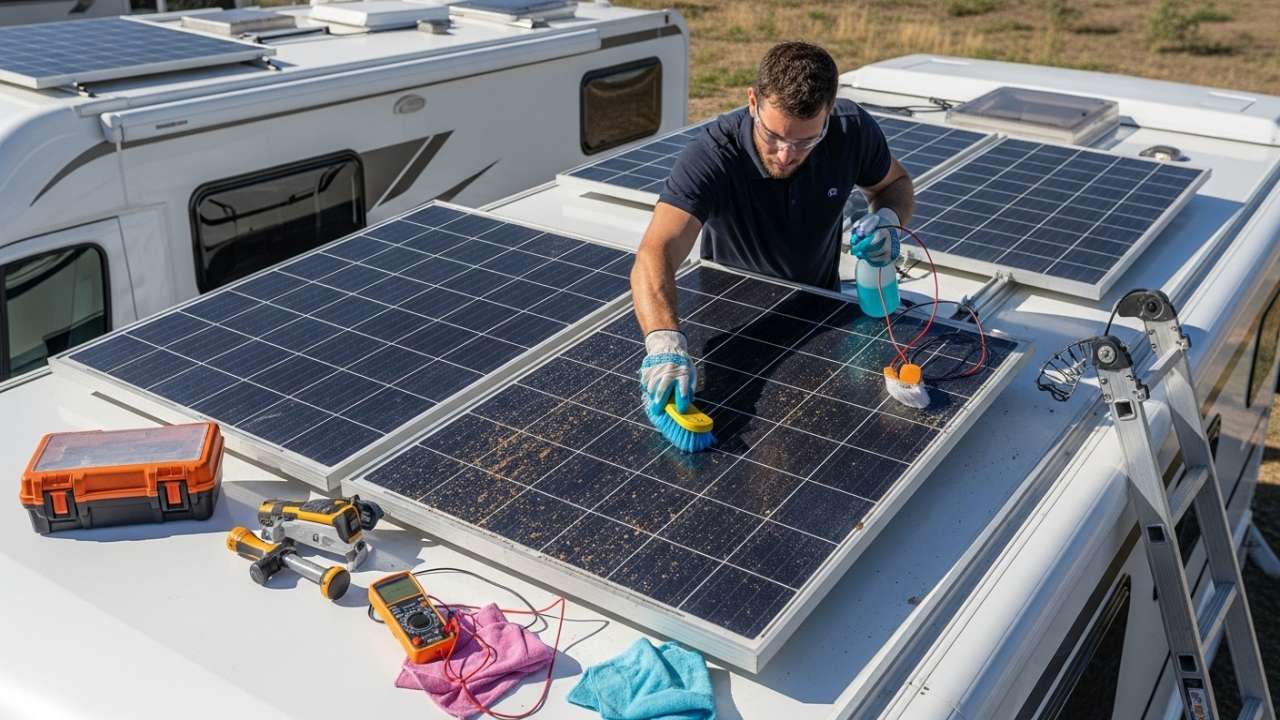
Week 2: Cleaning (Panel Focus)
Time: 15 minutes
Panel cleaning:
- Use distilled water (not tap water—minerals leave residue) and a soft brush or squeegee
- Spray panels with water, then gently scrub with brush
- Rinse thoroughly with clean water
- Dry with a microfiber cloth (prevents water spots)
- Timing: Morning or late evening (not midday—thermal shock can crack glass)
Why: Even light dust reduces RV solar panel output by 10–15%. This is the single most impactful maintenance task.
Frequency: Every 2–4 weeks if you’re actively camping. More often in dusty/pollen-heavy areas.
Week 3: Electrical Connections
Time: 10 minutes
DC terminals (battery, controller, inverter):
- If corrosion visible: disconnect battery, scrub terminals with a wire brush until shiny, reconnect
- Tighten all bolts (use appropriate wrench size—don’t overtighten)
- Apply a thin layer of dielectric grease (prevents future corrosion)
Breaker/fuse inspection:
- Look at inline DC breakers/fuses (between panels and controller, controller and battery, battery and inverter)
- Ensure they’re seated properly in holders
- If blown (black or damaged), replace with same amperage—never oversized
AC wiring (inverter to appliances):
- Check for loose plugs, frayed cords, or water damage
- Ensure nothing is pinched under cabinets or furniture
Week 4: System Performance Check
Time: 10 minutes
Battery voltage at rest (no charging, no loads running):
| Battery Type | Healthy Voltage | Warning (Investigate) | Critical (Act Now) |
|---|---|---|---|
| 12V lead-acid | 12.6–12.8V | 12.4V | <12.2V |
| 24V lead-acid | 25.2–25.6V | 24.8V | <24.4V |
| 12V lithium | 13.2–13.4V | 12.8V | <12.6V |
| 48V lithium | 52.8–53.6V | 51.2V | <50.4V |
If voltage is low: Check that panels are producing (sunny day, controller showing charge mode). If panels work but battery won’t charge, controller or wiring may be faulty—investigate further or contact technician.
Charge controller display:
- Verify it shows current amperage input from panels (should be >5A on sunny day)
- Check battery voltage reading matches your multimeter or battery monitor
- Confirm charging mode is appropriate (bulk, absorption, or float depending on battery state)
Inverter:
- Test a small AC load (plug in a lamp, run for 1 minute)
- Listen for any unusual sounds
- Check display for error codes (consult manual if any codes appear)
Seasonal Deep Maintenance (4x Per Year)
Beyond monthly checks, each season demands deeper attention. These tasks prevent major failures and extend component lifespan by years.
Spring Maintenance (March–May)
Time: 2–3 hours
After winter, your RV solar system may have suffered temperature swings, moisture accumulation, and corrosion. Spring maintenance wakes it back up.
Battery deep check:
- Lead-acid only: Check water levels in each cell (if flooded type). Top off with distilled water to ½ inch below cell opening.
- All types: Measure specific gravity (flooded lead-acid only, using hydrometer). Healthy: 1.265 or higher. Low: battery may be sulfated.
- Lithium: Check BMS (battery management system) error log via display or app. Clear any old warnings.
Panel inspection & deep clean:
- Remove panels if possible and inspect undersides for water intrusion, corrosion, or delamination
- Deep clean: use mild soap (car wash diluted) and soft brush, then rinse thoroughly
- Inspect seals around panel edges for cracks or separation
- Reinstall and re-torque mounting bolts
Wiring & connectors:
- Disconnect panels at combiner box (if present) and inspect for corrosion inside
- Clean any corroded connectors with contact cleaner and wire brush
- Reconnect with dielectric grease applied to terminals
Charge controller:
- Remove any dust from vents using compressed air (blow outward, not inward)
- Check fan operation (some controllers have cooling fans)
- Verify temperature sensor is not blocked or damaged
Inverter:
- Deep clean vents and fan (compressed air)
- Check AC wiring for any signs of heat damage (melted insulation, discolored wires)
- Test AC circuits by running several loads simultaneously for 30 minutes
System performance test:
- On a sunny day, measure panel output voltage and amperage at controller
- Verify battery charges to 100% by mid-afternoon
- Test inverter at 50%, 75%, and 100% load, watching for voltage sag or error codes
Also Read:- RV Air Conditioner Not Working? Troubleshoot & Fix in 30 Minutes (No Technician
Summer Maintenance (June–August)
Time: 2–3 hours
Summer heat stresses every component. Proactive cooling and inspection prevent thermal failure.
Heat management for batteries:
- Lead-acid: If battery compartment exceeds 100°F, add ventilation (drill holes, install vent fan)
- Lithium: Most LiFePO₄ batteries shut down at 140–150°F. Ensure air circulation. Add reflective covers if in direct sun.
- Measure battery temperature daily (use infrared thermometer). If exceeding safe limits, reposition or add shade.
Panel efficiency check:
- Measure panel output on a 95°F+ day
- Compare to rated capacity
- If output is <70% of rated (accounting for angle and dust), investigate heat issues or panel damage
Dust management (critical in summer):
- Clean panels weekly (not just monthly)
- In dry/dusty climates (Arizona, New Mexico, etc.), 2–3x per week
- Use distilled water only; mineral deposits on glass reduce transmission 3–5%
Inverter cooling:
- Run AC loads during peak heat hours (1pm–5pm) and monitor inverter temp
- If it throttles or shuts down due to overheating, install cooling fan or relocate to shadier spot
- Ensure inverter vents aren’t blocked by cabinets or insulation
Connection tightness check:
- Heat causes metal to expand, loosening bolted connections
- Re-tighten all DC terminals and bolts (especially battery posts)
- Check breaker/fuse holders for any looseness
Water intrusion inspection:
- After any rain, inspect all electrical enclosures for moisture
- If water present, dry immediately and check for corrosion inside
- Ensure gaskets and seals are intact; replace if cracked
Fall Maintenance (September–November)
Time: 2–3 hours
Fall is preparation time. Get systems ready for winter’s lower sunlight and temperature swings.
Battery capacity assessment:
- Lead-acid: Load test (optional, but valuable). Discharge to 50% with known load, then measure recharge time. Healthy battery: 12+ hours to full from 50%. Weak: <6 hours.
- Lithium: Check displayed capacity in battery monitor or BMS app. Should be within 95%+ of rated capacity. If degraded >20%, investigate (may need replacement).
Panel angle adjustment (for winter production):
- If you have adjustable mounts: increase tilt angle from summer 15–25° to winter 40–50°
- Fixed mounts: ensure not blocked by winter snow/ice accumulation risk
- Calculate optimal angle for your latitude (rule of thumb: latitude + 15° for winter)
Winterization prep:
- Locate all water drains in system (some charge controllers, inverters have moisture vents)
- Plan for freeze protection if in cold climate (antifreeze, heater tape, or shelter)
- Ensure battery bank is in insulated/protected location
Connector inspection for freeze:
- Wet connectors can freeze and crack in extreme cold
- Ensure all terminals are dry and corrosion-free
- Apply dielectric grease (water-resistant) to all connections
System stress test:
- Deliberately run high loads (inverter + water pump + heater) simultaneously
- Monitor battery voltage sag (should recover within 30 seconds of reducing load)
- Watch for any breaker trips or error codes
- Verify inverter doesn’t overheat or throttle
Winter Maintenance (December–February)
Time: 1–2 hours (monthly)
Winter is the hardest season for RV solar systems. Shorter days, lower sun angles, and cold temperatures all reduce output. Maintenance focuses on maximizing what little energy you have.
Battery care in cold:
- Cold reduces battery capacity temporarily (20–50% reduction at freezing temps)
- Keep battery warm if possible (insulation, location in heated RV area, heat tape)
- Check charge completion time—may take 2–3x longer in winter
- Avoid deep discharges (<20% battery remaining) in cold weather
Panel snow/ice management:
- After snow: remove immediately (don’t let sit >1 day)
- Use soft broom or plastic scraper (never metal, which scratches glass)
- Early morning before sun softens snow: easier removal
- Angle panels steeper in winter (helps shed snow, and optimal for low sun angle anyway)
Reduced power consumption:
- Winter sunlight is precious. Limit AC use, reduce heating load, run essential loads only
- This isn’t maintenance, but essential to avoid running out of power
Connection check after cold snaps:
- Extreme temperature swings cause metal fatigue and loosening
- After any hard freeze: re-tighten all bolts and connections
- Check for any cracked insulation (becomes brittle in cold)
System efficiency monitoring:
- On the rare sunny winter day, measure actual charge amps from panels
- If significantly lower than expected, dust/ice on panels is likely culprit
- Clean immediately
Monthly battery voltage check:
- Winter: check battery voltage at rest (no charging, no loads) every 2 weeks
- If the voltage drops gradually, the battery may be losing capacity or sulfating (lead-acid)
- If it drops below the warning thresholds, stop using and investigate
Also Read:- How to Fix RV Plumbing: Leaks, Clogs, Low Pressure & Frozen Pipes
Component-Specific Deep Maintenance (Annual or As-Needed)
Some maintenance tasks don’t fit into seasonal cycles. Do these once yearly or when performance degrades.
Annual Solar Panel Maintenance
Full panel inspection & servicing: 2–3 hours
Remove panels (if roof-mounted and accessible):
- Unbolt from mounting brackets
- Inspect undersides for water damage, delamination, or corrosion inside junction box
- Check all seals for cracks or separation
Clean with deep detail:
- Use mild detergent (car wash) and soft brush on both sides
- Rinse with distilled water
- Inspect glass for micro-scratches (reduce transmission 1–2%)
- Dry completely with microfiber cloth
Electrical inspection:
- Open junction box (if accessible without breaking seals)
- Look for corrosion, loose wires, or discoloration
- If water visible inside, panel is compromised—consider replacement
- Measure output voltage and amperage vs. STC (Standard Test Conditions)
- If <80% of rated, panel may be failing
Mounting inspection:
- Check all bolts, clamps, and brackets for corrosion
- Replace any rusted hardware with stainless steel equivalents
- Ensure gaskets under brackets are intact (prevents water intrusion)
Reinstall:
- Apply new sealant (silicone or polyurethane) under mounting feet
- Re-bolt, tighten firmly (but don’t strip)
- Apply dielectric grease to all terminals
Annual Charge Controller Maintenance
Time: 1 hour
External inspection:
- Blow out all vents with compressed air (outward only)
- Clean exterior with dry cloth
- Check all wire connections for looseness and corrosion
Performance check:
- On sunny day, measure input voltage from panels and output voltage to battery
- Verify charging current matches controller capacity (e.g., 60A controller should deliver 50–60A in good conditions)
- If underperforming, controller may be faulty (requires replacement)
Temperature sensor test:
- Some controllers have external temp sensors (for battery temperature compensation)
- Verify sensor is making contact with battery case or enclosure
- Test by moving sensor: charge current should adjust slightly (indicates sensor working)
Firmware update (if available):
- Check manufacturer website for firmware updates
- Some MPPT controllers allow updates (Victron, Epever, etc.)
- Update if available (improves efficiency, fixes bugs)
Internal inspection (advanced):
- Only if comfortable with electronics: open controller enclosure and inspect for corrosion, loose components
- Use compressed air to blow out dust
- Reseal with silicone before closing
Annual Battery Bank Maintenance
Time: 2–3 hours
Lead-acid specific:
- Equalize batteries (if flooded type): specialized charging cycle that balances cell voltages
- Perform once yearly or if specific gravity readings vary >0.030 between cells
- Consult battery manual for equalization procedure (varies by brand)
- Load test: discharge known load, measure recharge time (healthy: full charge in 12+ hours from 50%)
Lithium specific:
- Check battery management system (BMS) via app or display
- Review cycle count (number of charge/discharge cycles)
- Expected degradation: <3% per year (8–10 year lifespan for premium batteries)
- If degradation >10% annually, battery is failing or charging profile is wrong
All battery types:
- Disconnect and deep clean all terminals (wire brush + contact cleaner)
- Inspect for any cracks, leaks, or bulging (sign of failure—replace immediately)
- Measure specific gravity (lead-acid flooded) or resting voltage (all types)
- Verify all hold-down clamps are secure
Battery bank replacement planning:
- Lead-acid: if >3–5 years old and showing low capacity, budget for replacement
- Lithium: if >8–10 years old, start planning for replacement
- Upgrade opportunity: replace lead-acid bank with lithium (costs more upfront, but lasts 2–3x longer)
Annual Inverter Maintenance
Time: 1.5–2 hours
External inspection:
- Clean all vents and fan (compressed air, blowing outward)
- Wipe exterior with dry cloth
- Check for any signs of heat damage (discoloration, melted plastic, burnt smell)
AC wiring inspection:
- Inspect all AC cables for insulation damage, melting, or corrosion
- Test outlets with multimeter (verify 120V or 240V as applicable)
- Load test: run high loads (microwave, space heater, etc.) for 30+ minutes
- Monitor inverter temperature and voltage output (should remain stable)
Performance testing:
- At 25%, 50%, 75%, 100% load, measure:
- Input DC voltage (should remain stable)
- Output AC voltage (should stay ±5% of rated)
- Current draw (should match load expectations)
- Inverter temperature (should not exceed 130°F)
Cooling fan check:
- If inverter has cooling fan: run at full load, listen for fan engagement
- If fan doesn’t spin, motor may be seized—requires cleaning or replacement
- Verify fan vents aren’t blocked
Firmware update (if available):
- Check manufacturer site for updates
- Some modern inverters (Victron, Magnum, Outback) support updates
- Update if available (improves efficiency, fixes bugs)
Also Read:- RV Slide Out Stuck or Not Working? 6 Fixes That Work Now
Troubleshooting Guide: When Something Goes Wrong
Even with perfect maintenance, issues happen. Here’s how to diagnose and fix common RV solar system problems.
Problem 1: Panels Not Producing (Sunny Day, Should Be Working)
| Diagnosis | Check | Solution |
|---|---|---|
| Dust/dirt on panels | Look at panel surface; visibly dirty? | Clean immediately with distilled water |
| Shade on panels | Check for shadows from RV, trees, poles | Reposition RV or panels; trim branches |
| Panel angle suboptimal | Is panel nearly flat? (should be 20–50° depending on season) | Adjust mount angle; steeper in winter |
| Breaker/fuse blown | Check inline breaker between panels and controller; is it tripped? | Reset breaker; if trips again, investigate short circuit |
| Controller malfunction | Does controller display show anything? Any error codes? | Restart controller; if errors persist, contact manufacturer |
| Wiring loose/corroded | Visually inspect panel to controller wiring for loose connectors or green corrosion | Tighten connections; clean corroded terminals |
| Panel glass damage | Look for cracks, cloudy spots, or internal delamination | If major crack: panel is failing, consider replacement |
Problem 2: Battery Not Charging (Controller Shows Input, Battery Voltage Low)
| Diagnosis | Check | Solution |
|---|---|---|
| Battery terminals corroded | White/blue/green crusty buildup on posts? | Disconnect, scrub with wire brush, reconnect with dielectric grease |
| Wiring connection loose | Gently tug on battery cable connectors; any movement? | Tighten bolts (battery posts should be hand-tight minimum) |
| Battery faulty (lead-acid) | Is battery >5 years old? Does voltage not rise despite hours of charging? | Load test or replace; battery may be sulfated |
| Battery faulty (lithium) | Does battery BMS show errors? Low voltage alarm? | Check BMS error log; may require replacement |
| Charge controller faulty | Does controller show voltage input from panels but no charging current output? | Reset controller; if persists, controller may be faulty (requires replacement) |
| Breaker between controller and battery blown | Check inline breaker (typically 100–200A) | Replace with same amperage; if blows again, short circuit exists (investigate wiring) |
Problem 3: Inverter Shuts Off Under Load
| Diagnosis | Check | Solution |
|---|---|---|
| Battery voltage too low | What’s battery voltage when inverter shuts off? Is it <11.5V? | Don’t run inverter when battery <20% charged; charge first |
| Inverter overheating | Is inverter hot to touch? Any thermal alarm on display? | Move inverter to cooler, better-ventilated location; reduce loads |
| Load too high | What’s the wattage of loads you’re running? Does it exceed inverter rating (usually 2,000–3,000W continuous)? | Reduce simultaneous loads; space out high-draw devices |
| Loose AC wiring | Check all AC connections (input/output) for looseness or corrosion | Tighten all connections; replace any corroded contacts |
| Inverter faulty | Does inverter shut off even on light loads? Any error codes? | Reset inverter; if persists, inverter may be faulty (requires replacement) |
Problem 4: Rapid Battery Discharge at Night (Battery Drains Faster Than Expected)
| Diagnosis | Check | Solution |
|---|---|---|
| Excessive loads | What devices are running overnight? (heater, fridge, water pump, inverter standby draw?) | Reduce nighttime loads; turn off non-essentials |
| Inverter parasitic drain | Is inverter on standby (drawing 40–80W even when not in use)? | Turn inverter off when not needed for extended periods |
| Battery old/failing | Is battery >3–5 years (lead-acid) or >8+ years (lithium)? | Test capacity; likely battery is degraded, requires replacement |
| High DC loads | Any 12V loads running continuously (fans, water pump, fridge)? | Audit all 12V circuits; disable unnecessary night loads |
| Parasitic drain from monitoring equipment | Do you have battery monitor, shunt, or other devices always on? | Verify draw is <5W; excessive monitors can drain 50+ watts |
RV Solar Maintenance Cost & Time Summary
| Task | Details |
|---|---|
| Panel Cleaning | Frequency: Monthly (2–4 weeks) • Time: 15 min • Cost: $0 • Impact: High (10–15% efficiency gain) |
| Terminal Inspection & Tightening | Frequency: Monthly • Time: 10 min • Cost: $0 • Impact: High (prevents corrosion, fire risk) |
| Voltage & Performance Check | Frequency: Monthly • Time: 10 min • Cost: $0 • Impact: Medium (catches issues early) |
| Deep Panel Clean | Frequency: Quarterly • Time: 45 min • Cost: $0 • Impact: High (maintains peak output) |
| Battery Maintenance (Lead-Acid Water Top-Off) | Frequency: Quarterly • Time: 15 min • Cost: $5 • Impact: High (prevents sulfation) |
| Wiring & Connection Check | Frequency: Quarterly • Time: 30 min • Cost: $0 • Impact: High (ensures safety) |
Also Read:- Why Your RV Electrical System Fails (And How to Fix It Without a Technician)
Solar Annual Maintenance
| Task | Details |
|---|---|
| Annual Panel Inspection & Servicing | Frequency: Yearly • Time: 2–3 hours • Cost: $0–$100 • Impact: High (extends lifespan) |
| Charge Controller Maintenance | Frequency: Yearly • Time: 1 hour • Cost: $0 • Impact: Medium (keeps efficient) |
| Battery Deep Servicing | Frequency: Yearly • Time: 2–3 hours • Cost: $0–$50 • Impact: High (extends lifespan 1–2 years) |
| Inverter Maintenance | Frequency: Yearly • Time: 1.5–2 hours • Cost: $0 • Impact: Medium (prevents failure) |
Total annual time investment: 15–20 hours Total annual cost: $5–$150 (mostly optional) Return on investment: $8,000–$15,000 (avoided replacement costs)
Real-World Example: Sarah’s RV Solar System
Sarah has a 600W RV solar panel array, 400Ah lithium battery, and 3,000W inverter. She camps 2–3 weeks per month.
Month 1 (skips maintenance):
- Panels accumulate dust from a dry region
- Output drops to ~400W
- Battery takes 2+ hours longer to charge
- Inverter starts thermal throttling in afternoons
Month 2 (realizes issue, starts maintenance):
- Cleans panels weekly
- Tightens all connections
- Relocates inverter to shadier spot
- Output recovers to 550W
- Battery charges on schedule
- Inverter no longer throttles
Cost to Sarah:
- Month 1 “loss”: ~20 hours of charging downtime, reduced ability to run AC loads
- Month 2 “fix”: 2 hours of labor, $0 cost
- Lesson: 2 hours of maintenance > 20 hours of headaches
FAQ:
Q: How often should I clean RV solar panels?
A: Every 2–4 weeks in normal conditions. More often if dusty/dry climate (weekly), less often if clean area (monthly). After dust storms: same day. Rule of thumb: if you can see dirt, it’s time to clean.
Q: Can I use tap water to clean panels?
A: Not ideal. Tap water leaves mineral deposits that reduce light transmission by 1–3%. Use distilled water. If only tap available: rinse well with distilled after, or use pure water rinse at end.
Q: What’s the best time of day to clean panels?
A: Early morning (6–8am) or late evening (5–7pm). Avoid midday—heat differential between hot panel and cool water can crack glass. Cool panel first by misting, then wash, then rinse.
Q: Do I need a special tool to clean panels?
A: No. Soft brush, squeegee, and distilled water in a spray bottle. Avoid abrasive pads, pressure washers, or hard brushes—can scratch glass. Microfiber cloth for drying.
Q: How long does a battery last if I maintain it?
A: Lead-acid: 3–5 years. Lithium: 8–10 years. With perfect maintenance: add 1–2 years. With negligence: subtract 50%.
Q: Is lithium battery worth the maintenance compared to lead-acid?
A: Yes. Lithium requires less maintenance (no water top-off, equalization), lasts 2–3x longer, and charges faster. Initial cost is 3–5x higher, but over 10 years, lithium is cheaper.
Q: Can I maintain my RV solar system myself, or do I need a technician?
A: 95% you can do yourself (cleaning, tightening, visual checks). 5% you may need help: electrical troubleshooting, component replacement, firmware updates. For those: hire a tech or contact manufacturer support.
Q: What’s the most important maintenance task?
A: Cleaning RV solar panels. Dust reduces output 10–15% per month. A 15-minute cleaning restores efficiency—best ROI on your time.
Q: Do I need to maintain my system differently in summer vs. winter?
A: Yes. Summer: focus on heat management, frequent cleaning, shade. Winter: focus on maximizing output (angle adjustment), keeping batteries warm, managing reduced charge capacity.
Q: What happens if I don’t maintain my system?
A: Month 1–3: reduced efficiency (10–30% output loss). Month 3–6: component failures (corroded terminals, overheated controller). Month 6+: complete system failure ($8,000–$15,000 replacement cost).
Conclusion:
Your RV solar & power system is a $5,000–$15,000 investment. Protecting it costs almost nothing: 15–30 minutes per month, free supplies (distilled water, dielectric grease, wire brush). The alternative—neglect—costs thousands in repairs or replacements, plus the misery of being stranded without power.
The good news? RV solar maintenance is simple. Clean panels monthly, check connections monthly, monitor performance, and follow seasonal deep-dives. Do this, and your system runs flawlessly for 10–15 years. Skip it, and you’ll be shopping for new batteries by year two.
Start with next month’s maintenance schedule. Set phone reminders for panel cleaning (every 2 weeks) and connection checks (monthly). After a few cycles, it becomes routine. Then you’ll forget you ever had power problems—because you won’t.
Your future off-grid camping self will thank you.