I still remember the day I first considered adding solar panels to my RV. It was 2019, and I’d just spent $400 on a generator that barely lasted two camping seasons. My buddy Mark had installed solar on his Airstream the year before, and honestly, I was skeptical. But when I saw him boondocking comfortably for weeks without needing a hookup, I knew I had to try it myself.
Back then, information online was scattered and confusing. I made a few expensive mistakes during my installation—like buying the wrong gauge wire and having to replace it all—but I learned a ton in the process. Today, I want to share what I’ve learned from installing solar on three different RVs over the past five years, plus insights from talking to other RV owners in my local boondocking community.
Why I Decided to Go Solar (And Why You Should Consider It Too)
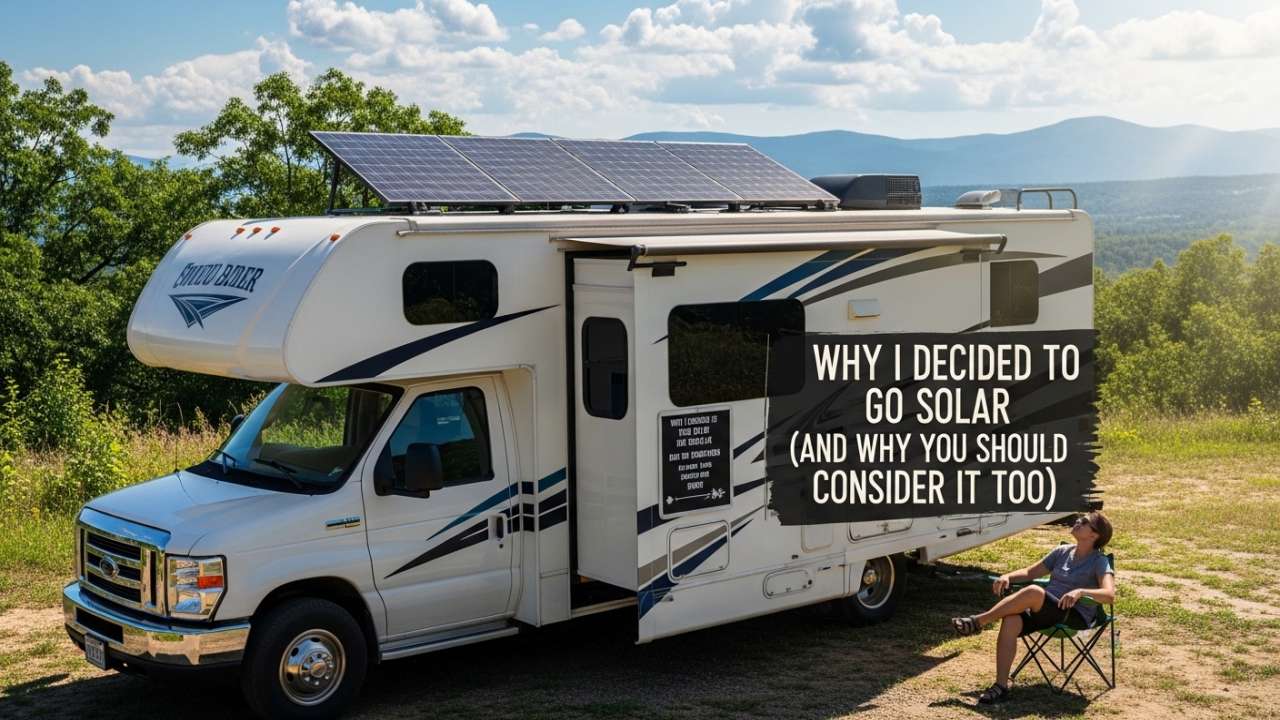
Let me be honest: the upfront cost is real. My complete 400-watt system with lithium batteries set me back around $6,500. But let me break down why that investment made sense for me.
Before solar, I was paying $35-$50 per night for an RV park with full hookups. During peak season (May through September), that adds up fast. I was also spending about $80-$100 per month on generator fuel and regular maintenance costs for my generator.
After going solar, I can boondock indefinitely as long as I have sunlight. In the last three years, I’ve cut my camping expenses by roughly 60%. But more than the money—and this might sound cheesy—there’s something special about waking up in the middle of nowhere, knowing your power is coming from the sun above you.
Here’s what I’ve noticed other RVers mention most:
- Freedom to camp anywhere: No more waiting for that one RV park with open sites
- Real cost savings: The money I save on hookup fees pays for the system
- Peace and quiet: No generator noise early in the morning
- Environmental peace of mind: I’m not burning fossil fuels on every trip
- Better resale value: When I eventually sell this RV, the solar system adds real value
Also Read:- RV Solar System Setup Complete Beginner’s Guide (2026)
Let’s Talk Reality: What You Actually Need to Know Before Starting
Before I even bought a single solar panel, I spent two weeks tracking my actual power usage. This was the most important step I took, and I wish I’d done it right from the start instead of guessing.
Understanding Your Power Consumption: The Real Numbers
I sat down with a notebook and went through every electrical item in my RV:
| Device | Daily Usage | Watts | Total Wh/Day |
|---|---|---|---|
| LED Interior Lights | 5 hours | 40W | 200 Wh |
| Ceiling Fan | 6 hours | 30W | 180 Wh |
| Water Pump | 45 min | 50W | 37.5 Wh |
| Dometic Fridge | 18 hours | 150W | 2,700 Wh |
| iPhone Charging | 2 hours | 10W | 20 Wh |
| Laptop | 4 hours | 50W | 200 Wh |
| Bathroom Vent Fan | 2 hours | 20W | 40 Wh |
| TOTAL | 3,377.5 Wh |
My actual daily consumption was around 3.4 kilowatt-hours. This surprised me—I thought it would be less because I don’t use AC power devices much. The refrigerator was the biggest power hog, followed by my lights and devices.
Figuring Out What Size System You Actually Need
This is where a lot of people make mistakes. They look at their daily consumption and buy just enough panels to match it. That doesn’t work in the real world, unfortunately.
Here’s why: solar panels don’t produce at rated capacity every single day. A 100-watt panel might produce only 50 watts on a cloudy day. In winter, even in sunny locations, the sun angle is lower and days are shorter. If you’re camping in northern regions or during winter months, your production drops significantly.
For my needs, I calculated:
- Daily consumption: 3,400 Wh
- Multiply by 2 (to account for weather and seasonal variations): 6,800 Wh
- I needed panels that could produce roughly 6,800 watts during optimal conditions
This is why I went with four 100-watt panels (400 watts total). In perfect summer conditions, they produce about 400 watts. In real conditions averaged across the year, they produce about 250-280 watts on average days.
For my battery bank, I wanted to go 3 days without sun (this is important for cloudy stretches or winter trips). So I needed:
3,400 Wh × 3 days = 10,200 Wh total battery capacity
I ended up with a 10kWh lithium battery system (specifically, four 2.56kWh LiFePO4 batteries). Some people use lead-acid batteries instead, which are cheaper upfront but need replacement every 4-5 years.
System Sizing Guidelines
| Usage Level | Daily Consumption | Panel Capacity | Battery Bank | Budget |
|---|---|---|---|---|
| Light (boondocking weekends) | 1,500-2,000 Wh | 300-400W | 3-5 kWh | $3,000-4,000 |
| Moderate (regular trips) | 3,000-4,000 Wh | 400-600W | 6-8 kWh | $4,500-6,500 |
| Heavy (full-time living) | 5,000+ Wh | 800W+ | 10+ kWh | $8,000+ |
| Off-grid homestead | 10,000+ Wh | 2000W+ | 20+ kWh | $15,000+ |
The Components You’ll Need: Getting Technical Without the Headaches
I remember opening my first charge controller and thinking, “What the heck am I looking at?” Let me break down each component in a way that actually makes sense.
The Solar Panels: Your Power Generators
The panels are the easy part to understand. They sit on your roof and convert sunlight into electricity. What matters is:
Wattage rating: Usually 100W, 200W, 300W, or 400W. Higher wattage = more power but heavier and more expensive.
Type:
- Monocrystalline (what I have): More efficient, black color, typically 18-22% efficient. Best for RVs since space is limited.
- Polycrystalline: Less efficient, blue color, around 15-17% efficient. Cheaper but needs more roof space.
- Flexible panels: Light and bendable, good for curved RV roofs. Less efficient than rigid.
The most common choice for RVers is rigid monocrystalline panels because they give you the most watts per square foot.
The Charge Controller: The Brain of Everything
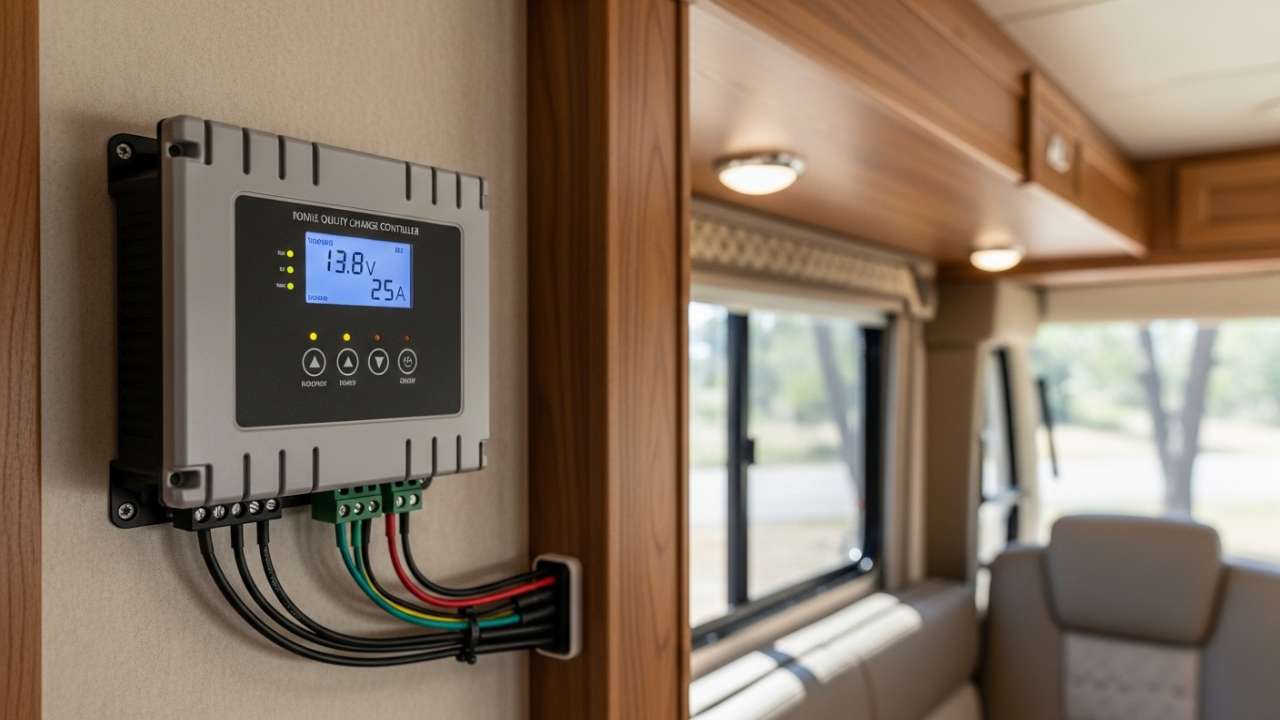
This device is non-negotiable. You absolutely cannot connect solar panels directly to your batteries. Period. The charge controller prevents your batteries from overcharging and potentially exploding (yes, that can happen).
There are two types:
PWM (Pulse Width Modulation) Controllers
- Simpler technology
- Works well with 12V systems
- Much cheaper ($200-400)
- Best for: Small systems (1-2 panels), parallel wiring
- Limitation: Less efficient with series wiring
MPPT (Maximum Power Point Tracking) Controllers
- More sophisticated electronics
- Can extract 25-30% more power from panels than PWM
- More expensive ($600-1,200)
- Best for: Larger systems (3+ panels), series or series-parallel wiring
- Worth it if: You want maximum efficiency from your investment
I used an MPPT controller (a Victron SmartSolar 150/35), and honestly, it was one of the best decisions I made. The extra efficiency means my panels produce noticeably more power, especially in marginal weather conditions.
Batteries: Where Your Power Actually Comes From
Panels collect energy during the day. Batteries store it for when you need it at night or during cloudy periods.
Lead-Acid Batteries (traditional):
- Cost: $1,500-2,500 for a 400Ah system
- Lifespan: 4-6 years with good maintenance
- Depth of Discharge: Can only use 50% safely (400Ah bank usable = 200Ah)
- Maintenance: Need checking and equalization
- Weight: About 200 lbs
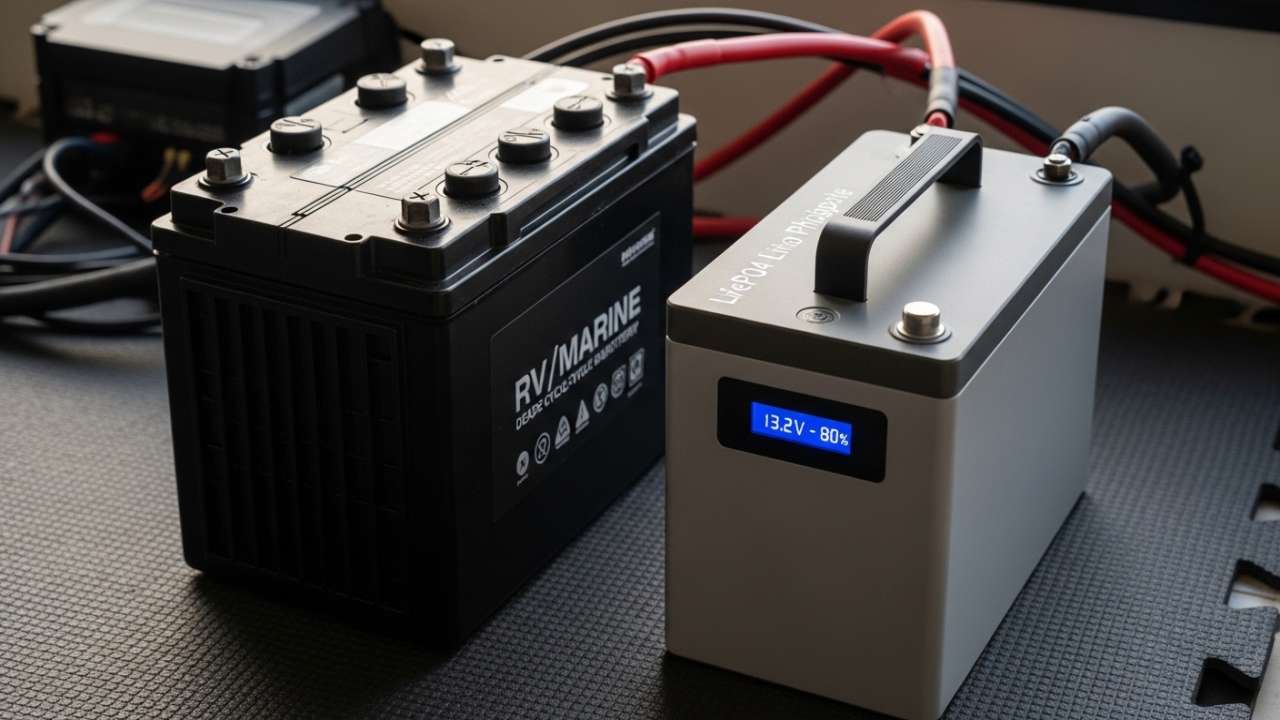
Lithium Batteries (modern):
- Cost: $4,000-6,000 for equivalent capacity
- Lifespan: 10+ years (often outlives the RV)
- Depth of Discharge: Can use 80-90% safely (400Ah bank usable = 350Ah)
- Maintenance: Virtually none
- Weight: About 80 lbs (much lighter)
I switched to lithium after five years with lead-acid. Yes, it was expensive. But I no longer have to check specific gravity, water levels, or worry about terminal corrosion. The weight savings also improved my RV’s handling. Plus, the real usable capacity is much higher.
The Other Essential Stuff
Fuses and Breakers: These protect your system from electrical fires and component damage. You need them in three places:
- Between panels and the charge controller (solar input protection)
- Between the charge controller and the battery (battery protection)
- Between the battery and the inverter (if you install one)
Wiring and Connectors: Use marine-grade or solar-rated cables. Never skimp here. Cheap wiring gets hot and can cause fires.
MC4 Connectors: The standard in solar. They’re waterproof and rated for the current flowing through them.
Getting Your Hands Dirty: The Actual Installation
Step 1: Planning Your Panel Placement
I spent a Saturday morning just looking at my RV roof from different angles. Sounds silly, but it’s important.
Most RV roofs have structural ribs that run the length of the vehicle. You want to mount your panels on these ribs for structural support—they’re typically spaced 16 inches apart and run the full length of the roof.
Check for obstructions:
- Will trees shade the panels when parked? (Trees are a bigger problem than you’d think)
- Is there an air conditioning unit or roof vent in the way?
- How much usable roof space do you actually have?
- Can you route wiring to your interior without creating ugly cable runs?
For my RV, I mounted two panels on one side and two on the other, spreading the load across the roof. This also means if one side gets shaded, I still get power from the other side.
Step 2: Mounting the Panels (And Actually Sealing It)
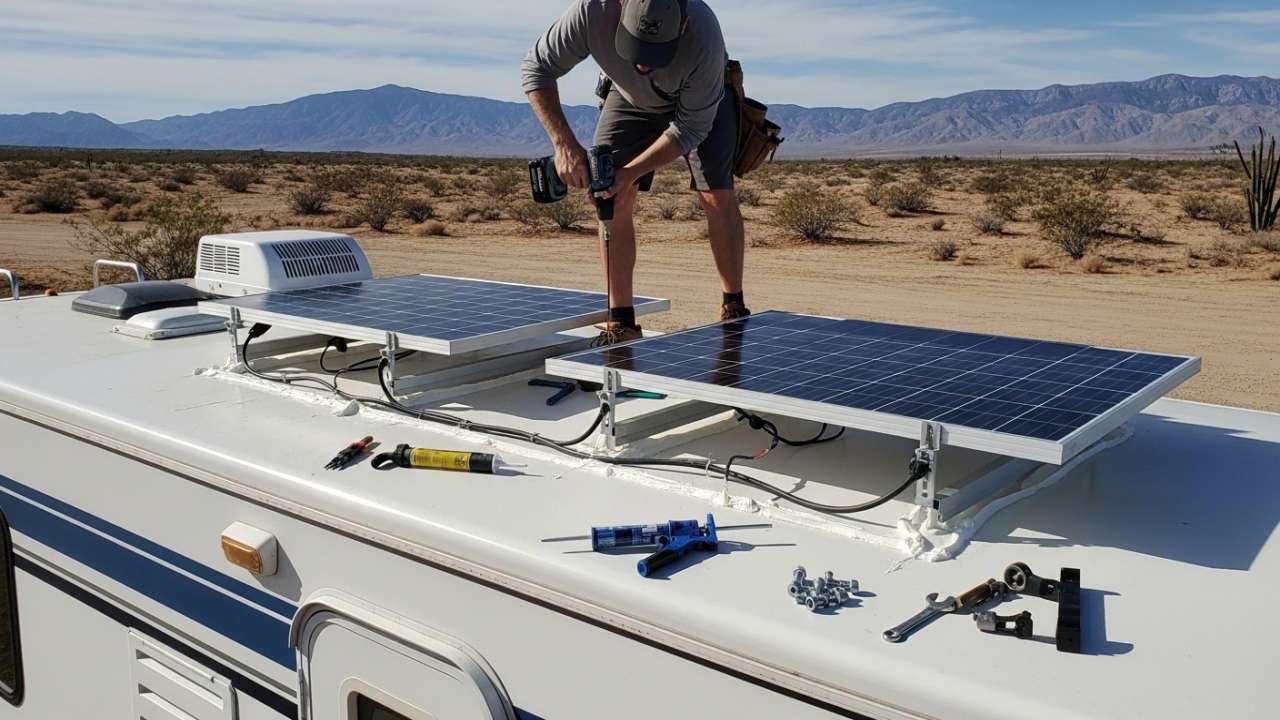
This is where most people’s roof leaks start. I’m serious. Poor sealing here creates problems you won’t notice for months until you see water stains on your ceiling.
What You’ll Need:
- Mounting brackets (L-brackets or Z-brackets, $30-50 per pair)
- Stainless steel bolts, washers, and lock nuts
- Dicor self-leveling sealant (this is critical—don’t use regular caulk)
- Butyl tape for gaskets
- Drill and bits
- Socket wrench
The Process:
- Mark your locations: Use a carpenter’s pencil to mark where your brackets will go, aligned with roof ribs.
- Drill pilot holes: This is important. A small pilot hole (about 1/8″) prevents the metal from cracking when you install the bolt.
- Seal before bolting: Put a small amount of Dicor in each pilot hole. This creates a waterproof seal around the bolt.
- Install brackets: Use stainless steel hardware only. Regular steel rusts, even if it’s galvanized.
- Add butyl tape: Run butyl tape around the bottom of the mounting rail before setting the panel in place. This adds another layer of water protection and helps with vibration dampening on rough roads.
- Mount the panels: Secure the panel to the brackets using the provided hardware. Tighten securely but don’t strip the bolts.
- Seal the whole area: Apply a generous bead of Dicor around all the mounting brackets. Make it look neat—this stuff is visible and ugly if applied sloppily.
- Let it cure: Dicor takes 24 hours to fully cure. Don’t touch the panels until it’s fully dry.
Pro tip: I made the mistake on my first installation of doing this work in direct sunlight. The Dicor cured unevenly and actually cracked. Do this work in shade or wait until evening when the sun is low. Also, if it rains within 24 hours, you might need to reapply.
Also Read:- Jackson Hole RV Solar Mountain Weather Performance Guide
Step 3: Routing Wires from Roof to Interior (Without Creating Leaks)
Getting power from your roof panels into your RV’s interior is surprisingly tricky. You need an entry point that doesn’t leak water.
Option A: Use Your Fridge Vent (Most Common)
Your RV probably has an exterior refrigerator vent opening. This opening already exists and is already sealed properly. Why drill a new hole?
- Run your panel wires down alongside your fridge vent
- The vent opening is already large enough to accommodate panel wires
- Minimal additional sealing needed
- This is what I did, and it’s been leak-free for three years
Option B: Use Your Plumbing Stack
Some RVs have a plumbing vent stack (usually on the side of the RV). You can run wires alongside it, though you still need proper sealing.
Option C: Drill a New Penetration (Last Resort)
If neither option works, drill a hole in your RV roof near a cabinet or wall where you can hide the wiring inside. Use a cable entry gland (rubber or plastic fitting designed for this) to seal it properly. This is more complex but sometimes necessary.
The Reality Check: Most roof leaks in RVs come from improper wire penetrations. Take this step seriously. Bad sealing here will cost you thousands in water damage later.
Understanding Solar Panel Wiring: Why It Matters
This is the part where I made my most expensive mistake, so pay attention.
When you have multiple solar panels, you need to decide how to connect them. Your choice affects voltage, amperage, wire costs, and system efficiency.
Wiring Configuration #1: Parallel Wiring
Think of this like multiple water hoses merging into one main hose. All the panels connect independently to a single main wire.
| Aspect | Details |
|---|---|
| Voltage | Stays the same (18V + 18V = 18V) |
| Amperage | Adds together (5A + 5A = 10A) |
| Wire Size Needed | Large/Expensive (thicker wires for high amperage) |
| Shade Tolerance | Good (one shaded panel doesn’t affect others much) |
| Best For | Small systems with 1-2 panels |
| Controller Type | PWM works fine |
Why I didn’t use parallel: When I calculated the wire sizes for four parallel panels at 20 amps total, I needed 6 AWG wire. That’s expensive and thick. I also couldn’t fit it neatly through my fridge vent opening.
Wiring Configuration #2: Series Wiring
This is like connecting panels in a chain. The positive of one connects to the negative of the next, and so on.
| Aspect | Details |
|---|---|
| Voltage | Adds together (18V + 18V + 18V + 18V = 72V) |
| Amperage | Stays the same (5A output regardless) |
| Wire Size Needed | Small/Cheap (thinner wires since amperage is low) |
| Shade Tolerance | Poor (one shaded panel reduces entire string output) |
| Best For | Systems with 3+ panels |
| Controller Type | PWM or MPPT (MPPT preferred) |
Why series wasn’t perfect for me: My RV parks under trees sometimes. If one panel gets shaded by a branch, my entire system output drops. That bothered me.
Wiring Configuration #3: Series-Parallel (What I Actually Used)
You create multiple series strings, then connect those strings together in parallel. Best of both worlds.
| Aspect | Details |
|---|---|
| Voltage | Intermediate (two strings of 2 panels = 36V) |
| Amperage | Intermediate (combines the benefits of both methods) |
| Wire Size Needed | Moderate |
| Shade Tolerance | Better (only one string affected if shaded) |
| Best For | Most RV systems with 4+ panels |
| Controller Type | MPPT preferred |
My actual setup: Two strings of two panels each (2×2 configuration). If shade hits one panel, I lose that string’s output but keep the other string running.
String 1: Panel 1 → Panel 2 (18V + 18V = 36V at 5A) String 2: Panel 3 → Panel 4 (18V + 18V = 36V at 5A) Combined output: 36V at 10A
This gave me good balance between voltage (manageable for my MPPT controller) and amperage (reasonable wire size at 8 AWG).
Also Read:- Wyoming Wind & RV Solar Panels: Protection & Mounting Tips
Installing the Charge Controller
The charge controller needs to be mounted somewhere inside your RV where it’s:
- Cool and well-ventilated
- Away from battery fumes
- Accessible for monitoring
- Protected from physical damage
I mounted mine in my battery cabinet next to the batteries. Some people use an external aluminum enclosure in their basement compartment.
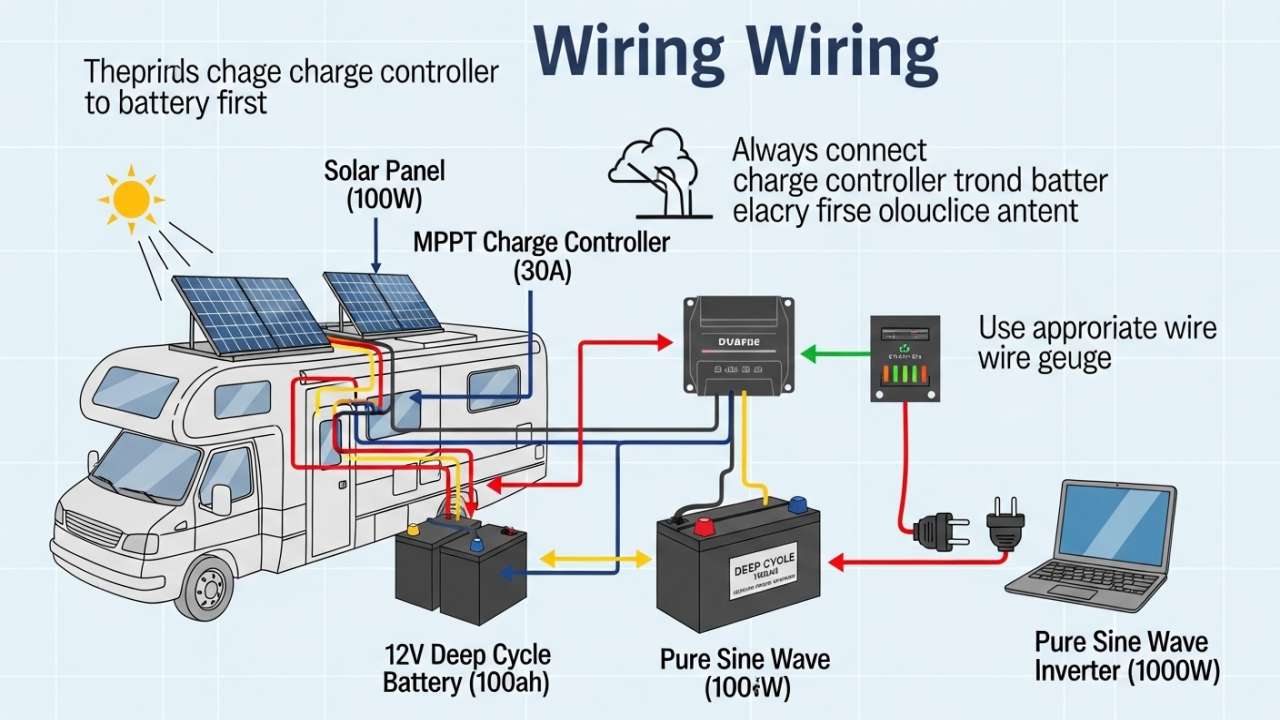
Important sequencing: You must connect the charge controller to your battery bank BEFORE connecting it to the solar panels. This is critical for safety.
Here’s why: The moment sunlight hits your panels, electricity flows out. If the battery isn’t connected to receive that electricity, it has nowhere to go. It’ll either damage the controller or create dangerous electrical conditions. Always battery first, panels second.
Connection steps:
- Turn off all power by disconnecting the negative battery terminal
- Install the charge controller’s negative wire to the battery’s negative terminal
- Install the charge controller’s positive wire to the battery’s positive terminal (with an ANL fuse or breaker rated for your system amperage between them)
- Use a multimeter to verify the battery is connected correctly (positive to positive, negative to negative)
- Tighten all connections so they don’t move
Only after this is completely done should you connect the solar panel wires to the charge controller.
Connecting Your Solar Panels: Understanding Wiring Diagrams
By now, you’ve mounted the panels, routed the wiring, and installed your charge controller. The final step is connecting panels to controller. This is where understanding solar panel wiring diagrams becomes crucial.
Before you make any connections, verify your wiring:
- Mark all positive wires with red tape
- Mark all negative wires with black tape
- Do this on the roof before the wires come off the roof
Double-check your series/parallel configuration:
- Series strings: positive of one to negative of next
- Parallel strings: all positives together, all negatives together
- Use proper MC4 connectors rated for your amperage
Also Read:- Best RV Solar Panels for South Dakota 2026
Understanding 12V Solar Panel Wiring Diagrams
Most RV systems operate at 12 volts. Here’s what a basic 12V system looks like:
Parallel 12V Configuration (Not Recommended for RVs):
- Panel 1 (18V) and Panel 2 (18V) connect independently
- Output stays at 18V but amperage doubles (requires thick, expensive wire)
- One shaded panel doesn’t affect others, but wiring costs are high
Series 12V Configuration (Good for stable sunny locations):
- Panel 1 (18V) connects to Panel 2 (18V) to Panel 3, etc.
- Voltage adds up: 18V + 18V = 36V at same amperage
- One shaded panel reduces entire system output
- Thinner wire required, good voltage for charge controllers
Series-Parallel 12V Configuration (My Choice – Recommended):
- Create two strings: String 1 has 2 panels in series (36V), String 2 has 2 panels in series (36V)
- Connect the two strings in parallel
- Final output: 36V at combined amperage
- Best balance between efficiency and shade tolerance
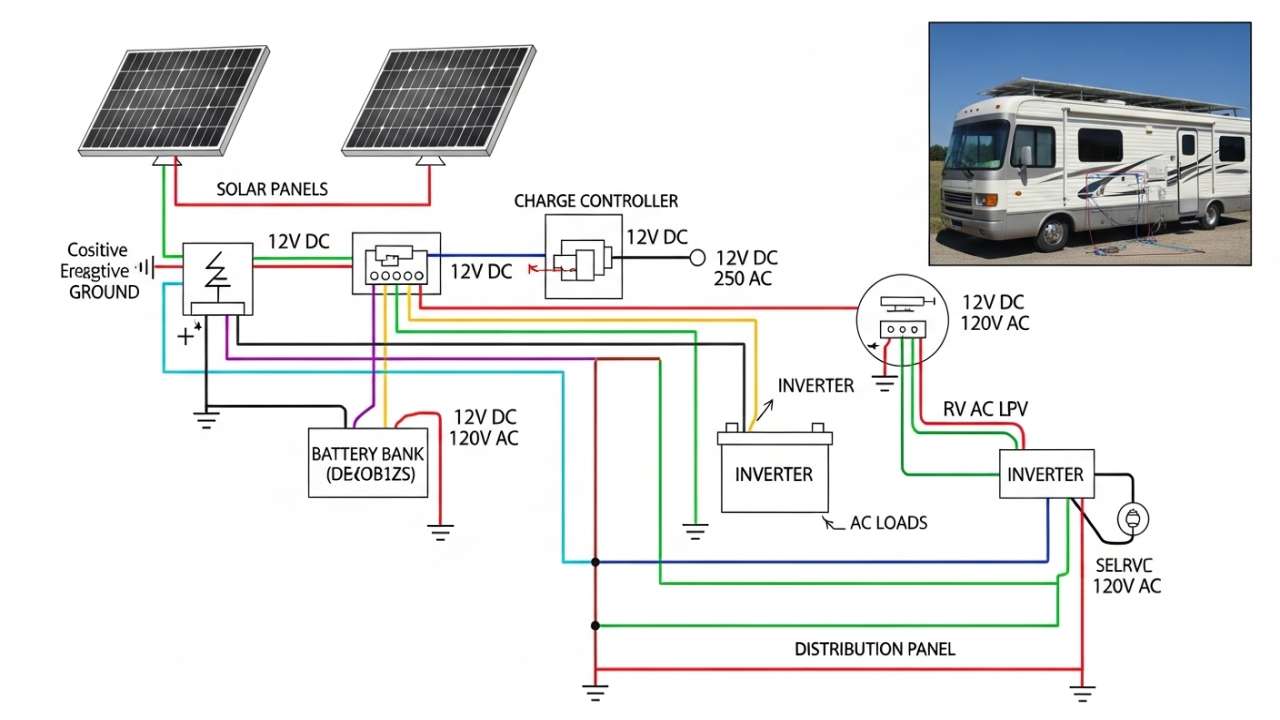
RV Solar Panel Wiring Diagram with Inverter
For a practical 5kW RV solar system with AC inverter capability, here’s how everything connects:
ROOF LEVEL:
Solar Panels (4 × 1.5kW)
        ↓
  [Solar DC Breaker - 50A]
        ↓
INTERIOR INSTALLATION:
  [MPPT Charge Controller]
        ↓
  [Battery DC Breaker - 250A]
        ↓
  [Lithium Battery Bank - 10kWh]
        ↓
  [Inverter - 3000W AC Output]
        ↓
  AC Loads (Microwave, AC Unit, TV, Outlets)

DC Wiring: 2/0 AWG cable from panels to controller
Battery Connections: 2 AWG cable from controller to battery
Inverter Input: 2/0 AWG cable from battery to inverter
AC Output: Romex cable to AC loads
Solar Panel Wiring Diagram for Home Use
Home systems typically operate at higher voltages (48V) for better efficiency. The diagram is similar but scaled up:
HOME SOLAR SETUP (48V):
Multiple solar arrays (4-8 panels each)
        ↓
  [DC Disconnect Switch]
        ↓
  [Hybrid Inverter/Charger - 5-10kW]
        ↓
  [LiFePO4 Battery Bank - 48V]
        ↓
  [AC Load Center / House Panel]
        ↓
  Home AC Loads (240V Distribution)
Solar Panel Wiring Diagram On-Grid (Utility Connected)
Many people ask about on-grid systems, where you’re connected to the utility:
GRID-TIED SYSTEM:
Solar Panels
        ↓
  [String Inverter or Micro-Inverters]
        ↓
  [AC Disconnect Switch]
        ↓
  Utility Meter ←→ House Panel
        ↓
  Home AC Loads

Note: No batteries needed. Excess power goes to grid.
For my RV setup, I use the RV solar panel wiring diagram with inverter approach because I need backup power when not connected to shore power.
5kW Solar Panel Wiring Diagram (Larger Systems)
If you’re planning a bigger system (5,000 watts), here’s the configuration:
5KW SYSTEM ARCHITECTURE:

Panels: 5 × 1000W monocrystalline (or 10 × 500W)
        ↓ (series strings)
        ↓
  [Breaker 80-100A DC]
        ↓
  [MPPT Controller - 150/100 or larger]
        ↓
  [Breaker 250-400A DC]
        ↓
  [Battery Bank - 15-20kWh]
   (20-25 LiFePO4 modules)
        ↓
  [Inverter - 5000-7000W]
        ↓
  [AC Panel - 200A Service]
        ↓
  Heavy AC Loads
Once you’ve connected everything according to your specific wiring diagram:
- Keep your panels covered with a blanket or tarp initially
- Connect the panel wires to your charge controller (positive to positive, negative to negative)
- Use a multimeter to verify voltage and polarity before exposing panels to sun
- Remove the blanket and verify your charge controller shows incoming power
- Watch the amperage reading—it should be roughly proportional to cloud cover
On my first connection, I saw about 8 amps flowing into my battery on a partly cloudy morning. By midday when the sun was bright, it jumped to 18 amps. That’s when I knew everything was working properly.
The Optional But Nice-to-Have: Installing an Inverter
An inverter converts your 12-volt DC battery power into 120-volt AC power—the same voltage as wall outlets in a house. This lets you run things like microwaves, TVs, or laptops directly from battery power.
I added a 3,000-watt pure sine wave inverter (Victron MultiPlus) about six months after my initial installation. It cost about $1,500, but now I can run AC devices without worrying about what I’m plugging in.
Sizing your inverter: Look at your highest-power device and double it. If your microwave draws 1,200 watts, get a 3,000-watt inverter minimum. Inverters need headroom.
Installation basics:
- Mount it close to the battery (within 6 feet ideally)
- Use heavy gauge battery cables (2 AWG minimum for anything over 1,000 watts)
- Install a DC-side breaker between battery and inverter
- Ground it properly according to the manual
The First Day: What to Expect
When you expose your completed system to sunlight for the first time, you’ll see:
- The charge controller lights up or screen activates
- Within seconds, it starts displaying incoming solar voltage
- As the sun gets higher, amps flowing in increases
- Your battery voltage will start rising (slowly at first)
- On a clear day, your amps might climb to peak values (mine reaches 20A on a beautiful day)
Don’t panic if you see lower numbers than expected. Clouds, dust on panels, panel temperature, and time of day all affect output. On a partly cloudy day, I might only see 3-5 amps. On a crystal clear day at solar noon, I get 18-20 amps.
Real Numbers From My System (Three Years In)
After three years of operation, here’s what I’ve actually experienced:
Summer performance (June-August):
- Average daily production: 20-22 kWh on mostly sunny days
- Cloudy days: 8-12 kWh
- Clear days: 24-28 kWh
- I can run AC devices freely and charge everything simultaneously
Winter performance (December-February):
- Average daily production: 8-12 kWh on clear days
- Cloudy days: 2-5 kWh
- Fewer clear days overall
- I run AC devices more conservatively
- I don’t charge all devices at once
What I’ve learned:
- My MPPT controller definitely captures more power than PWM would have
- Lithium batteries were worth the extra money (no maintenance, better usable capacity)
- Keeping panels clean makes a noticeable difference (I clean them every 4 weeks)
- My system paid for itself in year three from campground savings
- I haven’t needed the generator since the second camping season
Common Problems I’ve Encountered (And How I Fixed Them)
Problem #1: Charge Controller Shows Zero Input
Happened to me once during my first week. I checked everything three times.
What it was: I had left one panel wire disconnected before leaving the RV in storage.
What I learned: Always visually verify connections before assuming everything is working.
Problem #2: Lower Output Than Expected
My first week, I kept thinking my system wasn’t working properly. Output seemed low.
What it was: Normal variation from weather, panel temperature, and sun angle.
What I learned: Track your output over weeks, not days. A single cloudy day or cold day doesn’t mean something’s wrong.
Problem #3: A Fuse Kept Blowing
This one scared me because I didn’t know why.
What it was: My fuse rating was too close to maximum operating current. Every time my system hit peak output on a sunny day, it would blow.
What I learned: Size fuses about 20% above your maximum expected current, not right at it.
Problem #4: Battery Not Charging Even With Solar Input
Happened when I first got my lithium batteries.
What it was: Lithium batteries need specific charge controller settings. The controller’s voltage settings were configured for lead-acid, not lithium.
What I learned: Read your battery manual carefully and configure your controller accordingly.
Maintenance: Keeping Things Running
I’ve found that RV solar systems require surprisingly little maintenance. Here’s what I actually do:
Monthly: Visually inspect all exposed connections and wiring for corrosion or damage. Takes 15 minutes.
Quarterly: Clean the panels with distilled water and a soft brush. Takes about 30 minutes. This alone can improve output by 10-15%.
Annually: Check all bolts and connections to ensure nothing has loosened from vibration during travel.
Every 2-3 years: Inspect sealants around roof mounts and reapply Dicor if needed.
That’s it. My lithium battery system has required zero maintenance. My lead-acid system (before I upgraded) needed water level checks and occasional equalization.
Is It Really Worth It?
Let me be straightforward: solar isn’t for everyone.
Worth it if: You camp regularly, want to boondock, own your RV, plan to keep it more than 3-4 years, or spend significant time off-grid.
Not worth it if: You only take weekend trips to RV parks with hookups, rent your RV, plan to sell in 2 years, or live in a very cloudy climate.
For me, the math works:
- Initial investment: $6,500 (panels, controller, batteries, installation)
- Annual savings: $2,500-3,000 (hookup fees, generator fuel)
- Payback period: 2.5 years
- Additional benefit: Freedom to camp anywhere
Also Read
Final Thoughts
Standing on my RV roof watching those first watts flow from my panels into my battery system was one of the most satisfying moments of my RV journey. Not because I’m an electrician or engineer—I’m not. But because I took the time to understand the system, plan carefully, and execute methodically.
If I can do this, so can you. The technology isn’t magic. It’s just electrons following a path you create for them. Respect the electricity, follow safety procedures, and you’ll be powering your adventures with the sun in no time.
Your boondocking dreams are waiting. Now you have the knowledge to make them happen.
Complete Solar Panel Wiring Diagrams Reference
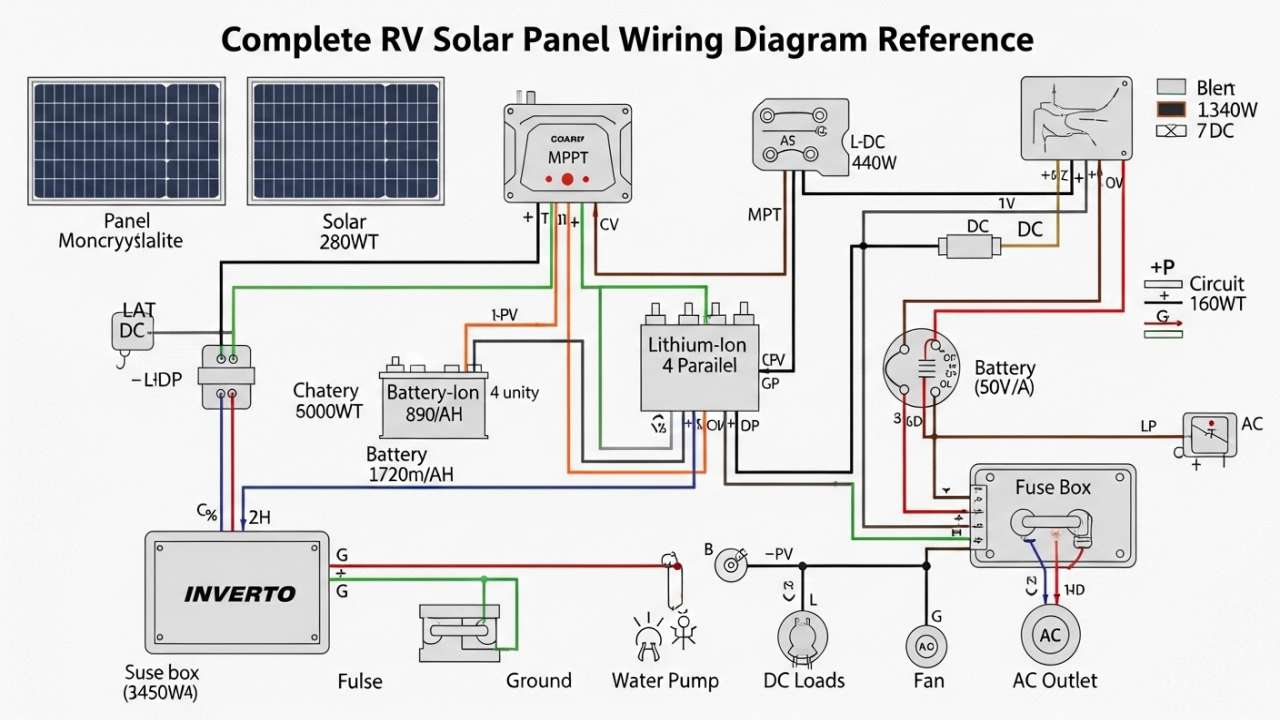
This section covers all the major wiring diagram variations you might encounter when researching solar panel installation.
3kW Solar Panel Wiring Diagram PDF Reference
For a 3,000-watt system (common for full-time RV living):
| Component | Rating | Purpose |
|---|---|---|
| Solar Panels | 3×1000W | Generate power |
| Charge Controller | MPPT 100/50 | Regulate input |
| Battery Bank | 8-10 kWh | Store energy |
| Inverter | 3000W Pure Sine | Convert to AC |
| Main DC Breaker | 250A | System protection |
| Solar Input Breaker | 100A | Panel protection |
RV Solar Panel Wiring Diagram PDF – What’s Included
A complete RV solar wiring diagram shows:
- Roof-mounted panel arrays
- Wire gauge specifications (8 AWG to 2/0 AWG typically)
- Breaker and fuse locations with amperage ratings
- Charge controller model and connections
- Battery bank configuration
- Inverter connections (if included)
- Ground connections
Solar Panel Wiring Diagram for Home On-Grid vs Off-Grid
On-Grid (Connected to Utility):
- No batteries required
- The inverter connects to the utility panel
- The meter runs backward when producing excess
- No backup power during outages
Off-Grid (Standalone):
- Battery bank essential
- Backup generator recommended
- Complete autonomy from utility
- Must size carefully for seasonal variations
12 Volt Solar Panel Wiring Diagram PDF
Most RVs use 12V nominal systems. A typical 12V diagram includes:
12V SYSTEM OVERVIEW:
├─ Solar Panels (18-20V open circuit)
├─ MPPT Controller (steps down to 12-14V charging)
├─ 12V Battery Bank (Lithium or Lead-Acid)
├─ DC Loads (Lights, Pump, Fan, Refrigerator)
└─ Inverter (converts to 120V AC for devices)
The beauty of 12V is simplicity. The disadvantage is higher amperage through wires.
Solar Panel Wiring Diagram 12V with Inverter
When you add an inverter to a 12V system:
12V WITH AC POWER:
Solar Panels
    ↓
MPPT Controller → 12V Battery → 3000W Inverter → AC Loads
                                    ↓
                              120V AC Outlets
Battery must be sized to support inverter surge current (typically 2-3× rated wattage for 1-2 seconds).
Also Read:- How to Size an RV Solar System the Right Way
5kW Solar Panel Wiring Diagram PDF Complete System
A 5kW system represents a serious installation for full-time living or homes:
System Components:
- Solar array: 5000-6000W (10-12 × 500W panels OR 5 × 1000W panels)
- Batteries: 15-25 kWh storage (20-30 LiFePO4 modules)
- Inverter: 5000-7000W pure sine wave
- Charge controller: 150A+ MPPT rated for system voltage
- Wiring: Heavy gauge (2/0 AWG or larger)
- Breakers: 250A main, 100A+ solar input
This size system can power a home or a large RV completely.
Detailed Solar Panel Wiring Diagram for Home Installation
Home installations often use 48V systems for efficiency. Here’s the full breakdown:
COMPLETE HOME SOLAR WIRING:

ROOF:
[Multiple solar panels in strings]
        ↓
[DC Disconnect Switch]
        ↓
[AC Disconnect Switch at inverter]

MECHANICAL ROOM:
[Hybrid Inverter/Charger - 5-10kW]
[Capable of: Solar input + Grid input + Battery storage]
        ↓
[Battery Bank - 48V nominal]
[LiFePO4 modules connected in series/parallel]
        ↓
[Transfer Switch]
[Chooses between: Inverter output, Grid, or Backup generator]
        ↓
[House AC Panel - 200A service]
        ↓
AC Loads [lights, appliances, heat pump, EV charger]

MONITORING:
- Battery management system tracks voltage/current/temperature
- Inverter display shows real-time production and usage
- Mobile app connectivity (most modern systems)
Understanding the Role of Each Component in Wiring Diagrams
Solar Panels: Source of power. Voltage increases with temperature decrease. Current increases with light intensity.
DC Disconnect: Safety switch to isolate panels from controller before maintenance.
Charge Controller: Heart of the system.
- PWM: Simpler, 70-80% efficient, good for low voltage
- MPPT: Smarter, 95%+ efficient, required for series strings
Battery Management System (BMS): In lithium systems, it monitors cell voltages and balances charging. Essential safety component.
Main DC Breaker: Protects the battery from overcurrent. Sized at 125% of the maximum expected current.
Inverter: Converts DC to AC. Pure sine wave recommended for modern electronics.
AC Panel/Load Center: Distributes AC power safely to loads.
Also Read:- South Dakota RV Domicile: Solar Panel Tax Benefits & Setup
Wiring Diagram Reading Tips
When you’re looking at actual PDF diagrams:
- Follow the power flow: Start at panels, trace path to battery, then to loads
- Note the gauges: Wire size increases for longer distances
- Check the breakers: Each should be appropriately sized with clear amperage
- Identify the fuses: Protection at critical points
- Look for grounds: Every system needs proper grounding
- Find the disconnects: Safety switches to isolate components
Why Wiring Diagrams Matter
A proper wiring diagram shows:
- Correct wire gauges (prevents fires)
- Breaker/fuse locations (prevents equipment damage)
- Component sizing (ensures system works)
- Safety disconnects (allows safe maintenance)
- Grounding requirements (prevents electrocution)
- Voltage levels at each point (aids troubleshooting)
Never skip the diagram. Your insurance company and local inspectors will want to see it. More importantly, it keeps you and your family safe.
Frequently Asked Questions
Q: Do I really need a charge controller between my panels and battery? A: Absolutely. Connecting panels directly to battery risks fire and explosion. The charge controller prevents overcharge. Non-negotiable.
Q: What if I only use my RV a few times a year? A: Solar still makes sense. You won’t recoup costs as quickly, but the system requires no maintenance while sitting unused. It’s there when you need it.
Q: Should I buy cheap panels from Amazon to save money? A: No. I see this mistake constantly. Buy from reputable solar companies. Cheap panels fail early, have poor warranties, and often underperform. The $100 you save now costs you $1,000 later.
Q: My RV is mostly in shade. Can I still go solar? A: Limited shade is fine. Consistent shade (like under trees) is problematic. If your parking spot gets 4+ hours of direct sun daily, you’ll see benefit.
Q: How often should I clean the panels? A: Every 4-6 weeks if possible. I just use distilled water and a soft cloth. Dirty panels lose 15-25% efficiency.
Q: Can I expand my system later? A: Yes. I added an extra battery bank and an inverter years after my initial installation. Build with growth in mind.
Q: What about snow on panels in winter? A: Snow reduces output to zero until it melts. Some people tilt panels to shed snow, but most RVers just accept lower winter production and plan accordingly.
Q: What’s the difference between my wiring diagram and the PDF I found online? A: Most diagrams follow the same basic principles. Yours might differ in:
- Voltage (12V vs 24V vs 48V)
- Component brands (different inverter/controller models)
- Battery chemistry (lithium vs lead-acid)
- System size (1kW to 50kW) The fundamentals—breakers, disconnect switches, grounding—remain the same.
Q: Do I need a permit to install solar? A: For RVs? Usually no. For homes? Yes, almost always. Check your local building codes and get proper electrical permits before installation.
Q: Can I see an actual solar panel wiring diagram for my specific setup? A: Yes! Ask your equipment manufacturers for detailed wiring diagrams. They provide PDFs specific to their products. Also check YouTube for videos showing your exact component combinations.